Plant Overview
The Agave horrida, often called the "Mexican Lime Agave," looks like a piece of living gothic architecture. Despite its intimidating name—horrida means "bristling" or "rough" in Latin—this succulent is a prized ornamental for its symmetrical, dramatic beauty. Originating from the rocky volcanic slopes of central Mexico, it is a tough survivor that adds a "don't touch me" elegance to any desert-style garden or sunny windowsill.
🔍 How to Identify
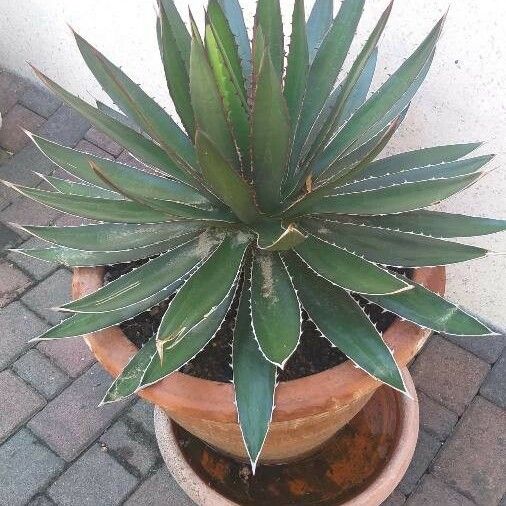
- 🌵 The Rosette: It grows in a tight, symmetrical clump of stiff, sword-shaped leaves that typically reach about 1 to 2 feet in diameter.
- 🦷 The "Shark Teeth": The most striking feature is the edge of the leaves, which are lined with large, jagged, grayish-white spines that contrast beautifully against the dark green foliage.
- 🎨 Leaf Color: The leaves are a deep, glossy green, sometimes taking on a reddish or purplish hue when exposed to intense sunlight or cooler temperatures.
🏡 In Your Garden
- ☀️ Sun-Seeker: This plant thrives on light. If grown indoors, it needs the brightest spot available; otherwise, it will lose its compact shape and the spines won't develop their characteristic bold color.
- 🪨 The "Dry Feet" Rule: Because it evolved on volcanic cliffs, it hates "wet feet." Use a very gritty cactus mix and terracotta pots to ensure moisture evaporates quickly, as the roots are highly susceptible to rot.
- 🏺 Container Living: Unlike many larger Agaves, the horrida stays relatively small and rarely produces "pups" (offsets), making it an ideal choice for decorative pots where it can remain the lone star of the show.
⚠️ Safety & Toxicity
- ⚔️ Physical Hazard: The terminal spines (the tips) and the marginal teeth are incredibly sharp and rigid. They can easily puncture skin or clothing.
- 🐾 Pet & Child Safety: While not considered deadly if nibbled, the sap can cause skin irritation (dermatitis) or mouth swelling. The primary danger is the mechanical injury from the thorns; always place this plant away from hallways or low-level areas where pets and children play.
✨ Fun Fact
The Agave horrida is a "monocarpic" plant, meaning it spends its entire life (often 15 to 30 years) store-piling energy for one single, spectacular event. It will eventually grow a massive flower spike up to 15 feet tall, bloom once, and then the mother plant will die, leaving behind seeds for the next generation.

Detailed Care Instructions
To grow Agave horrida plant, you can follow these steps:
- Choose a suitable location: Agave horrida prefers full sun, so select a spot in your garden that receives at least 6-8 hours of direct sunlight daily. Additionally, ensure that the soil is well-draining as agaves do not tolerate wet feet.
- Prepare the soil: Agave horrida thrives in well-drained soil. If your soil is heavy or clayey, add some organic matter like compost or sand to improve drainage.
- Planting: Dig a hole slightly larger than the root ball of the agave. Place the plant in the hole, making sure the root ball is level with the ground. Backfill the hole with soil, firming it gently around the roots.
- Watering: Initially, water the agave deeply and then allow the soil to dry before watering again. Once established, agaves are drought-tolerant and require infrequent watering. Water sparingly during periods of intense heat or prolonged drought.
- Mulching: Apply a layer of mulch around the base of your agave plant to help conserve moisture, suppress weed growth, and regulate soil temperature.
- Fertilizing: Agaves generally do not require regular fertilizing. However, you can apply a balanced slow-release fertilizer in early spring to help promote healthy growth.
- Pruning: Agave horrida usually does not require pruning. However, you can remove any dead or dried leaves by cutting them close to the base using clean pruning shears.
- Propagation: Agave horrida can be propagated through offsets or plantlets that develop around the base of the mother plant. Gently separate the offsets from the main plant once they have developed a root system. Plant them in a well-draining potting mix, keep them lightly moist, and gradually reduce watering as they grow.
Remember, Agave horrida is a slow-growing plant, so be patient and provide it with the right growing conditions.

Place in a bright room that is sun drenched almost all day. Or directly in a south-facing window.

To water this particular plant, it is important to wait until the soil has dried out completely before watering it again. It is recommended to use a watering can or hose equipped with a gentle flow nozzle to moisten the soil around the root zone thoroughly. Avoid getting water on the leaves or core of the plant as it can cause damage to it. Overwatering should be avoided as it can cause root rot. In the colder months, water should be limited as the plant becomes dormant, requiring less water. In hotter or drier months, it may require more frequent watering. It is important to keep in mind the environment and growing conditions that the plant is situated in, as it may influence its watering needs.
Agave Horrida plants should be fertilized once a year in the spring, using a well-balanced fertilizer with equal amounts of nitrogen, phosphorus, and potassium. It is recommended to dilute the fertilizer to half strength before application. Apply the fertilizer around the base of the plant, avoiding contact with the leaves. Water thoroughly after fertilizing. Do not fertilize during the winter months.
Agave Horrida is a type of succulent plant that requires a well-draining soil mix to thrive. It is best to use a soil mix that is specifically designed for cacti and succulent plants. The soil should be composed of a blend of organic materials such as peat moss, coconut coir, and compost, as well as inorganic materials such as sand, perlite, and vermiculite. This combination of materials will provide the proper drainage and aeration that Agave Horrida needs to grow healthy roots and prevent root rot. The pH level of the soil should be slightly acidic to neutral (between 6.0 and 7.0), and the soil mix should be loose and crumbly, allowing water to penetrate the soil easily. It is essential to use a soil mix that does not retain water for too long to prevent overwatering.
To propagate this plant, you will need to remove offsets from the base of the mother plant. These offsets should be at least 4 inches tall and have a small root system of their own.
Once you have identified the offsets, carefully separate them from the mother plant using a sharp knife. Be sure to cut as close to the base of the plant as possible to avoid damaging the roots.
After separating the offsets, allow them to dry for a few days in a cool, dry place. This will help to prevent rot and encourage the development of new roots.
Once the offsets have dried, plant them in a well-draining soil mix and water thoroughly. It is important to keep the soil moist but not waterlogged during the establishment phase.
Place the newly planted offsets in a bright, sunny location where they will receive at least 6 hours of direct sunlight each day. It may take several months for the plants to become established, but with proper care, they will eventually grow into mature plants.


