Plant Overview
Often called the Fiber-edged Albuca or the rather unglamorous "Snotlelie" in its native South Africa, this hardy succulent bulb is a master of survival. Hailing from the rocky grasslands and outcrops of the Eastern Cape, it is easily recognized by the curious dark fibers that wrap around its bulb like a protective, bristly sweater. In spring, it rewards patient gardeners with delicate, upright flowers that look as if they have been hand-painted with olive-green racing stripes.
🔍 How to Identify
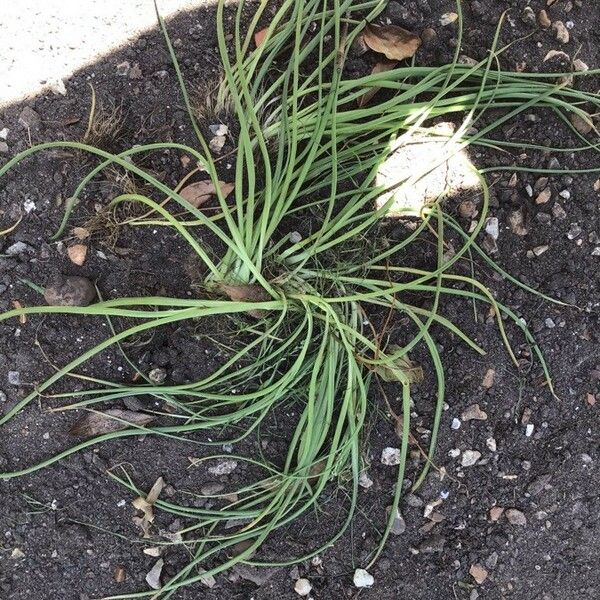
- 🧅 The Fibrous Base: The most distinct feature is the "tunic" of dark, stiff, hair-like fibers (setae) that protrude from the top of the bulb at the soil line.
- 🍃 Channelled Leaves: The leaves are long, narrow, and slightly fleshy, often featuring a distinct U-shape or channel running down their length.
- 🔔 Striped Blossoms: It produces a tall flower spike holding white or pale yellow blossoms, each petal marked with a signature dark green stripe down the center.
🏡 In Your Garden
- 🏜️ Drainage is King: Because it evolved in rocky, well-draining environments, this plant will rot quickly if left in "wet feet." It thrives in gritty, sandy soil and prefers terracotta pots that allow the bulb to breathe.
- 💤 The Dormancy Dance: Albuca setosa is deciduous. If the leaves begin to wither and turn brown after the flowering season, don't panic—it is simply entering its natural dormancy period to save energy.
- ☀️ Sun Seeker: To keep the flower stalks from leaning or becoming "leggy," place it in the brightest spot possible; it loves soaking up the morning sun.
⚠️ Safety & Toxicity
- 🐾 Mildly Toxic: While not considered deadly, the bulb contains saponins that can cause nausea, vomiting, or diarrhea if ingested by dogs, cats, or small children.
- 🧴 Skin Sensitivity: The sap inside the leaves is quite slimy and can occasionally cause mild skin irritation or "itchiness" for people with sensitive skin. It is best to wear gloves when dividing the bulbs.
✨ Fun Fact
The quirky nickname "Snotlelie" (Snot Lily) comes from the thick, mucilaginous sap found within the leaves and bulb. This gooey substance acts as a high-tech internal reservoir, allowing the plant to stay hydrated during extreme South African droughts!

Detailed Care Instructions
To grow Albuca setosa, commonly known as "Corkscrew Albuca" or "Slime Lily," follow these steps:
- Obtain seeds or bulbs: You can either buy seeds online or purchase bulbs from a reputable nursery or garden center. Bulbs are generally easier to grow than seeds.
- Planting: If using seeds, sow them in seed-starting mix or a well-draining soil mix. If using bulbs, plant them directly into a pot filled with well-draining soil. Place the seeds or bulbs about 1 inch deep into the soil.
- Light: Albuca setosa prefers bright, indirect light. Place the pot in a location that receives partial sun to bright, indirect light. Avoid exposing the plant to direct sunlight, as it can scorch the leaves.
- Temperature: Albuca setosa prefers mild to warm temperatures. Maintain a temperature between 60-75°F (15-24°C) during the day and around 50-60°F (10-15°C) at night.
- Watering: Water the plant sparingly, allowing the soil to dry out between waterings. Overwatering can lead to root rot, so it's important to provide well-draining soil. During the growing season (spring and summer), water more frequently but still ensure the soil dries out between watering sessions.
- Fertilization: Feed the plant with a diluted, balanced liquid fertilizer every 2-4 weeks during the growing season to promote healthy growth. Reduce or stop fertilizing during the dormant season (fall and winter).
- Pruning: Albuca setosa doesn't require much pruning. However, you can trim off any dead or damaged leaves to maintain a neat appearance.
- Dormancy: During the fall and winter months, Albuca setosa enters a dormant phase. Reduce watering and allow the soil to dry out slightly. Keep the plant in a cool location with lower light levels during this period.
- Repotting: As the plant grows, you may need to repot it into a larger container every 1-2 years. Use a well-draining soil mix and ensure the new pot has drainage holes.
- Propagation: Albuca setosa can be propagated by separating bulb offsets or by collecting and planting seeds. Bulb offsets can be gently separated from the parent bulb and replanted. Seeds can be collected from mature plants and sown in soil mix.
By following these care guidelines, you should be able to successfully grow and enjoy your Albuca setosa plant.

Place in a bright room that is sun drenched almost all day. Or directly in a south-facing window.

To water this plant, it is important to ensure that the soil is partially dry before watering. This plant should not be overwatered as it is susceptible to root rot. When watering, aim to thoroughly saturate the soil with water until it starts to drain out of the bottom of the pot. Allow the soil to dry partially before watering again, usually every 7-10 days depending on the environment and the size of the pot. It is important to use a well-draining potting mix, as this plant does not like to be in waterlogged soil. It is also recommended to water it directly into the soil rather than on the leaves to avoid any risk of fungal or bacterial infections.
To fertilize this plant, use a balanced fertilizer with equal parts nitrogen, phosphorus, and potassium. Apply the fertilizer once a month during the growing season. Dilute the fertilizer to half the recommended dosage and apply it to the soil around the plant, being careful not to get any on the leaves. Water the plant after fertilizing to help the nutrients soak into the soil. Avoid fertilizing during the dormant season.
Albuca Setosa plant prefers well-draining, sandy or loamy soil with a pH range of 6.5 to 7.5. The soil should contain organic matter that can retain moisture while allowing excess water to drain quickly. Since the plant grows underground bulbs that store nutrients, the soil should also be rich in nutrients that are important for bulb development and growth. It's important to avoid using heavy clay soils as they can retain water for too long and may lead to root rot. A suitable soil mix for Albuca Setosa plant can be made by combining sand, perlite, and organic compost in equal parts. The plant should be repotted in fresh soil every one to two years to prevent soil depletion and improve soil aeration.
To propagate this plant, you will need to first select a healthy and mature plant from which to take cuttings. Choose a stem that is at least several inches long and healthy looking.
Next, use a sharp and sterile pair of scissors or garden shears to cut the stem at a 45-degree angle just below a node. Nodes are the parts of the stem where leaves and branches grow from.
Remove any leaves or branches from the lower half of the stem, leaving just a few at the top.
Prepare some well-draining soil in a pot or container. You can use a mix of perlite, sand, and peat moss.
Dip the cut end of the stem into rooting hormone powder to encourage root growth.
Insert the stem into the soil, making sure that the lower portion is buried and the remaining leaves are above the soil surface.
Water thoroughly and place the pot in a warm and bright location, but out of direct sunlight.
After a few weeks, the cutting should begin to develop roots and new growth. Once the new plant is well established, you can transfer it to a larger pot or transplant it into your garden.


