Plant Overview
Often called the "Gourmet Onion," the Shallot (Allium ascalonicum) is the refined, mild-mannered cousin of the common onion. Legend says it was brought back to Europe by Crusaders from the ancient port of Ashkelon, giving the plant its botanical name. Unlike its larger relatives, it grows in elegant clusters, making it a favorite for home gardeners who appreciate subtle flavors and space-efficient growth.
🔍 How to Identify
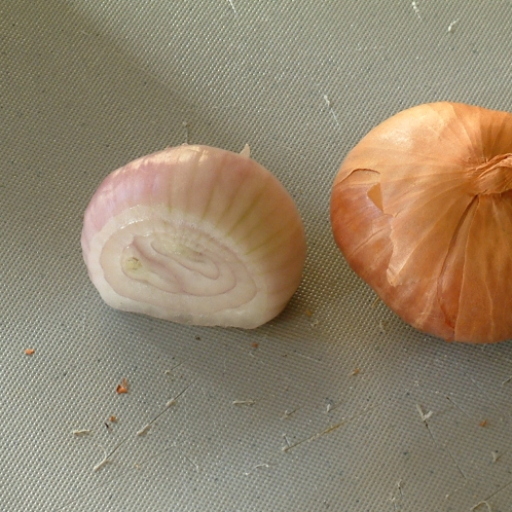
- 🧄 The Bulbs: Unlike a single large onion, shallots produce clusters of small, teardrop-shaped bulbs that grow together. They are typically wrapped in a thin, papery skin that ranges from copper-gold to pale rose.
- 🍃 The Foliage: It features long, slender, hollow green leaves (scapes) that emerge from the ground in a fountain-like display. These leaves are more delicate than those of a standard yellow onion.
- 🌸 The Bloom: If left to go to seed, the plant produces a "scapose" flower head—a spherical cluster of tiny, star-shaped white or lavender flowers perched atop a tall, sturdy stalk.
🏡 In Your Garden
- 🧅 The Multiplier Effect: Shallots are nicknamed "multiplier onions" because of their unique growth habit. A single "set" (bulb) planted in the soil will divide and expand into a cluster of five to twelve distinct bulbs by harvest time.
- ☀️ Drainage is Vital: Shallots are prone to rotting if they sit in heavy, wet soil. They thrive best in "sandy-loam" textures where water drains away quickly. To ensure success, gardeners often plant them so the very tips of the bulbs are just peeking out of the soil surface.
- 🌿 Low Interference: They have shallow root systems and do not compete well with weeds. Keeping the area around them clear is the secret to getting those sought-after large, gourmet bulbs.
⚠️ Safety & Toxicity
- 🐾 Pet Danger: High. Like all members of the Allium genus (including garlic and chives), shallots contain N-propyl disulfide. This compound is highly toxic to dogs and cats, as it can cause life-threatening damage to their red blood cells.
- 👶 Human Safety: Perfectly safe for human consumption. While they may cause minor eye irritation ("crying") when sliced, they are a culinary staple worldwide.
✨ Fun Fact
In professional French cuisine, shallots are considered the "bridge" between garlic and onions. They provide the aromatic punch of garlic with the sweetness of an onion, but without the harsh, lingering aftertaste!

Detailed Care Instructions
| Color | White |
| Soil Ph | 5.0-7.0 |
| Humidity | Normal |
| Lighting | Part Sun |
| Toxicity | Toxic |
| Soil Type | Loamy, Well-Drained |
| Bloom Time | Spring |
| Difficulty | Easy |
| Plant Type | Biennial |
| Mature Size | 1 To 2 Feet Tall |
| Native Area | Asia |
| Temperature | 14°C - 30°C |
| Sun Exposure | Full Sun, Partial Shade |
| Hardiness Zones | 4 To 10 |
To grow Allium ascalonicum, also known as the shallot plant, follow these steps:
- Soil preparation: Choose a location with well-draining soil that receives full sun or partial shade. Amend the soil with organic matter, such as compost, to improve its nutrient content and drainage.
- Planting: Plant shallot bulbs in early spring or fall, depending on your climate. Space the bulbs about 6 inches apart and plant them 1-2 inches deep, with the pointed end facing up. If starting from seeds, sow them during the same season and thin them to the desired spacing once they germinate.
- Watering: Keep the soil consistently moist but not waterlogged. Water the plants deeply when the top inch of soil feels dry. Avoid overwatering as it may lead to rotting or fungal diseases.
- Fertilizing: Shallots benefit from a balanced fertilizer before planting and a light application of organic fertilizer (such as compost or well-aged manure) once every couple of months. Follow the packaging instructions for the specific fertilizer you choose.
- Weed control: Keep the area around the shallot plants free from weeds, as weeds can compete for nutrients and water. Regularly remove any emerging weeds by hand or use a shallow hoe to avoid damaging the shallow root system of the shallots.
- Harvesting: Shallots are usually ready for harvest after 90-120 days, depending on the variety and growing conditions. Harvest them when the foliage begins to yellow and wilt. Gently dig up the bulbs, being careful not to damage them. Allow the bulbs to cure in a cool, dry, and well-ventilated area for a few weeks. Once the outer layers have dried and tightened, remove any remaining soil and store the shallots in a cool, dark, and dry place.
Remember to consult local gardening resources or experienced gardeners in your area for specific advice tailored to your climate and local conditions.

Place in a bright room that is sun drenched almost all day. Or directly in a south-facing window.

Allium Ascalonicum is a plant that requires regular watering to thrive. It is important to ensure that the plant receives enough water, but also avoid overwatering. The best method for watering the plant is to water deeply and slowly, allowing the water to penetrate deep into the soil.
To water the plant, use a watering can or a hose with a soft spray nozzle. Direct the water at the base of the plant, making sure to water the entire root zone. Avoid watering the foliage or flowers, as this can lead to fungal diseases.
The frequency of watering will depend on the climate and growing conditions. In general, the plant should be watered deeply once or twice a week, depending on how quickly the soil dries out. During periods of hot weather or drought, the plant may require more frequent watering.
It is important to monitor the soil moisture regularly and adjust the watering schedule as needed. Overwatering can lead to root rot and other issues, so it is important to strike a balance between providing enough water and not overdoing it. With proper watering and care, Allium Ascalonicum can thrive and produce a bountiful harvest.
For optimal growth of this plant, it is recommended to fertilize it with a balanced fertilizer during its active growing season. Apply the fertilizer according to the package instructions, typically every 4-6 weeks. Be careful not to over-fertilize as this can lead to stunted growth or damage to the plant. Additionally, make sure to water the plant regularly to ensure that the fertilizer is properly absorbed.
The ideal soil for growing this plant should be well-draining and fertile, with a pH range of 6.0 to 7.0. It should be rich in organic matter, such as compost or well-aged animal manure, to support healthy growth and development. In addition, the soil should be loose and crumbly, allowing for good air circulation around the roots and preventing waterlogging, which can lead to root rot. It may also be helpful to add a balanced fertilizer, such as a 10-10-10 or 20-20-20 blend, to the soil prior to planting. Overall, a good quality soil that is well-prepared will provide the necessary nutrients and growing conditions for successful growth and harvest of this plant.
To propagate this plant, you will need to start by removing the bulb from the soil. Carefully divide the bulbs, ensuring that each section has a healthy portion of the root. Once divided, plant each section in well-draining soil, making sure the upper portion of the bulb is just slightly covered with soil. Water the newly planted bulbs thoroughly. It is important to avoid overwatering, as this can lead to rot. Place the plants in a sunny location with good air circulation. In about 4-6 weeks, the plants will begin to grow new leaves from the top of the bulb. Over time, the bulb will produce additional offsets that can be separated and replanted to expand your garden.


