Plant Overview
Often called the Italian Alder, this Mediterranean beauty is the "overachiever" of the alder family. Unlike its cousins who insist on living in boggy wetlands, the Italian Alder is remarkably drought-tolerant and thrives in tough urban environments. Its glossy, deep-green foliage provides a lush, architectural look that stays vibrant long after other trees have dropped their leaves for autumn.
🔍 How to Identify
- 🍃 The Leaf Shape: True to its name (cordata meaning heart-shaped), the leaves are perfectly heart-shaped with a pointed tip and a shiny, leathery texture that glimmers in the sun.
- 🍂 Winter Ornaments: In late winter, the tree is decorated with long, drooping male catkins (yellowish-brown) and small, woody, egg-shaped cones that look like miniature pineapples.
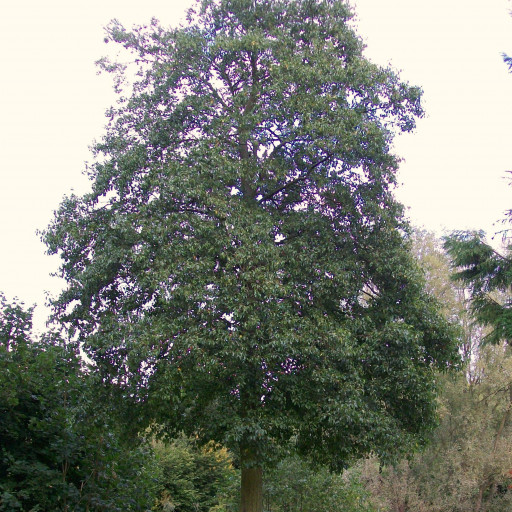
- 🌳 Bark & Form: It typically grows in a neat, conical or pyramidal shape when young, featuring smooth, grey-brown bark that develops shallow fissures as it matures.
🏡 In Your Garden
- 🌱 The Soil Builder: This plant is a "pioneer species." It has a symbiotic relationship with soil bacteria that allows it to "fix" nitrogen from the air into the ground, actually improving the soil quality for neighboring plants.
- 🏙️ City Resilient: Because it tolerates air pollution and compacted soil better than most trees, it is a favorite for street planting and windbreaks.
- 💧 Establishment: While it is the most drought-tolerant alder, it needs consistent watering during its first few years to establish its deep root system; once settled, it is incredibly hardy.
⚠️ Safety & Toxicity
- ✅ Status: Non-toxic and safe for general landscapes.
- 🤧 Allergy Note: Like most alders, it produces a significant amount of pollen in late winter and early spring, which may be a nuisance for those who suffer from seasonal hay fever.
- 🐾 Pet Friendly: There are no known toxic effects for dogs, cats, or horses, making it a safe choice for farmhouse gardens and pet owners.
✨ Fun Fact
The Italian Alder is so efficient at holding onto its foliage that it is often the last tree to go bare in the winter. It is even known to stay green until December in some climates, earning it the nickname "the evergreen deciduous tree."

Detailed Care Instructions
To grow Alnus cordata (Italian alder) plant, follow these steps:
- Climate and soil requirements: Alnus cordata prefers full sun to partial shade and moist, fertile, well-drained soil. It can tolerate a wide range of soil types.
- Planting: Choose a suitable planting location, ensuring there is enough space for the mature tree as it can grow up to 100 feet (30 meters) tall and spread around 50 feet (15 meters) wide. The best time to plant is in early spring or autumn.
- Dig a hole: Dig a hole that is slightly wider and deeper than the plant's root ball.
- Preparing the root ball: Gently loosen the roots of the Alnus cordata plant to encourage growth and prevent root binding.
- Place the plant in the hole: Carefully place the Alnus cordata plant in the hole, ensuring that the top of the root ball is level with or slightly above the ground.
- Backfill the hole: Fill the hole with soil, gently packing it around the plant to remove any air pockets. Ensure the plant is stable and upright.
- Watering: Water the plant thoroughly after planting and continue to water regularly, especially during dry spells, to keep the soil evenly moist.
- Mulching: Apply a layer of organic mulch around the base of the plant to help retain moisture, prevent weed growth, and regulate soil temperature.
- Pruning: Prune any damaged or crossed branches during the dormant season to maintain a healthier and more aesthetically pleasing shape. However, minimal pruning is generally required.
- Maintenance: Monitor the plant for pests and diseases and take appropriate action if necessary. Regularly fertilize the plant with a balanced fertilizer to promote healthy growth.
- Protection: Protect the plant from extreme weather conditions, such as frost or excessive heat, especially during its early years.
Following these steps should help you successfully grow an Alnus cordata plant. Remember to consider its size and ensure you have enough space when choosing a planting location.

Place in a bright room that is sun drenched almost all day. Or directly in a south-facing window.

To water this plant, you should first check the soil moisture level using a moisture meter or by gently inserting your finger into the soil up to your second knuckle. If the soil feels dry, it is time to water. When watering, pour the water in a slow, steady stream onto the soil around the base of the plant, rather than directly onto the leaves or trunk. Be sure to water thoroughly so that the water reaches the roots. Avoid overwatering, as this can lead to root rot and other problems. It is also important to note the plant's specific water requirements, which may vary depending on factors such as the climate, soil type, and season.
To fertilize this plant, use a balanced fertilizer with equal parts nitrogen, phosphorus, and potassium. Apply the fertilizer in early spring before new growth appears or in late fall after leaf drop. Water the fertilizer into the soil, making sure not to get any on the leaves or stem. Repeat fertilizing annually for healthy growth and development.
The best soil for Alnus Cordata plant is nutrient-rich, well-draining soil with a pH range of 6.0 to 7.5. It should be planted in soil that is rich in organic matter such as compost or well-rotted manure. The soil should be moist but not waterlogged. Alnus Cordata prefers acidic to slightly alkaline soils, but can tolerate a wide range of soil types including heavy clay. Soil that is too dry may affect its growth and cause the leaves to turn yellow. It is recommended to mulch the soil around the Alnus Cordata plant with organic matter to maintain moisture and suppress weeds. Additionally, the soil should be free draining to prevent root rot.
To propagate this plant, start by collecting some healthy stem cuttings from the parent plant. Make sure the cuttings are approximately 6 to 8 inches long and have at least two or three leaf nodes. Remove the leaves from the bottom third of the stem and dip the cut end in rooting hormone.
Prepare a well-draining and nutrient-rich soil mixture and moisten it slightly. Make holes in the soil with a pencil or a plant dibber and insert the treated stem cuttings into the holes. Press gently on the soil to firm it around each cutting.
Place the potted cuttings in a well-lit area with filtered sunlight or bright, indirect light. Keep the soil consistently moist but not waterlogged to avoid rotting. Mist the cuttings daily to maintain high humidity around them.
After a few weeks, you should notice new growth emerging from the cuttings' leaf nodes, indicating that rooting has occurred. Keep the plants in their pots and continue to care for them as they grow. Once they have established a good root system and some healthy foliage, you can consider transplanting them to larger containers or out into the garden.


