Plant Overview
Often called the Savannah Milkweed, this delicate perennial is a hidden gem of the Southeastern United States coastal plains. While its famous cousins flaunt bright oranges and pinks, Asclepias pedicellata sports an "alien-chic" look with its star-shaped, pale green flowers. It acts as a vital, though often overlooked, refueling station and nursery for the iconic Monarch butterfly.
🔍 How to Identify
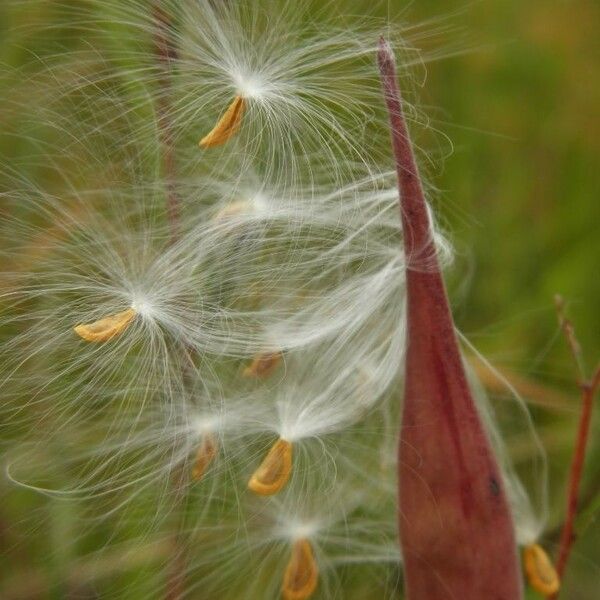
- 🌼 Greenish Blooms: Unlike typical garden milkweeds, the flowers are a unique yellowish-green or creamy white, often blending in with the surrounding grasses.
- 📏 Long Pedicels: Its namesake feature is the "pedicel" (the tiny stalk holding each individual flower), which is unusually long, giving the flower cluster a loose, umbrella-like appearance.
- 🍃 Slender Profile: The plant is thin and wiry, typically growing between 1 to 2 feet tall with narrow, lance-shaped leaves that point upwards.
🏡 In Your Garden
- ☀️ The Pine Flatwood Vibe: In the wild, this plant loves the acidic, sandy soils of pine savannahs. To mimic this at home, ensure your soil is well-draining and avoid heavy fertilizers which can overwhelm its delicate system.
- ⚓ The Taproot Rule: This species develops a deep, stubborn taproot to survive fire and drought. This makes it very hardy once established, but it "protests" heavily if you try to transplant it. It is best started from seed in its permanent location.
- 🐛 The "Swiss Cheese" Look: Do not panic if your plant looks ragged! Being a host plant means caterpillars will eat the leaves. This is a sign of a healthy, functioning ecosystem in your backyard.
⚠️ Safety & Toxicity
- 🐾 Toxic to Pets: Like all members of the Asclepias genus, the plant contains cardiac glycosides. It is toxic to dogs, cats, and livestock if consumed in significant quantities.
- 🧴 Sticky Sap: When a leaf is broken, a milky white latex leaks out. This sap can be a skin irritant for some people and can cause painful stinging if it hitches a ride on your fingers into your eyes.
✨ Fun Fact
Monarch caterpillars are master chemists! By eating this plant, they sequester the milkweed’s toxins into their own bodies. This makes the caterpillars (and the resulting butterflies) taste bitter and toxic to birds, effectively turning the plant's defense system into their own personal suit of armor.

Detailed Care Instructions
Asclepias pedicellata, commonly known as the "Cowhorn" milkweed, is a perennial plant native to parts of North America. It is an important host plant for various species of butterflies, especially the monarch butterfly. Here are steps to successfully grow Asclepias pedicellata:
1. Site Selection
- Light: Choose a location that receives full sun (at least 6 hours of direct sunlight per day).
- Soil: Asclepias pedicellata prefers well-draining soil. Sandy or loamy soils are ideal. If your soil is heavy clay, consider amending it with organic matter to improve drainage.
2. Soil Preparation
- pH Level: Aim for a soil pH of 6.0 to 7.0, which is generally suitable for milkweed.
- Amendments: If necessary, work in compost or well-rotted manure to enrich the soil, but avoid overly rich soil as this can cause excessive leaf growth at the expense of flowers.
3. Planting
- Seeds: You can start Asclepias pedicellata from seeds. Stratify seeds by placing them in a moist paper towel, sealing in a plastic bag, and refrigerating for about 30 days. Then, sow seeds in the spring after the last frost.
- Transplants: You can also purchase young plants from a nursery. Space them about 18-24 inches apart to allow for growth.
4. Watering
- Initially, water the plants regularly to encourage root establishment, especially during dry spells. Once established, Asclepias pedicellata is relatively drought-tolerant.
5. Maintenance
- Mulching: Apply a layer of mulch around the plants to retain moisture and suppress weeds.
- Weeding: Keep the area around the plants weed-free to reduce competition for nutrients and water.
- Pruning: Deadhead spent flowers to encourage additional blooming and prevent excessive self-seeding if you do not want the plants to spread.
6. Pests and Diseases
- Pests: Watch for aphids and other pests. Use insecticidal soap or neem oil if needed.
- Diseases: Generally, Asclepias pedicellata is resistant to many diseases, but make sure there is good air circulation to prevent fungal issues.
7. Attracting Pollinators
- Consider planting other native flowers nearby to attract more pollinators and enhance the ecosystem around your milkweed.
8. Seasonal Care
- In the fall, allow the plants to go dormant naturally. In spring, you can cut back any dead stems to promote new growth.
9. Propagation
- If you want to propagate more plants, consider allowing some to go to seed and collect seeds for future planting.
By following these guidelines, you can successfully grow Asclepias pedicellata in your garden, supporting local wildlife and enjoying its beautiful blooms.

Place in a bright room that is sun drenched almost all day. Or directly in a south-facing window.

Asclepias pedicellata, a perennial plant that thrives in well-drained conditions, requires specific watering practices for optimal growth and health. Here’s how to properly water this species:
1. Soil Check: Before watering, always check the moisture level of the soil. Insert your finger about an inch into the soil. If it feels dry at that depth, it's time to water. If it's still moist, wait a few more days before checking again.
2. Watering Frequency: During the active growing season (spring and summer), aim to water deeply but infrequently. This encourages the plant to develop a robust root system. Typically, watering once a week should suffice, but this may vary based on local climate, soil type, and rainfall.
3. Watering Technique: When watering, apply water at the base of the plant to minimize wetting the foliage. This reduces the risk of fungal diseases. Allow the water to soak in rather than running off the surface.
4. Amount of Water: Aim to provide enough water to reach the root zone, usually about 1 to 2 inches of water per week. If using a drip irrigation system or soaker hose, make sure it is set to provide this amount over the watering period.
5. Drought Tolerance: This species is known for its drought resistance once established. Therefore, adjust your watering schedule during dry periods, gradually reducing the frequency as the plant matures.
6. Seasonal Adjustments: During the cooler months, when the plant is dormant, significantly reduce watering frequency. Water only enough to prevent the soil from completely drying out.
7. Mulching: Applying a layer of organic mulch around the base of the plant can help retain soil moisture, regulate temperature, and suppress weeds, which further aids in proper watering practices.
By paying attention to the plant's specific needs and the environmental conditions, you can ensure that it remains healthy and vigorous throughout its growing season.
Asclepias pedicellata, commonly known as a milkweed species, benefits from specific fertilizing practices to enhance its growth and overall health. Follow these instructions for optimal fertilization:
- Soil Test: Before fertilizing, perform a soil test to determine nutrient levels and pH. This will guide your fertilization strategy.
- Timing: Fertilize in early spring, just as new growth emerges. This timing supports the plant during its active growing season.
- Type of Fertilizer: Use a balanced, slow-release fertilizer with an N-P-K (Nitrogen-Phosphorus-Potassium) ratio suitable for flowering plants, such as a 10-10-10 or 14-14-14 formula. Alternatively, consider organic options like compost or well-rotted manure.
- Application Rate: Follow the manufacturer’s instructions for the amount to apply, typically around 1 to 2 pounds per 100 square feet for granular fertilizers. If using liquid fertilizer, dilute according to the package directions.
- Method:
- For granular fertilizers, evenly spread the granules around the base of the plant, taking care not to allow them to come into direct contact with the stems.
- For liquid fertilizers, apply them when watering to promote absorption through the roots.
- For granular fertilizers, evenly spread the granules around the base of the plant, taking care not to allow them to come into direct contact with the stems.
- Watering: After applying fertilizer, thoroughly water the plant. This helps to activate the nutrients and facilitates their uptake by the root system.
- Frequency:
- For granular fertilizers, a single application in spring is generally sufficient for the growing season.
- If using liquid fertilizers, consider applying every 4 to 6 weeks during the growing season, but adjust based on the plant’s response and soil nutrient levels.
- For granular fertilizers, a single application in spring is generally sufficient for the growing season.
- Observe Plant Health: Monitor for growth response. If leaves turn yellow or growth is stunted, reconsider your fertilization strategy and adjust if necessary.
- Avoid Over-Fertilization: Excess nutrients can harm the plant and the surrounding ecosystem. Less is often more, especially with native species.
By adhering to these guidelines, you can effectively support the health of Asclepias pedicellata through appropriate fertilization.
Asclepias pedicellata thrives best in well-draining soil that is rich in organic matter. Here are some key characteristics to consider when selecting the appropriate soil for this plant:
- Soil Texture: A sandy loam or loamy soil is ideal, as it provides good drainage while retaining some moisture. Avoid compacted or heavy clay soils that can lead to waterlogging.
- pH Level: The preferred soil pH range is typically between 6.0 and 7.5. This slightly acidic to neutral pH supports nutrient availability for optimal growth.
- Organic Matter: Incorporating organic matter, such as compost or well-rotted leaf mold, can enhance soil structure, nutrient content, and moisture retention. This also encourages beneficial microbial activity.
- Drainage: Ensure that the soil has excellent drainage properties. Amending the soil with sand or perlite can help improve drainage and prevent root rot.
- Nutrients: While these plants can adapt to a variety of soil conditions, they benefit from a nutrient-rich environment. A balanced fertilizer, used sparingly, can support healthy growth during the growing season.
- Compaction: Avoid overly compacted soils, as good aeration is crucial for healthy root development. Tilling or loosening the soil before planting can improve this aspect.
In summary, aim for well-draining, sandy loam or loamy soil with moderate organic matter and a pH level between 6.0 and 7.5 to support the healthy growth of Asclepias pedicellata.
Asclepias pedicellata can be propagated through both seeds and cuttings. Here’s a detailed guide on each method:
Propagation by Seeds
- Seed Collection:
- Collect seeds from mature, dried pods. These should be harvested when they turn brown and begin to split open.
- Handle the seeds carefully to avoid damage.
- Collect seeds from mature, dried pods. These should be harvested when they turn brown and begin to split open.
- Seed Preparation:
- To improve germination rates, consider stratifying the seeds. This involves storing them in a moist medium (like sand or peat) in a sealed bag in the refrigerator for about 30 days. This mimics winter conditions.
- To improve germination rates, consider stratifying the seeds. This involves storing them in a moist medium (like sand or peat) in a sealed bag in the refrigerator for about 30 days. This mimics winter conditions.
- Planting:
- Prepare a well-draining soil mix that includes sand, perlite, and potting soil.
- Sow the seeds on the surface of the soil, as they require light to germinate. Sprinkle a thin layer of soil over them, but avoid burying them deeply.
- Water gently to avoid displacing the seeds.
- Prepare a well-draining soil mix that includes sand, perlite, and potting soil.
- Environment:
- Place the seed trays in a warm location with bright indirect light. Maintain a temperature of about 70°F to 80°F (21°C to 27°C).
- Keep the soil consistently moist but not soggy.
- Place the seed trays in a warm location with bright indirect light. Maintain a temperature of about 70°F to 80°F (21°C to 27°C).
- Germination:
- Germination can take anywhere from 2 to 4 weeks. Once the seedlings have developed a few true leaves, they can be transplanted into individual pots.
- Germination can take anywhere from 2 to 4 weeks. Once the seedlings have developed a few true leaves, they can be transplanted into individual pots.
- Transplanting:
- Once seedlings are sturdy enough to handle, transplant them into larger pots or directly into the garden, ensuring they are spaced adequately to allow for their mature size.
Propagation by Cuttings
- Once seedlings are sturdy enough to handle, transplant them into larger pots or directly into the garden, ensuring they are spaced adequately to allow for their mature size.
- Cutting Selection:
- Choose healthy stems during the growing season. Look for semi-hardwood cuttings that are 4 to 6 inches long, ideally taken in late spring or early summer.
- Choose healthy stems during the growing season. Look for semi-hardwood cuttings that are 4 to 6 inches long, ideally taken in late spring or early summer.
- Preparing the Cuttings:
- Use sterile pruning shears to make a clean cut just below a leaf node. Remove any lower leaves to prevent them from rotting in the soil.
- Use sterile pruning shears to make a clean cut just below a leaf node. Remove any lower leaves to prevent them from rotting in the soil.
- Rooting Hormone:
- Dip the cut end of each cutting in rooting hormone to encourage root development. This step is optional but can enhance success rates.
- Dip the cut end of each cutting in rooting hormone to encourage root development. This step is optional but can enhance success rates.
- Planting:
- Fill a small pot with a well-draining soil mix, similar to the one used for seed propagation.
- Make a hole in the soil with a pencil or stick, insert the cutting, and firm the soil around it to eliminate air pockets.
- Fill a small pot with a well-draining soil mix, similar to the one used for seed propagation.
- Watering:
- Water the cuttings thoroughly, allowing excess water to drain away.
- Water the cuttings thoroughly, allowing excess water to drain away.
- Environment:
- Cover the pots with a plastic bag or a clear plastic dome to create a humid environment, which will help to prevent the cuttings from drying out.
- Place the pots in a bright, indirect light location. Avoid direct sun, which can cause overheating and drying.
- Cover the pots with a plastic bag or a clear plastic dome to create a humid environment, which will help to prevent the cuttings from drying out.
- Root Development:
- Check the cuttings periodically for moisture and remove the covering for short periods to provide air circulation. After a few weeks, gently tug on the cuttings; if you feel resistance, roots are developing.
- Check the cuttings periodically for moisture and remove the covering for short periods to provide air circulation. After a few weeks, gently tug on the cuttings; if you feel resistance, roots are developing.
- Transplanting:
- Once the cuttings have established a good root system, transplant them into larger pots or into the garden, similar to seedlings.
Care Post-Propagation
- Once the cuttings have established a good root system, transplant them into larger pots or into the garden, similar to seedlings.
- Watering: Ensure young plants receive regular watering until established, but do not let them sit in standing water.
- Sunlight: Once established, these plants prefer full sun to partial shade.
- Fertilizing: Use a balanced fertilizer sparingly, as these plants are typically low-maintenance.
Propagation through seeds might take longer, but it allows for a larger number of plants. Cuttings can provide faster results but may have a lower success rate. Choose the method that best suits your gardening needs and conditions.


