Plant Overview
Commonly known as the Saw-pod or Serradella, Astragalus pelecinus is a resilient Mediterranean native often celebrated for its ability to thrive in poor, sandy soils. This low-growing legume looks like a delicate wildflower but is actually a powerhouse of soil regeneration, fixing nitrogen and providing nutritious forage. Its most striking feature isn't its flower, but its uniquely jagged, comb-like seed pods that look like miniature saw blades lying in the grass.
🔍 How to Identify
- 🌿 The Foliage: Features delicate, pinnate leaves with multiple pairs of tiny, oval leaflets that give the plant a feathery, fern-like appearance.
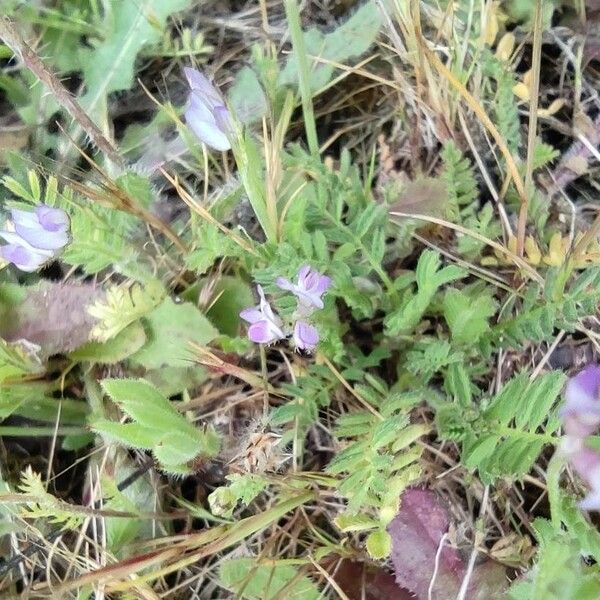
- 🌸 The Blooms: Small, pea-shaped flowers that range from pale blue to soft lilac, usually appearing in small clusters during the spring.
- 🪚 The Pods: The most diagnostic feature; flat, elongated seed pods with distinctive serrated or "toothed" edges on both sides, resembling a double-sided saw.
🏡 In Your Garden
- 🌾 Soil Restorer: This plant is an excellent "pioneer species." It is frequently used in permaculture or sustainable farming to improve soil quality, as it "fixes" nitrogen from the air into the ground.
- ☀️ Drought Survivor: It thrives in full sun and is highly adapted to sandy, acidic soils where other plants might wither. Because it is an annual, it focuses all its energy into seed production before the peak summer heat arrives.
⚠️ Safety & Toxicity
- 🐾 Livestock Friendly: Unlike some of its "Locoweed" cousins in the Astragalus genus, the Saw-pod is generally considered safe and is often used as a high-protein forage for sheep and cattle.
- 👶 General Caution: While not known to be toxic to humans, it is not a culinary herb. The serrated pods can be a minor choking hazard for small children or curious pets, so it’s best enjoyed as a groundcover rather than a snack.
✨ Fun Fact
The genus name Astragalus comes from the Greek word for "ankle bone." In ancient times, the dried, dice-shaped seeds of certain species in this family were used in games of chance, much like modern-day dice!

Detailed Care Instructions
To grow the Astragalus pelecinus plant, you can follow these steps:
- Choose a sunny location: Astragalus pelecinus plants prefer full sun. Find a spot in your garden or yard that receives at least 6-8 hours of direct sunlight per day.
- Prepare the soil: The soil should be well-draining. If the soil in your area is heavy or clayey, consider adding compost or organic matter to improve drainage. A slightly alkaline soil with a pH of 7-8 is ideal for these plants.
- Sow the seeds: Astragalus pelecinus can be grown from seeds. Plant the seeds directly into the prepared soil, about 1/4 inch deep. Space the seeds 6-8 inches apart to allow for growth.
- Watering: Keep the soil moist but not waterlogged during the germination phase, which typically takes 1-2 weeks. Once the plants are established, they are drought-tolerant and only require occasional watering.
- Maintenance: Remove any weeds or competing plants that may grow around the Astragalus pelecinus plants. Mulching can help control weed growth and retain moisture in the soil.
- Pruning: Although Astragalus pelecinus plants do not require extensive pruning, you can trim back any dead or damaged branches to maintain a neat appearance.
- Harvesting seeds: Astragalus pelecinus plants produce small pods containing seeds. Allow the pods to dry on the plant and then collect them before they split open. Store the seeds in a cool, dry place for future propagation.
Note: Depending on your location and climate, it's advisable to consult with a local nursery or gardening expert for specific guidance on growing Astragalus pelecinus in your area.

Place in a bright room that is sun drenched almost all day. Or directly in a south-facing window.

The best way to water this plant is to ensure that the soil is moist but not waterlogged. Allow the top inch of soil to dry out a bit before watering again. It is important to water deeply and thoroughly, making sure the water reaches the roots of the plant. Avoid getting water on the leaves as this can cause damage. During periods of hot weather, the plant may require more frequent watering. However, during the cooler months, you may need to reduce watering frequency. It is always best to check the soil moisture level before watering to ensure that you do not over or underwater the plant.
- Begin fertilizing your plant in the spring, after the last frost.
- Use a balanced fertilizer with an NPK ratio of 10-10-10.
- Apply the fertilizer to the soil around the base of the plant, being careful not to get any on the leaves.
- Water the plant thoroughly after applying the fertilizer.
- Repeat the fertilization process once every four to six weeks throughout the growing season.
- Stop fertilizing the plant in late summer to let it prepare for winter dormancy.
- Always follow the manufacturer’s instructions for the fertilizer you are using, and do not apply more than recommended.
Astragalus Pelecinus prefers a well-drained soil with sandy loam texture. The ideal soil pH for this plant is between 6.0 to 7.5. The plant can grow in a wide range of soil types, but it grows best in soils that are rich in organic matter. It is important to avoid soils that are too heavy, as they can retain water and cause the roots to rot. Adding compost or well-rotted manure to the soil before planting can help improve soil structure and fertility. In areas with poor drainage, it is advisable to plant the Astragalus Pelecinus in raised beds to prevent waterlogging. Providing adequate water and nutrients to the plant is essential for its growth and development. Overall, the recommended soil type for Astragalus Pelecinus is well-drained, sandy loam soil with a pH range of 6.0 to 7.5 that is rich in organic matter.
To propagate this plant, take a stem cutting from a mature and healthy plant in the spring or summer. Make sure the cutting is around 4-6 inches long and has several leaves attached. Remove the bottom set of leaves and dip the end of the cutting in rooting hormone. Plant the cutting in a well-draining soil mixture and keep it moist but not overly wet. Place the cutting in a bright, indirect light location and ensure the temperature remains warm. After several weeks, roots will begin to develop and new growth will appear. Transplant the new plant into a separate container once it has established roots and appears healthy.


