Plant Overview
Often called the "Hardy Begonia," this elegant perennial is a rare rebel in the Begonia family. While most of its cousins shiver at the first sign of frost, Begonia evansiana (scientifically known as Begonia grandis) is famous for its ability to survive freezing winters and return with lush, tropical-looking foliage year after year. In Victorian times, it was a prized resident of shaded estates, cherished for the way its ruby-red leaf veins glow when caught in the late afternoon sun.
🔍 How to Identify
- 🍃 Stained-Glass Foliage: The large, lopsided heart-shaped leaves are a deep olive green on top, but flip them over to reveal a stunning network of crimson veins and a reddish-purple underside.
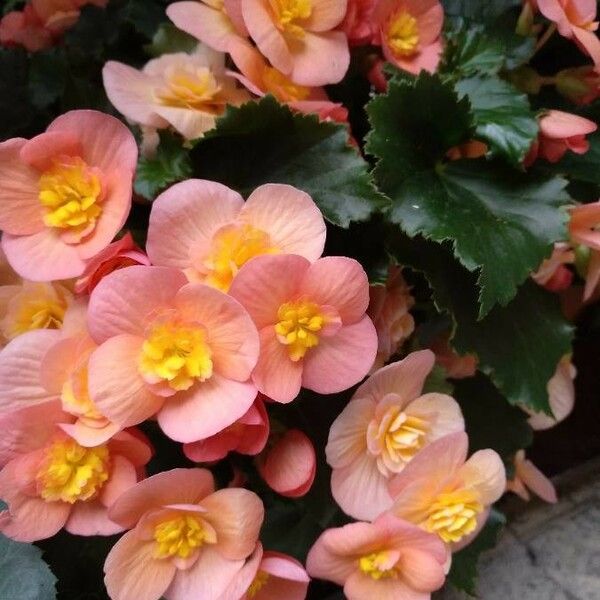
- 🌸 Dangling Blooms: From mid-summer through autumn, it produces airy clusters of delicate, pendulous pink flowers that look like tiny, winged jewels hanging from red stems.
- 🫘 The "Pea" Bulblets: Look closely at the leaf joints (axils) in late summer; you’ll see small, pea-sized green bumps. These are bulbils, which the plant drops to the ground to "clone" itself for the following year.
🏡 In Your Garden
- 🌘 The Shadow Dweller: This is the ultimate solution for those "trouble spots" in your yard where grass refuses to grow. It thrives in full to partial shade and prefers the cool, moist soil of a woodland setting.
- 💤 The Late Sleeper: Don't panic in the spring! Unlike most perennials, the Hardy Begonia stays dormant until the ground is truly warm, often not appearing until late May or June. Mark its spot so you don't accidentally dig it up during spring cleaning.
- 🌱 Naturalizing Nuance: Because it drops bulbils, it will slowly form a beautiful, shimmering colony. It isn't invasive, but it is "persistent," filling in gaps between ferns and hostas with effortless grace.
⚠️ Safety & Toxicity
- 🐾 Pet Safety: Like almost all begonias, this plant contains soluble calcium oxalates.
- 🚫 Risk Level: It is considered toxic to dogs, cats, and horses. If ingested, it can cause intense oral irritation, drooling, and difficulty swallowing. The most toxic parts are the underground tubers, so keep "diggers" away from the planting site.
✨ Fun Fact
The Hardy Begonia is one of the very few Begonia species that can survive temperatures as low as -10°F (-23°C) if provided with a thick blanket of mulch. It’s a true survivor that bridges the gap between delicate tropical beauty and rugged garden reliability.

Detailed Care Instructions
To grow Begonia Evansiana plants, follow these steps:
- Choose a suitable location: Begonia Evansiana thrives in partial shade or filtered sunlight. It prefers well-draining soil rich in organic matter. Make sure the location offers protection from direct sunlight and strong winds.
- Prepare the soil: Amend the soil with organic matter like compost or well-rotted manure. This improves drainage and provides essential nutrients for plant growth.
- Planting: Dig a hole in the prepared soil that is slightly larger than the root ball of the plant. Place the plant in the hole, ensuring that the crown of the plant (where the stem meets the roots) is at soil level. Gently fill the hole with soil and firm it around the plant.
- Watering: Water the plant thoroughly after planting to help settle the soil and provide moisture to the roots. Begonia Evansiana prefers consistently moist but not waterlogged soil. Water the plant regularly, especially during dry periods, but avoid overwatering as it may lead to root rot.
- Mulching: Apply a layer of organic mulch around the base of the plant to help retain moisture, regulate temperature, and control weed growth. This can be done using materials like wood chips, straw, or compost.
- Fertilizing: Begonia Evansiana benefits from regular fertilization. Apply a slow-release balanced fertilizer according to the manufacturer's instructions during the growing season. This will provide the plant with essential nutrients for healthy growth.
- Pruning: Regularly remove any dead or faded flowers to encourage continuous blooming. Prune back any leggy or overgrown stems to maintain a compact and bushy habit.
- Pests and diseases: Keep an eye out for common pests like aphids, mealybugs, and mites. Treat any infestations promptly with insecticidal soap or neem oil. Avoid overhead watering to prevent diseases like powdery mildew. Ensure good air circulation around the plant to minimize disease risk.
- Winter care: In cooler climates, Begonia Evansiana is not frost-tolerant. Before the first frost, dig up the plants and store the rhizomes in a cool and dry place, like a basement or garage. Replant them in spring after the danger of frost has passed.
With proper care, Begonia Evansiana plants can thrive and produce beautiful flowers season after season.

Place in a window with dappled sun or a spot in the middle of a room. Or directly in a window facing west or east.

To water this particular plant, it is important to first check the moisture level of the soil. Use a moisture meter or stick a finger into the soil to check for moisture. If the soil is dry, water the plant thoroughly, allowing excess water to drain out of the bottom of the container. It is important not to allow the soil to become too soggy or waterlogged, as this can lead to root rot. Water the plant consistently, but allow the top inch of soil to dry out before watering again. In addition, avoid getting water on the leaves of the plant, as this can lead to fungal diseases. Finally, it is important to adjust the watering schedule based on environmental factors like temperature and humidity, as these can impact the plant's water needs.
To fertilize the plant, use a balanced fertilizer with equal amounts of nitrogen, phosphorus, and potassium. Dilute the fertilizer to half strength and apply it every two weeks during the growing season, which is typically from spring to fall. Be careful not to over-fertilize as this can lead to burnt roots and damage to the plant. Water the plant regularly to prevent the fertilizer from accumulating in the soil and causing harm to the plant.
Begonia Evansiana plant prefers a soil that is well-draining and rich in nutrients. The soil should have a pH level of around 6.0 to 6.5, slightly acidic to neutral. It is important that the soil is not waterlogged or too dry. A mixture of organic compost, peat moss, and perlite can be used to create a loose, well-draining soil. It is also recommended to add slow-release fertilizer to the soil before planting. This will ensure that the plant receives nutrients over a longer period of time. Overall, the soil should be light, airy, and nutrient-rich to support the growth of the Begonia Evansiana plant.
To propagate this plant, you will need to take a stem cutting from a healthy plant. Ensure that the stem has at least two nodes and is around 4-6 inches long. Using a sharp and sterile pair of scissors, cut the stem just below a node.
Next, remove the lower leaves from the stem, leaving two or three leaves at the top of the stem. If the remaining leaves are large, cut them in half to reduce the amount of moisture that the plant loses through transpiration.
Dip the cut end of the stem into rooting hormone powder, ensuring that it is thoroughly coated. This step is optional but can increase the chances of the cutting rooting successfully.
Next, prepare a pot filled with well-draining soil. Make a hole in the soil and insert the cutting into it, ensuring that the node is buried in the soil. Gently press the soil around the stem, making sure it is secure.
Water the cutting well and place it in a location with bright, indirect light. The cutting should not be exposed to direct sunlight as it may dry out and die.
Ensure that the soil remains moist but not waterlogged. After a few weeks, check the cutting for roots by gently tugging on it. If the stem resists the tug, roots have likely formed, and you can begin to treat it like a mature plant.


