Plant Overview
Often called the "Architect's Best Friend," the Japanese Boxwood is the backbone of formal garden design worldwide. Known for its tiny, elegant foliage and its willingness to be sculpted into almost any shape, this evergreen shrub brings a sense of permanent structure to the landscape. While it hails from East Asia, it has become a staple in gardens from London to Los Angeles, prized for its slow-growth habit and year-round greenery.
🔍 How to Identify
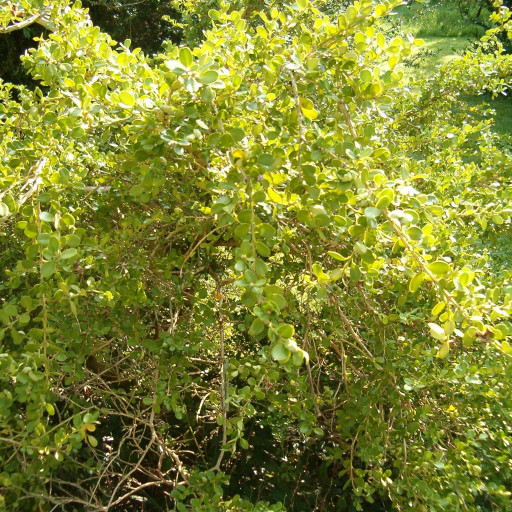
- 🌿 The Foliage: Look for small, leathery, oval-shaped leaves that grow in opposite pairs. They are a bright, glossy green and typically measure less than an inch long, giving the plant its "Littleleaf" nickname.
- 📐 Growth Habit: It naturally forms a dense, rounded mound. The branches are stiff and woody, often appearing slightly square-shaped when they are young and green.
- 🌼 Subtle Blooms: In early spring, it produces clusters of tiny, petal-less yellow flowers. While they are easily missed by the eye, their sweet, honey-like fragrance often gives them away to nearby gardeners.
🏡 In Your Garden
- ✂️ Sculptural Potential: Because it grows slowly and branches densely, it is the premier choice for topiary and low "knot" gardens. It handles heavy pruning better than almost any other shrub, but remember to thin out the center occasionally to allow sunlight and air to reach the inner branches.
- 💧 Shallow Roots: This plant has a very shallow root system. It hates "wet feet" and will suffer in soggy soil, but it also needs a thick layer of mulch to protect those shallow roots from drying out during hot summer spells.
⚠️ Safety & Toxicity
- 🐾 Toxic to Pets: Japanese Boxwood contains alkaloids that are toxic to dogs, cats, and horses. If ingested, it can cause digestive upset, drooling, or more serious lethargy.
- 🧤 Skin Irritation: The sap can occasionally cause mild skin irritation or dermatitis. It is wise to wear gardening gloves when you are performing heavy pruning or shaping.
✨ Fun Fact
The wood of the Boxwood is so incredibly dense and fine-grained that it actually sinks in water! Because of this unique density, it has been used for centuries to craft high-end items like chess pieces, woodwind instruments, and intricate printing blocks.

Detailed Care Instructions
To grow Buxus Microphylla plants, also known as Japanese boxwood, follow these steps:
- Choose a suitable location: Buxus Microphylla plants prefer partial shade to full sun and well-drained soil. Select a location with good air circulation and protection from harsh winds.
- Prepare the soil: Ensure the soil is loose, fertile, and drains well. If the soil is heavy or clay-based, amend it with organic matter such as compost or aged manure to improve drainage and nutrient content.
- Planting: Dig a hole slightly larger than the root ball of the Buxus Microphylla plant. Gently remove the plant from its container, loosen any tightly bound roots, and place it in the hole at the same depth as it was in the container. Backfill the hole with soil, firming it gently around the plant.
- Watering: Water the plant thoroughly immediately after planting to settle the soil and eliminate any air pockets. Afterward, provide regular watering until the plant is established. Generally, Buxus Microphylla plants prefer moist soil, so water consistently, but avoid overwatering.
- Mulching: Spread a layer of organic mulch around the base of the plant, leaving a small gap around the stem or trunk. Mulch helps retain moisture, suppresses weeds, and regulates soil temperature.
- Pruning: Buxus Microphylla plants respond well to pruning and shaping. Prune in early spring or late winter before new growth begins. Regular pruning helps maintain the desired shape and encourages dense foliage.
- Fertilizing: Feed the plant with a balanced slow-release fertilizer in early spring and late summer. Follow the manufacturer's instructions for proper application.
- Pest and disease control: Buxus Microphylla plants can be prone to pest and disease problems, such as boxwood leafminer, boxwood psyllids, and diseases like boxwood blight or leaf spot. Monitor your plants regularly for signs of pests or diseases and take necessary measures, such as using insecticide or disease control treatments, if needed.
- Winter protection: In colder climates, protect Buxus Microphylla plants from strong winter winds and extreme temperatures. Consider using burlap or providing a windbreak to shield the plants.
- Maintenance: Regularly monitor the plants for any signs of stress, disease, or pests. Proper maintenance, including watering, pruning, and fertilization, will help ensure vigorous growth and healthy plants.
Remember to research specific care requirements for Buxus Microphylla plants in your geographical area, as conditions may vary.

Place in a bright room that is sun drenched almost all day. Or directly in a south-facing window.

1. Determine the watering needs of the plant by checking the soil moisture level. Insert your finger into the soil up to the second knuckle and if it feels dry, it's time to water the plant.
2. Use a watering can with a narrow spout or a hose with a gentle spray nozzle to avoid splashing water onto the leaves of the plant.
3. Water slowly and evenly around the base of the plant, ensuring that the water reaches the roots.
4. Avoid overwatering the plant as this can lead to waterlogging and root rot. Allow the top inch of soil to dry out before watering again.
5. Water the plant early in the morning or late in the evening to avoid evaporation and reduce the risk of fungal diseases.
6. Consider using a mulch around the base of the plant to help retain moisture and prevent weeds from growing.
7. Monitor the plant regularly to ensure that it is receiving the right amount of water. Adjust the frequency and amount of water according to the plant's needs and the weather conditions.
8. If the plant is in a container, ensure that there is adequate drainage to prevent water from accumulating at the bottom and causing root rot.
To fertilize this plant, apply a balanced, slow-release fertilizer in early spring, following the manufacturer's instructions for the specific product. Be sure to avoid over-fertilizing, as this can cause damage to the plant and lead to excess growth. Water the plant thoroughly after fertilizing to help distribute the nutrients throughout the soil. Repeat the fertilization process every six to eight weeks throughout the growing season, or as needed based on the plant's growth and the soil's nutrient levels.
The ideal soil for this plant is a well-draining, slightly acidic soil with a pH between 6.0 and 6.5. It should be rich in organic matter and nutrient-dense, but not overly nutrient-rich. The soil should be loose and airy so that the roots can breathe and grow without being suffocated. It should also retain moisture well without becoming waterlogged, as this can lead to root rot. It is important to avoid using heavy clay soils or soils with poor drainage, as this can lead to poor growth and even death of the plant. Adding compost or other organic matter to the soil can help improve its structure and nutrient content.
There are several ways to propagate this plant, but one effective method is by using stem cuttings. Here are the steps:
- Take stem cuttings from the parent plant. Choose healthy stems that are about 4-6 inches long and have at least 3 sets of leaves.
- Trim the leaves from the bottom set of nodes to create a bare stem beneath the remaining leaves.
- Dip the cut end of the stem into rooting hormone powder.
- Plant the stem in a well-draining soil mix, leaving only the top set of leaves above the soil surface.
- Water the cutting thoroughly and place it in a warm, bright location with indirect sunlight.
- Cover the cutting with a plastic bag or a clear plastic dome to create a humid environment.
- Check the cutting regularly and keep the soil moist but not waterlogged.
- After a few weeks, roots should start to develop. This can be checked by gently tugging on the stem. If it resists, roots have formed.
- Once rooted, remove the plastic covering and gradually acclimate the new plant to normal conditions.
- Continue to care for the plant as you would a mature boxwood plant, providing adequate water, light, and nutrients.
Common pests of the japanese box include Spider mites. Make a habit of checking your japanese box frequently for pests so that any infestations can be caught and managed early.


