Plant Overview
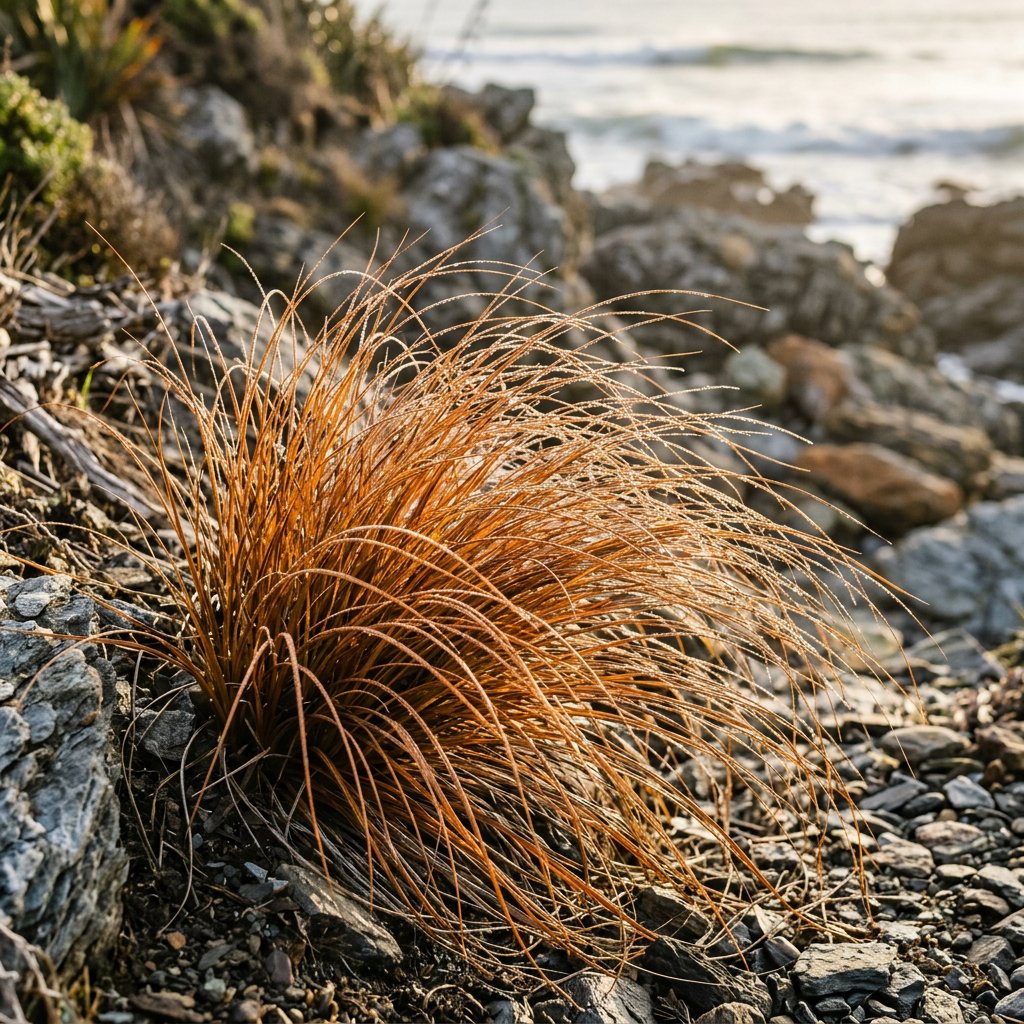
Known affectionately as the Orange New Zealand Sedge, this plant is the ultimate color-shifter of the ornamental grass world. Native to the rugged landscapes of New Zealand, it acts as a garden chameleon, transitioning from an understated olive green to a fiery explosion of bronze and copper. It is a favorite for modern landscapes, offering a tactile, "mop-top" aesthetic that provides movement and texture in even the smallest breeze.
🔍 How to Identify
- 🌾 The Foliage: It features exceptionally fine, hair-like leaves that are tough and leathery, forming dense, arching mounds that spill over garden edges.
- 🎨 The Palette: Look for the distinct color gradient; while the base of the clump often stays green, the tips turn a luminous burnt-orange or russet, especially when stressed by sun or cold.
- 🌾 The Seed Heads: In summer, it produces small, dark brown flower spikes on long, weeping stems that often trail gracefully along the ground.
🏡 In Your Garden
- ☀️ The Sun Factor: To get the best "fire" out of your sedge, plant it in full sun. While it grows fine in the shade, it will lose its signature orange glow and remain a muted olive-green.
- ✂️ Low Intervention: Unlike many grasses, this is an evergreen sedge. Avoid "hacking" it back to the ground in winter; instead, simply "comb" through the plant with gloved hands in the spring to remove dead blades and keep it looking fresh.
⚠️ Safety & Toxicity
- 🐾 Non-Toxic: This plant is generally considered safe and non-toxic for cats, dogs, and horses, making it a "worry-free" choice for pet-friendly backyards.
- 🧤 Abrasive Edges: While not as sharp as some of its relatives, the long leaves have a slightly rough texture. If you have sensitive skin, wearing gardening gloves during maintenance will prevent minor "grass cuts."
✨ Fun Fact
Botanists use a famous rhyme to tell plants like this apart from similar-looking species: "Sedges have edges, rushes are round, and grasses are hollow right up from the ground." If you feel the base of a Carex stem, it is distinctly triangular!

Detailed Care Instructions
To grow Carex testacea, also known as orange sedge or New Zealand sedge, follow these steps:
- Choose the right location: Carex testacea does well in full sun to partial shade, so select a spot with these light conditions. It prefers moist, well-draining soil.
- Prepare the soil: Before planting, amend the soil with organic matter like compost to improve drainage and nutrient content. Remove any weeds or rocks from the planting area.
- Propagate from divisions or buy plants: Carex testacea can be propagated by dividing established clumps or by purchasing nursery-grown plants. Divide clumps in early spring or fall for best results.
- Planting: Dig a hole slightly larger than the rootball of the plant. Place the plant in the hole, making sure it sits at the same level it was growing in its previous container. Gently firm the soil around the roots.
- Watering: After planting, thoroughly water the plant to settle the soil. Keep the soil slightly moist, but not waterlogged. Water regularly during dry spells or when the top inch of soil dries out.
- Mulching: Apply a layer of mulch around the plant to help retain moisture and suppress weeds. Carex testacea appreciates a layer of organic mulch like bark chips or compost.
- Fertilization: This plant does not generally require regular fertilization. However, you can apply a slow-release, balanced fertilizer in early spring to promote healthy growth.
- Pruning: Carex testacea doesn't require regular pruning but you can trim back any dead or damaged foliage to keep the plant looking tidy. Prune in early spring before new growth begins.
- Propagate further if desired: As the plant matures, it will develop clumps that can be divided further to create new plants. Divisions can be done every few years, preferably in early spring or fall.
- Winter care: Carex testacea is generally hardy, but if you live in a cold region, protect the plant from severe frost or freeze by providing a layer of mulch around the base in late fall.
By following these steps, you can successfully grow Carex testacea and enjoy its beautiful orange-colored foliage.

Place in a window with dappled sun or a spot in the middle of a room. Or directly in a window facing west or east.

This plant requires regular watering to stay healthy and hydrated. It is important to keep the soil consistently moist but not waterlogged. To achieve this, water the plant deeply once a week, making sure the water reaches the roots. During the hotter months, the plant may require more frequent watering. It is also important to avoid getting the foliage wet, as this can lead to disease and pest issues. When watering, aim for the soil around the base of the plant rather than watering from above. This will help the water to reach the roots and keep the foliage dry. Use a well-draining soil and a container with drainage holes to prevent water buildup.
For optimal growth and health of this plant, it is recommended to fertilize it during its active growing season using a balanced, slow-release fertilizer. Apply the fertilizer according to the package instructions, using roughly half the recommended amount. It is important to ensure that the soil is moist before and after fertilizing to prevent burning of the roots. Additionally, avoid fertilizing during periods of drought or extreme heat as this can also cause damage to the plant. Monitor the plant closely for any signs of over or under fertilization, such as yellowing of leaves or stunted growth.
The best type of soil to use for the plant is a mixture that is well-draining and loose. The ideal pH range for the soil should be 5.0 to 7.5. The soil should be enriched with organic matter such as compost or peat moss. When planting, it is important to make sure the soil is evenly moist and well-compacted around the plant's root system. Adequate drainage is crucial to prevent waterlogging and root rot. In addition, the plant should be fertilized with a balanced plant food during the growing season to ensure healthy growth and development. The soil should be kept consistently moist, but not waterlogged, and the plant needs to be kept in partial shade.
To propagate this plant, first identify healthy stem tips with several leaves. Cut the stem tip at an angle to obtain a length of about 8-10 cm. Remove the lower leaves from the stem cutting and dip the cut end in rooting hormone powder to promote root growth.
Fill a small container with a well-draining soil mix and make a hole in the center. Insert the cutting into the hole and gently press the soil around the base of the cutting. Water the soil well and cover the container with a clear plastic bag, creating a mini greenhouse environment to help retain moisture.
Place the container in a warm, bright spot, but avoid direct sunlight. After a few weeks, check for root growth by gently tugging at the cutting. Once roots have formed, remove the plastic bag and gradually acclimate the propagated plant to the outside environment.
Keep the new plant well-watered and fertilize every few weeks to encourage new growth. With proper care, the propagated plant will eventually mature to resemble a mature, healthy plant.
Common pests of the sedge include Thrips. Make a habit of checking your sedge frequently for pests so that any infestations can be caught and managed early.


