Plant Overview
Often called the "Birdlime Tree," Ceodes umbellifera is a tropical curiosity that has earned a somewhat notorious reputation in the wild. Known for its lush, glossy foliage, it is most famous—or infamous—for its extremely sticky seeds that have been known to entangle small birds. In the home or garden, however, it is prized as a robust ornamental plant that brings a dense, jungle-like aesthetic to any space.
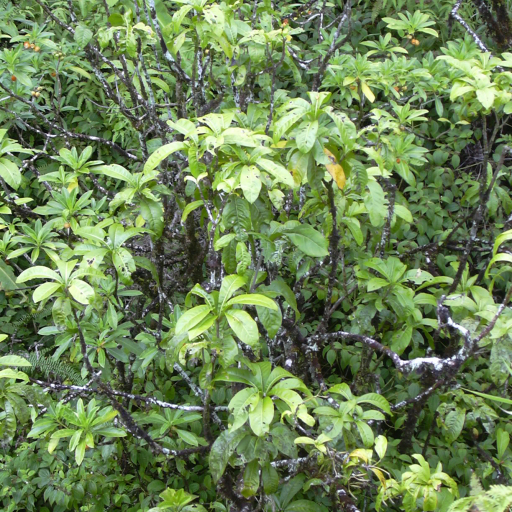
🔍 How to Identify
- 🍃 Lush Foliage: The leaves are large, leathery, and smooth, often appearing in a vibrant, deep green or as "Variegata" cultivars with striking creamy-white patterns.
- 🌸 Umbrella Blooms: It produces clusters of small, fragrant, star-shaped flowers that emerge in umbrella-like formations (hence the name umbellifera).
- 🍯 Sticky Ribbed Fruit: Its most unique feature is the elongated, five-ribbed fruit which secretes a powerful, natural adhesive as it matures.
🏡 In Your Garden
- 🏝️ Tropical Humidity: This plant is a true child of the tropics; while it is adaptable, it thrives best in high humidity and bright, indirect light. If the air becomes too dry, the leaf edges may turn brown and crisp.
- 🌱 Stable Environment: Ceodes hates being moved frequently. It has a sensitive root system that prefers well-draining soil and a stable temperature. Avoid placing it near air conditioning vents or drafty windows, as it may drop leaves in protest.
⚠️ Safety & Toxicity
- 🟢 Chemical Status: This plant is generally considered non-toxic to humans and common household pets like cats and dogs if accidentally nibbled.
- 🚫 Physical Hazard: The "birdlime" glue on the seeds is the primary safety concern. In an outdoor setting, the seeds can be physically hazardous to small birds, bats, and large insects who may become trapped in the sticky substance. If you have a variegated indoor specimen, simply prune the flower stalks before they go to seed to avoid any sticky messes.
✨ Fun Fact
In various Pacific cultures, the incredibly sticky sap from the fruit was traditionally harvested and used as a natural glue to catch small birds, which is how the tree earned its most common nickname, "The Birdlime Tree."

Detailed Care Instructions
To grow Ceodes Umbellifera (also known as Sweet Chervil), follow these steps:
- Choose a suitable location: Sweet Chervil thrives in partial shade or filtered sunlight. Find a spot that receives at least 4-6 hours of indirect sunlight per day.
- Prepare the soil: The plant prefers well-draining soil that is rich in organic matter. Till the soil to remove any weeds or rocks, and mix in compost or aged manure to improve fertility.
- Sow the seeds: Sow the seeds directly in the garden during spring or fall. Scatter the seeds over the prepared soil and gently press them down, as they require light to germinate. Keep the seeds moist but not overly wet.
- Watering: Water the plant regularly, ensuring the soil remains consistently moist but not waterlogged. Aim for deep watering sessions rather than frequent shallow waterings.
- Mulching: Apply a layer of organic mulch, such as straw or wood chips, around the base of the plants. This helps to conserve moisture, suppress weeds, and maintain a more even soil temperature.
- Thin the seedlings: Once the seedlings emerge and grow a few inches tall, thin them out to provide enough space for each plant to grow. Space them around 6-8 inches apart.
- Fertilization: Ceodes Umbellifera does not require heavy fertilization. However, you can provide a balanced, slow-release fertilizer once or twice during the growing season to promote healthier growth.
- Maintenance: Regularly weed around the plants to prevent competition for nutrients. Pinch back the tips of the plants to promote bushier growth. Watch for pests such as aphids or slugs and take appropriate measures if necessary.
- Harvesting: You can start harvesting the leaves as soon as they grow to a usable size, usually within 8-12 weeks of sowing. Cut the leaves close to the base of the plant, and new growth will emerge.
By following these steps, you can successfully grow Ceodes Umbellifera (Sweet Chervil) and enjoy its delicate, aromatic leaves in your garden or kitchen.

Place in a window with dappled sun or a spot in the middle of a room. Or directly in a window facing west or east.

To effectively water Ceodes Umbellifera plants, it's important to consider a few key factors. First, ensure that you are using well-draining soil for planting these plants. This will prevent waterlogging and root rot.
When it comes to watering, it's crucial to strike a balance between providing sufficient moisture and avoiding over-watering. These plants prefer a moderately moist soil, rather than being constantly saturated.
To determine when to water, check the soil regularly by inserting your finger about an inch into the soil. If it feels dry at that depth, it's time to water. Be cautious not to let the soil completely dry out, as it may harm the plant.
While watering, aim to saturate the soil uniformly to ensure all the roots receive moisture, but avoid excessive watering that could cause water to pool on the surface. A slow and steady watering session is preferable, allowing the water to penetrate the soil properly.
Additionally, it is advisable to water the plants early in the day to give them enough time to dry off before the cooler evening temperatures. This helps to prevent diseases associated with excessive moisture.
In summary, the key to watering Ceodes Umbellifera plants revolves around maintaining moderate soil moisture levels and ensuring proper drainage. This will help keep the plants healthy and thriving.
To provide proper fertilizing instructions for the Ceodes Umbellifera plant, it is important to use a balanced fertilizer that contains a mix of essential nutrients. Follow these guidelines:
- Dilute the fertilizer: Mix the recommended amount of fertilizer with water according to the instructions on the packaging. Use a watering can or sprayer for easy application.
- Timing: Start fertilizing in the spring or early summer, when the plant begins active growth. Avoid fertilizing during the dormant period or winter months.
- Frequency: Apply the diluted fertilizer once every month during the growing season. Over-fertilizing can be harmful, so ensure you follow a regular schedule.
- Application method: Carefully pour or spray the diluted fertilizer around the base of the plant, ensuring it reaches the soil. Avoid direct contact with the plant's leaves or stem, as this may cause burning or damage.
- Watering: After fertilizing, water the plant lightly to help the nutrients penetrate the soil. Provide enough water to moisten the top layer of soil without saturating it.
- Monitor the plant's health: Pay attention to any signs of over or under-fertilization. If the leaves start turning yellow or curling up, reduce the amount of fertilizer used. On the other hand, if the plant appears burned or shows signs of salt buildup on the soil surface, rinse it with clean water and reduce the frequency of fertilization.
- Environmental considerations: Consider the plant's growing conditions and adjust fertilizer application accordingly. For example, if the plant is growing in rich soil or receives ample nutrients from compost, reduce the amount or frequency of fertilizing.
Always refer to the specific fertilizer instructions and adjust the measurements or frequency as directed, as different fertilizers may have varying concentrations. Regularly observing and responding to your plant's growth and appearance will help you fine-tune the fertilization process for optimal health and development.
When selecting the soil for the Ceodes umbellifera plant, it is important to consider its natural habitat and growing conditions. This plant is typically found in areas with well-draining soil that is rich in organic matter. Therefore, it is recommended to use a soil mix that mimics these characteristics.
The ideal soil for Ceodes umbellifera should have a loamy texture, which means it should contain a balanced mixture of sand, silt, and clay. This type of soil provides good drainage while retaining enough moisture for optimal plant growth. A loamy soil also offers sufficient aeration and allows the roots to access oxygen easily.
To ensure that the soil is nutrient-rich, it is advised to include organic matter such as compost or well-rotted manure in the soil mix. This will provide essential nutrients to the plant and promote healthy growth. Additionally, organic matter helps improve soil structure, enhances water retention, and encourages beneficial microbial activity.
It is worth noting that Ceodes umbellifera thrives in slightly acidic to neutral soil pH. Testing the soil pH and adjusting it to a range of 6.0 to 7.0 is beneficial for the plant's overall health. This can be achieved by incorporating amendments such as lime or sulfur, depending on the current pH level of the soil.
Furthermore, it is important to ensure that the soil is free from contaminants or pollutants that may harm the plant. Avoid using soil that has been exposed to pesticides or herbicides as they can negatively impact the plant’s growth and health.
Maintaining proper soil moisture is vital for the Ceodes umbellifera plant. It is advisable to provide consistent moisture without overwatering. Therefore, incorporating materials like perlite or vermiculite into the soil mix can improve drainage and prevent waterlogging.
In summary, when selecting soil for the Ceodes umbellifera plant, opt for a well-draining loamy soil that is rich in organic matter. Maintain a slightly acidic to neutral pH range and ensure the soil is uncontaminated. By providing the appropriate soil conditions, you can encourage healthy growth and prevent potential issues for this plant.
To propagate Ceodes Umbellifera plant, you can follow the steps below:
- Select a healthy parent plant: Look for a mature and disease-free Ceodes Umbellifera plant to ensure successful propagation.
- Prepare a well-draining potting mix: Use a mixture of equal parts peat moss, perlite, and vermiculite, or any other well-draining soil mixture appropriate for propagating plants.
- Take stem cuttings: Using a sharp and clean pair of scissors or pruning shears, take 4-6 inch long stem cuttings from the parent plant. Make sure the cuttings have at least three leaf nodes.
- Remove lower leaves: Gently strip off the lower leaves from the bottom half of the cutting to create a clean stem.
- Apply rooting hormone (optional): Dip the cut end of the stem into a rooting hormone powder or gel, which can help stimulate root development. This step is optional but can increase the success rate of propagation.
- Plant the cuttings: Make holes in the prepared potting mix and insert the cut end of each stem cutting into the hole, ensuring that at least one or two leaf nodes are below the soil surface.
- Provide optimal conditions: Place the potted cuttings in a warm and bright location, away from direct sunlight. Maintain a temperature of around 70-80°F (21-27°C) and provide adequate humidity levels by covering the cuttings with a plastic bag or placing them inside a propagator.
- Water regularly: Keep the potting mix slightly moist at all times, but avoid overwatering, as excessive moisture can lead to rotting. Mist the cuttings with water regularly to maintain humidity.
- Monitor and wait for root development: It usually takes 4-6 weeks for roots to develop. Check for signs of new growth, indicating successful rooting. Gently tug on the cuttings after a few weeks to feel for resistance, indicating root establishment.
- Transplant the rooted cuttings: Once a healthy root system has developed, carefully lift the rooted cuttings from the potting mix and transplant them into individual pots filled with a well-draining potting soil. Ensure the newly potted plants receive bright, indirect light and continue to water them as needed.
By following these steps, you can propagate Ceodes Umbellifera and expand your collection of this particular plant.


