Plant Overview
Often called the "Parlor Palm," Chamaedorea elegans has been a beloved indoor companion since the Victorian era. It earned its nickname by being one of the few plants capable of surviving in the dim, drafty, and often smoky parlors of 19th-century homes. Today, it remains a favorite for its elegant, arching fronds and its remarkably easy-going nature.
🔍 How to Identify
- 🌿 The Fronds: Features delicate, pinnate (feather-shaped) leaves that grow in a soft, arching habit. The leaflets are narrow and have a slight papery texture.
- 🎋 The Stems: Thin, green, reed-like stems grow in tight clumps. As the plant matures, these stems can develop rings that resemble miniature bamboo.
- 🌼 The "Bead" Flowers: On mature plants, you might see branched stalks holding tiny, yellow, ball-shaped flowers. These look like small beads and eventually turn into non-edible berries if pollinated.
🏡 In Your Garden
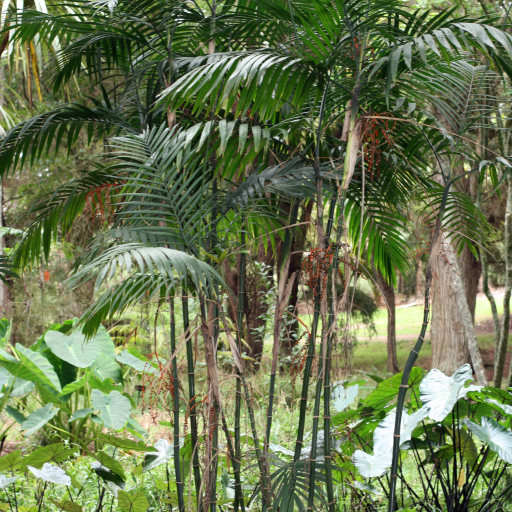
- 🌥️ Understory Logic: In the wild, these palms grow under the dense canopy of Central American rainforests. This means they are naturally "shade-tolerant." In your home, they thrive in indirect light; harsh, direct sun will quickly bleach and burn their delicate leaves.
- 🪴 Slow and Steady: Unlike many tropical plants that grow like weeds, Chamaedorea is a slow-grower. It prefers to stay in the same pot for several years. Because it has a sensitive root system, "up-potting" too frequently can cause the plant to go into shock.
- 💧 Humidity over Wetness: While it loves a humid environment (mist it occasionally!), it hates sitting in soggy soil. Use a well-draining peat-based mix to prevent root rot, which is the most common cause of death for these palms.
⚠️ Safety & Toxicity
- ✅ Non-Toxic: This is one of the safest plants you can bring into your home. It is officially listed by the ASPCA as non-toxic to both dogs and cats.
- 🛡️ Physical Safety: Unlike some other palm species (like the Sago Palm, which is actually a cycad), the Parlor Palm has no sharp spines or hidden thorns, making it perfectly safe for households with curious children.
✨ Fun Fact
In the 1800s, owning a Chamaedorea was a major status symbol. It was considered a "prestige plant" because it was one of the first exotic species brought back from the Americas that could actually survive the dark, coal-heated homes of high-society London.

Detailed Care Instructions
To grow a Chamaedorea plant, also known as a Parlor Palm, follow these steps:
- Choose the right location: Chamaedorea plants prefer bright, indirect sunlight. Avoid placing them in direct sunlight, as it can scorch the delicate leaves.
- Provide the right temperature: These plants thrive in average room temperatures between 65-80°F (18-27°C). Protect them from drafts and extreme temperature changes.
- Water appropriately: Keep the soil evenly moist, but not soggy. Water thoroughly when the top inch of soil feels dry. Ensure good drainage to prevent root rot.
- Humidity: Chamaedorea plants prefer moderate to high humidity. You can increase humidity by placing a tray of water near the plant or using a humidifier.
- Fertilize occasionally: Use a balanced, water-soluble fertilizer for indoor plants during the growing season (spring and summer). Follow the package instructions for dosage and frequency.
- Repot when necessary: These plants prefer to be slightly root-bound, so repot only when the roots start to become crowded. Use a well-draining potting mix suitable for houseplants.
- Pruning: Remove any dead or yellowing leaves to maintain the plant's appearance. Pruning can be done throughout the year.
- Pest control: Inspect the plant periodically for pests like spider mites or mealybugs. If found, isolate the plant, and use appropriate pest control methods, such as insecticidal soap or neem oil.
- Propagation: Chamaedorea plants can be propagated through division. Carefully separate the root ball into smaller sections, ensuring each section has roots and leaves. Plant the divisions in separate pots, and follow regular care instructions.
By following these steps, you can successfully grow a Chamaedorea plant and enjoy its lush, tropical foliage.

Place in a window with dappled sun or a spot in the middle of a room. Or directly in a window facing west or east.

To properly water this plant, first ensure that the soil is well-draining and not waterlogged. Allow the top inch of soil to dry out before watering again. When watering, thoroughly saturate the soil until it begins to drain out the bottom of the pot. Avoid getting water on the leaves or in the crown of the plant, as this can lead to rot or disease. In drier environments or during hot weather, the plant may need to be watered more frequently. Additionally, it is important to use room-temperature water rather than cold water, as the latter can shock the plant's roots.
To fertilize your Chamaedorea plant, use a water-soluble or slow-release fertilizer with balanced NPK (nitrogen, phosphorus, and potassium) content. Mix the fertilizer according to the instructions on the packaging and apply it to the soil around the base of the plant during the growing season, which is usually from spring to fall. Be sure not to over-fertilize, as this can damage the plant's roots and cause fertilizer burn. Additionally, always water your plant before and after applying fertilizer to avoid dehydration.
Chamaedorea plant prefers soil that is well-draining, fertile, and has good moisture holding capacity. The ideal pH range of soil for this plant is between 5.5 to 6.5. It is recommended to use a mixture of organic matter, such as peat moss or compost, and a well-balanced commercial potting mix. Avoid using heavy soils that may hinder drainage and lead to waterlogging, which can cause root rot. When planting, make sure to provide a layer of gravel or rocks in the bottom of the pot to facilitate drainage, and avoid compacting the soil too tightly around the roots to ensure healthy growth. Regular fertilization is also recommended to provide necessary nutrients for the plant's growth and overall health.
There are several methods to propagate this plant. One way is through division, where the plant is carefully removed from its pot and its root structure is divided into smaller sections. Each section should have enough roots to support itself. The newly divided sections can then be planted in individual pots with fresh soil.
Another method is through stem cuttings. Using a sharp and clean pair of shears, a stem is cut just below a node, which is where leaves attach to the stem. The cutting is then placed in a container with moist soil and covered with a plastic bag to create a humid environment. The cutting should be kept in a warm and bright location, but not in direct sunlight. Roots will begin to form within a few weeks.
Lastly, this plant can also be propagated through seeds. The seeds should be removed from the fruit and washed to remove any pulp. They should then be soaked in water overnight before being planted in a container with moist soil. The container should be covered with plastic to maintain humidity and kept in a warm and bright location. It may take several weeks for the seeds to germinate.


