Plant Overview
Known as the "Ivy-leaved Cineraria" or "Wild Cineraria," this charming South African native is a master of disguise. Before its cheerful yellow flowers emerge, its lush, scalloped foliage is frequently mistaken for English Ivy or certain types of Geraniums. It is a resilient, spreading perennial that acts as a bridge between wild coastal landscapes and curated rock gardens.
🔍 How to Identify
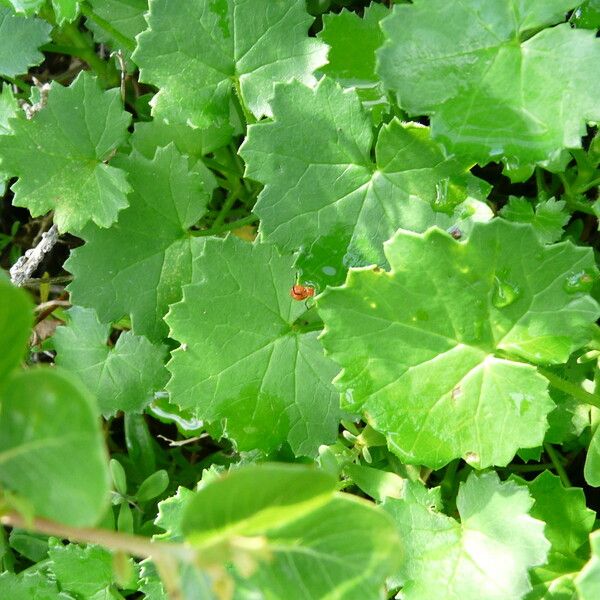
- 🍃 The Foliage: The leaves are heart or kidney-shaped with deeply lobed, "toothed" edges, bearing a striking resemblance to ivy. They are often a soft, muted green and slightly fleshy to the touch.
- 🌼 The Blooms: It produces clusters of bright, golden-yellow daisy-like flowers. Unlike the large, florist-style Cinerarias, these are dainty and numerous, standing on slender stalks above the leaves.
- 🌱 Growth Habit: It behaves as a scrambling groundcover or a low-growing mound. In the right conditions, its stems can trail over stones or walls, creating a cascading effect.
🏡 In Your Garden
- 🪨 The Rocky Life: This plant is naturally adapted to rocky slopes and coastal cliffs. In your garden, it thrives in well-draining soil and is an excellent choice for rockeries or "difficult" slopes where other plants might struggle.
- ⛅ Sun & Shade Balance: While it enjoys the sun, it prefers a bit of protection during the hottest part of the day. In high-heat regions, dappled shade will keep the leaves from looking "tired" or scorched.
- ✂️ Maintenance: It can become a bit leggy or "woody" over time. A light pruning after the flowering season helps maintain a compact, bushy shape and encourages fresh leaf growth.
⚠️ Safety & Toxicity
- 🚫 Status: Toxic if ingested.
- 🐾 Details: Like many members of the Asteraceae family, Cineraria geifolia contains pyrrolizidine alkaloids. These compounds can cause liver distress if eaten in large quantities. Keep it away from curious pets (especially dogs and cats) and young children who might be tempted by the bright flowers.
✨ Fun Fact
In its native South African habitat, this plant is considered a "pioneer." It is often one of the first species to colonize disturbed ground or rocky outcrops, paving the way for more sensitive plants by stabilizing the soil with its spreading root system!

Detailed Care Instructions
To grow Cineraria Geifolia plant, you can follow these steps:
- Choose a suitable location: Cineraria Geifolia plant prefers full sun or partial shade. Select an area with well-draining soil.
- Prepare the soil: Ensure the soil is fertile, rich in organic matter, and well-draining. Add compost or peat moss to improve soil quality if necessary.
- Sow seeds: Cineraria Geifolia can be grown from seeds. Start seeds indoors in pots or trays about 6-8 weeks before the last frost date. Scatter the seeds over the soil, press them gently, and cover them lightly with a thin layer of soil. Water the soil lightly.
- Maintain temperature and moisture: Keep the soil consistently moist but not waterlogged. Maintain a temperature of around 70°F (21°C) during germination.
- Thin seedlings: Once the seedlings have grown a few inches tall, thin them out to provide adequate space for growth. Space the seedlings around 8-12 inches apart.
- Transplanting: After the danger of frost has passed, you can transplant the seedlings to their permanent outdoor locations. Ensure the soil is prepared and amend with compost or organic matter if needed. Dig a hole slightly larger than the root ball of the seedling, place it in the hole, and fill it in with soil. Water the plant thoroughly after transplanting.
- Watering and fertilizing: Cineraria Geifolia prefers regular watering. Keep the soil moist but not waterlogged. Apply a balanced fertilizer every 4-6 weeks during the growing season to promote healthy growth and blooming.
- Pruning: Regularly pinch back the plant to promote bushier growth. This can also prevent it from becoming leggy and promote better flowering.
- Pest and disease control: Monitor the plant for pests such as aphids, spider mites, and whiteflies. Treat any infestations promptly. Provide good airflow around the plant to prevent diseases like powdery mildew.
- Enjoy the blooms: Cineraria Geifolia plant produces beautiful, daisy-like flowers. Enjoy their vibrant colors and upkeep the plant by providing adequate care throughout the growing season.
Remember to check specific care instructions for the variety of Cineraria Geifolia you have, as there may be slight differences in preferred conditions and care requirements.

To properly water this plant, it is important to observe the soil moisture level. Check the soil with your finger or a moisture meter to ensure it is slightly moist but not waterlogged. Water the plant thoroughly until the excess water drains from the bottom of the pot. Allow the soil to dry out slightly before watering again. It is important to avoid getting water on the leaves, as this can lead to fungal issues. Consider using a watering can with a narrow spout or a drip irrigation system to target the soil directly. In addition, this plant prefers moist but well-draining soil, so ensure that the pot has proper drainage holes and the soil is not compacted.
To fertilize the Cineraria Geifolia plant, first ensure that the soil is moist. Try to use a nitrogen-rich fertilizer, such as one that contains ammonium sulfate or ammonium nitrate. Dilute the fertilizer with water according to the manufacturer's instructions, and apply it to the soil around the base of the plant. Take care not to let fertilizer come into contact with the leaves or stems of the plant, as this may damage it. Depending on the potency of the fertilizer, you may need to reapply it every few weeks. Always read and follow all instructions and safety precautions outlined on the fertilizer label.
When growing the particular plant species known as Cineraria Geifolia, it's recommended to use a well-draining soil that is rich in organic matter. A mixture of peat moss, perlite, and vermiculite is a great option to ensure adequate drainage. The soil pH should be slightly acidic, ideally around 6.0-6.5. It's important to avoid any heavy or clay soils, as they can lead to waterlogged roots and ultimately harm the plant. Additionally, adding compost or other fertilizers can promote healthy growth and flowering.
To propagate this plant, take stem cuttings from a mature and healthy specimen. Use sharp and sterilized pruning shears to cut a 3-4 inch long stem and remove any lower leaves from the stem. Dip the cut end in a rooting hormone powder and insert it into a pot filled with a well-draining and soilless mix. Water the cutting and cover the pot with a plastic bag or dome to retain humidity. Place the pot in a bright and warm location, but away from direct sunlight. Keep the soil moist but not waterlogged and mist the cutting regularly to prevent it from drying out. In a few weeks, the cutting should root and develop new growth. After the roots have established, transplant the young plant into a larger pot or in the garden.


