Plant Overview
Known as the "Large-flowered Clusia" or a regal cousin of the "Autograph Tree," this tropical beauty is the crown jewel of its genus. With architectural foliage and massive, porcelain-like blooms, it looks more like a living sculpture than a typical houseplant. In its native South American rainforests, it often begins life as an epiphyte, gracefully reaching its roots down from the canopy to the forest floor.
🔍 How to Identify
- 🍃 Leathery Leaves: Large, deep-green, paddle-shaped leaves that feel remarkably thick, waxy, and rubbery to the touch.
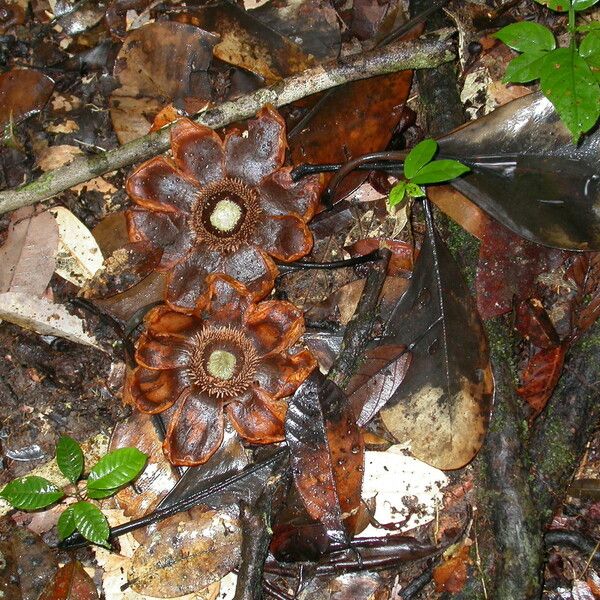
- 🌸 Spectacular Blooms: It produces some of the largest flowers in the family—showy, white-and-pink blossoms that look like they were carved from wax.
- 🪵 Aerial Roots: As the plant matures, it often develops dramatic woody roots that grow downward from the branches, searching for soil.
🏡 In Your Garden
- 💧 Waxy Resilience: Those thick, succulent-like leaves are built to store water, meaning the Clusia is far more drought-tolerant than other tropical broadleaf plants.
- ☀️ Light for Blooms: While it is loved as a foliage plant in lower light, it requires very bright, indirect sunlight to gather enough energy to produce its famous "grand" flowers.
- 🪴 Contained Growth: In the wild, it can become a massive tree, but it adapts beautifully to life in a pot. Container gardening naturally stunts its size, making it a manageable and striking indoor accent.
⚠️ Safety & Toxicity
- 🐾 Toxic to Pets: The plant contains a milky sap (latex) that can cause digestive upset, drooling, or vomiting if chewed on by cats or dogs.
- 🖐️ Skin Irritant: The sap can be a skin irritant for humans. It is best to wear gloves when pruning or taking cuttings to avoid a sticky, itchy rash.
✨ Fun Fact
✍️ Nature’s Notepad: The leaves are so durable that you can scratch a message into the surface with a blunt tool, and the "scar" will remain visible and crisp for the entire life of the leaf—which can be several years!

Detailed Care Instructions
To grow Clusia grandiflora plants, also known as pitch apple or autograph tree, follow these steps:
- Choose the right location: Clusia grandiflora prefers full sun to partial shade, so find a spot in your garden or yard where it will receive 6-8 hours of sunlight per day. The plant can tolerate a wide range of soil types, but well-draining soil is recommended.
- Prepare the soil: Before planting, prepare the soil by loosening it and removing any weeds or debris. You can also amend the soil with organic matter, such as compost, to improve its fertility and drainage.
- Planting: Dig a hole that is slightly larger than the root ball of your Clusia grandiflora plant. Place the plant in the hole, making sure that it sits at the same level it was planted in its container. Fill the hole with soil and gently firm it around the base of the plant.
- Watering: Water the plant thoroughly after planting to help settle the soil and eliminate any air pockets around the roots. Clusia grandiflora plants have moderate water needs, so water regularly but avoid overwatering, as it can lead to root rot. Allow the top few inches of soil to dry out between waterings.
- Fertilization: Apply a balanced, slow-release fertilizer to the soil around the base of the plant in spring and summer. Follow the instructions on the fertilizer label for the appropriate amount to use. This will provide the necessary nutrients for healthy growth.
- Pruning: Clusia grandiflora plants usually require minimal pruning. However, if necessary, you can trim back any dead, damaged, or overgrown branches to maintain the desired shape and size. Pruning is best done in spring or early summer.
- Mulching: Apply a layer of organic mulch, such as wood chips or straw, around the base of the plant. This helps to retain moisture, suppress weeds, and regulate soil temperature. Leave a gap around the trunk to prevent moisture buildup and potential rot.
- Protection from extreme cold: Clusia grandiflora plants are generally hardy in USDA zones 10-11. If you live in a colder region, consider growing the plant in containers that can be moved indoors during winter or provide protection, such as covering with blankets or mulch, during frosty periods.
- Regular care: Monitor the plant for any signs of pests or diseases and take appropriate action if necessary. Also, remove any fallen leaves or debris from the plant to maintain cleanliness and prevent the buildup of fungal diseases.
By following these steps, you can successfully grow Clusia grandiflora plants and enjoy their beautiful glossy leaves and unique flowers.
- Check the soil moisture: Before watering the plant, check the soil moisture level by inserting your finger about 1 inch deep into the soil. If it feels dry, then water the plant.
- Watering frequency: Water the plant once a week during the growing season (spring and summer). Reduce the frequency during the dormant season (fall and winter) to once every 2-3 weeks.
- Watering method: Use a watering can or hose with a gentle spray nozzle to water the plant. Avoid overwatering as it can lead to root rot.
- Amount of water: Water the plant until water comes out of the drainage holes. Do not allow the plant to sit in standing water as it can also cause root rot.
- Soil type: The plant prefers well-draining soil. If the soil is heavy and clayey, mix it with organic matter to improve drainage.
- Location: Place the plant in a location where it can receive bright, indirect sunlight. Do not expose it to direct sunlight as it can damage the leaves.
- Humidity: The plant prefers high humidity. If your home is dry, mist the leaves occasionally or place a humidifier nearby.
- Fertilizer: Fertilize the plant once a month with a balanced fertilizer during the growing season. Do not fertilize during the dormant season.
- Pruning: Prune the plant to control its size and shape. Remove any dead, damaged, or yellowing leaves.
To fertilize this plant, use a balanced fertilizer with equal amounts of nitrogen, phosphorus, and potassium. Apply the fertilizer every three to four weeks during the growing season, which is typically from spring to summer. Water the plant thoroughly before applying the fertilizer. Apply the fertilizer around the perimeter of the plant, avoiding the base and any foliage. Do not over-fertilize as this can cause damage to the plant.
The soil that is best suited for this particular plant should be well-draining and should contain a good amount of organic matter. It should not be compacted or clayey, as this can lead to waterlogging and root rot. A pH level that ranges from slightly acidic to slightly alkaline is ideal. A mix of peat moss, perlite, and sand can work well for growing this plant. It is also important to ensure that the soil is well-aerated to promote healthy root growth.
To propagate this species of plant, you will need to take stem cuttings from a healthy and mature plant. The best time to take cuttings is during the active growth period, which is usually in the spring and summer months.
Using clean and sharp shears, cut a stem of about 6 to 8 inches in length. Remove any leaves from the bottom half of the stem, leaving only a few at the top. Dip the cut end in rooting hormone to promote root growth.
Fill a small container with a well-draining potting mix and make a hole in the center. Insert the cutting into the hole, making sure that the bottom half is covered by the soil. Water the soil gently, making sure not to disturb the cutting.
Cover the container with a plastic bag or wrap to create a mini greenhouse and help retain moisture. Keep the cutting in a bright, indirect light and maintain a warm, humid environment. You can mist the cutting with water once a day to help prevent it from drying out.
After a few weeks, you should start to see new growth and roots forming. Once the new plant has established a few leaves, you can remove the plastic covering and start gradually acclimating it to more sunlight and less humidity.


