Plant Overview
Often called the Prairie Tickseed or Finger Coreopsis, this resilient native of the American Midwest is a golden star of the tallgrass prairie. Its botanical name, palmata, hints at its most distinctive feature: leathery leaves that look like tiny, outstretched hands or bird feet. It is the rugged, low-maintenance cousin of the common garden Coreopsis, built to withstand baking sun and harsh winds without flopping over.
🔍 How to Identify
- 🌿 The Leaves: Deeply lobed, stiff leaves that branch out into three distinct "fingers." Unlike other Coreopsis varieties with lacy foliage, these are thick and leathery.
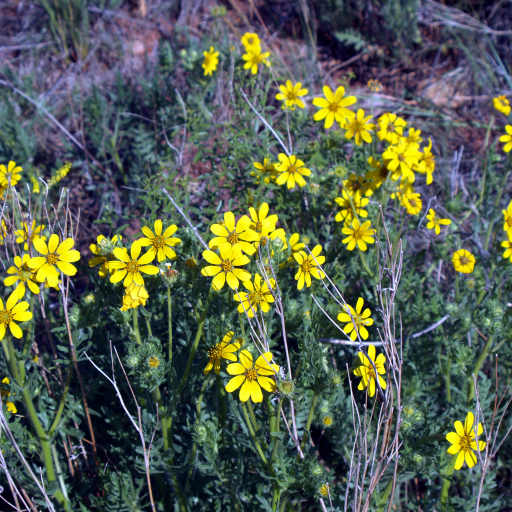
- 🌼 The Flowers: Classic daisy-like blooms with eight bright yellow petals. The tips of the petals are often notched or "pinked," as if cut with craft scissors.
- 📏 The Stature: It maintains a very rigid, upright habit. The stems are unbranched until they reach the top, creating a neat, architectural look in a wild landscape.
🏡 In Your Garden
- 🌱 Colony Maker: This plant spreads slowly via underground rhizomes. While it isn't aggressive, it will eventually form a dense, golden carpet that acts as a living mulch, suppressing weeds naturally.
- ☀️ Tough Love: It actually prefers "lean" soil. If you give it too much fertilizer or water, the plant may grow too fast and lose its signature stiffness. It is the perfect candidate for that dry, sunny corner where nothing else seems to grow.
⚠️ Safety & Toxicity
- ✅ Pet & Human Safe: Coreopsis palmata is generally considered non-toxic to dogs, cats, and horses. It is a very "family-friendly" wildflower for residential landscapes.
- 🧤 Mild Sensitivity: While safe to touch, the sap can occasionally cause minor skin irritation in people with highly sensitive skin. Wearing gloves while pruning large patches is a good practice.
✨ Fun Fact
The common name "Tickseed" comes from the appearance of its seeds, which are small, flat, and dark—looking remarkably like tiny ticks. Historically, these seeds were so convincing that some folk traditions suggested they could be used to trick birds or even repel insects from bedding!

Detailed Care Instructions
To grow Coreopsis palmata plants, follow these steps:
- Choose a suitable planting location: Coreopsis palmata prefers full sun to light shade. Select a location with well-draining soil.
- Prepare the soil: Loosen the soil in planting area and remove any weeds or rocks. Amend the soil with compost or well-rotted manure to improve fertility and drainage.
- Planting: Dig a hole that is slightly larger than the root ball of the plant. Place the plant in the hole and backfill with soil, gently firming it around the roots. Leave enough space between plants to allow for proper air circulation.
- Watering: Water the newly planted Coreopsis palmata thoroughly. After that, water regularly, keeping the soil moist but not soggy. Reduce watering once the plant establishes itself.
- Mulching: Apply a layer of organic mulch, such as wood chips or straw, around the plants to conserve moisture, suppress weed growth, and regulate soil temperature.
- Fertilization: If your soil is low in nutrients, you can feed the plants with a balanced slow-release fertilizer in early spring. Follow the package instructions for proper application.
- Pruning: In late fall or early spring, trim back any dead or damaged stems. This will help rejuvenate the plant and promote healthy growth.
- Pest and disease control: Coreopsis palmata is generally resistant to pests and diseases. However, keep an eye out for common issues such as aphids or powdery mildew. Treat any problems promptly using organic or chemical interventions as needed.
- Division: Over time, the plants can become crowded. To maintain vigor, divide the clumps every 2-3 years in early spring or fall. Dig up the clump, separate it into smaller sections with healthy roots, and replant them at the desired location.
- Enjoy the blooms: Coreopsis palmata produces bright yellow flowers that attract pollinators such as bees and butterflies. Be patient, as it may take a year or two for the plant to reach its full flowering potential.
By following these steps, you can successfully grow Coreopsis palmata plants and enjoy their beautiful blooms in your garden.

Place in a bright room that is sun drenched almost all day. Or directly in a south-facing window.

To water this plant, ensure the soil is dry to the touch before watering. Use a watering can or hose to saturate the soil evenly, ensuring the water reaches the roots of the plant. Avoid getting water on the foliage as this can lead to disease. Water deeply, but do not allow the soil to become waterlogged as this can cause root rot. Water more frequently during hot, dry weather, and less frequently during cooler, wet weather. Be sure to provide adequate drainage to prevent standing water around the roots.
To fertilize this plant, choose a balanced, slow-release fertilizer containing equal parts nitrogen, phosphorous, and potassium. Apply the fertilizer in the early spring, just as the new growth begins to appear. Use a light hand when applying the fertilizer, and water thoroughly after application to help the plants absorb the nutrients. Avoid over-fertilizing, as this can lead to weak growth and reduced flower production.
The optimal soil for the Coreopsis Palmata plant is well-draining and loamy, with a neutral to slightly alkaline pH level. Organic matter such as compost or aged manure can be added to enrich the soil and improve drainage. The plant prefers a sunny location and thrives in hot, dry conditions. It is important not to over-water the Coreopsis Palmata as it can lead to root rot.
To propagate this plant, start by taking stem cuttings from healthy and mature plants. The ideal time to take cuttings is during the growing season when the plant is actively growing. Cuttings should be taken early in the morning before the sun becomes too hot. Cut a stem that is at least 4-6 inches long using a sharp pair of scissors or pruning shears.
Remove the leaves from the lower half of the stem, leaving only a few leaves on the tip. Dip the cut end of the stem into rooting hormone powder or gel. This will help to encourage root growth.
Fill a planting container with a well-draining potting mix and make a small hole in the center. Insert the cutting into the hole and press the soil down firmly around the stem. Water the newly planted cutting thoroughly and place it in a bright, but shaded area, protected from direct sunlight.
Keep the soil consistently moist and maintain a warm and humid environment by covering the container with plastic or a clear plastic bag. Remove the bag for a few hours each day to allow some air circulation.
After a few weeks, check if the cutting has rooted by gently pulling the stem. If resistance is felt, the cutting has developed roots and can be transplanted into its permanent location. Keep in mind that it may take several months for the plant to develop strong roots and establish itself in its new environment.


