Plant Overview
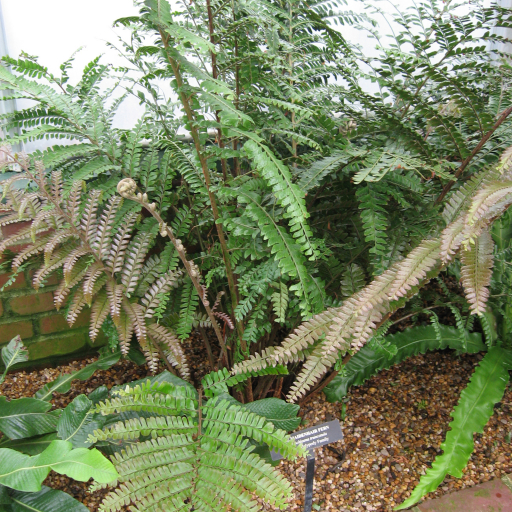
Known as the Mahogany Fern or the Jewel of the Jungle, this stunning plant looks like it stepped straight out of a prehistoric landscape. Unlike its delicate, feathery cousins, this fern features thick, leathery fronds that boast a rich, metallic bronze hue when young, eventually maturing into a deep, glossy emerald. It is a favorite for indoor collectors who want a fern that feels substantial and ancient rather than fragile.
🔍 How to Identify
- 🌿 "Truncated" Leaflets: The plant gets its name from its leaflets, which are roughly rectangular or square-edged, appearing as if someone neatly trimmed the tips with a pair of scissors.
- 🪵 Mahogany Stems: The central stalks (stipes) are a dark, woody brown and covered in fine, shaggy scales that give the plant a rugged, textured appearance.
- 💎 Glossy Texture: The foliage is surprisingly stiff and waxy to the touch, reflecting light in a way that makes the plant look almost polished.
🏡 In Your Garden
- 💧 The Humidity Trap: Because it hails from the humid floors of tropical rainforests, it craves moisture in the air. If your home is dry, the "truncated" edges will quickly turn brittle and brown; it performs best in a bathroom or near a dedicated humidifier.
- 🪴 Central Growth: Unlike many ferns that spread via aggressive underground runners, the Mahogany Fern grows from a central crown. It prefers to stay slightly snug in its pot, as its root system is sensitive to being drowned in oversized, soggy containers.
⚠️ Safety & Toxicity
- 🐾 Pet Friendly: This fern is generally considered non-toxic to cats and dogs, making it a safe, stylish choice for pet-filled households.
- 👶 Human Safety: There are no known toxins for humans. However, as with many ferns, the spores on the underside of mature leaves can occasionally cause mild irritation to those with sensitive respiratory systems if the plant is shaken or handled excessively.
✨ Fun Fact
The Mahogany Fern is a "living fossil." It belongs to a monotypic genus, meaning it is the only species of its kind, and its ancestors have remained largely unchanged for millions of years, dating back to the era of the dinosaurs.

Detailed Care Instructions
| Humidity | High |
| Lighting | Shade |
| Difficulty | Hard |
| Temperature | 15°C - 23°C |
| Hardiness Zones | 9A - 11B |
To grow Didymochlaena truncatula plants, follow these steps:
- Obtain seeds or young plants from a nursery or online supplier.
- Choose a location that provides optimal growing conditions. Didymochlaena truncatula prefers shade or partial shade, with indirect sunlight. It also requires high humidity levels.
- Prepare the planting site by enriching the soil with organic matter such as compost or well-rotted manure, as this fern prefers moist, well-draining soil.
- Plant the seeds or young plants in the prepared soil, making sure they are placed at the same depth as they were growing in their containers. Space plants about 12-18 inches apart if planting more than one.
- Water the newly planted ferns thoroughly, keeping the soil evenly moist but not waterlogged. Mist the plants regularly with water to increase humidity.
- Mulch around the base of the plants with a layer of organic mulch, such as straw or wood chips, to help retain moisture and suppress weeds.
- Monitor the plants for any signs of pests or diseases, such as leaf spots or aphids, and treat as necessary.
- Provide regular fertilization during the growing season using a balanced, slow-release fertilizer or a liquid fertilizer diluted to half strength. Follow the instructions on the fertilizer packaging for application rates.
- Trim off any damaged or dead fronds to maintain the plant's appearance and health.
- Continue to water and maintain high humidity throughout the growing season.
By following these steps, you should be able to successfully grow Didymochlaena truncatula plants.

Place in a dark room with little light, like a dark bedroom or a spot far away from a window or directly in a north-facing window.

Didymochlaena Truncatula plant should be watered thoroughly but infrequently, allowing the soil to dry out slightly between watering. It is important to avoid overwatering, as this can lead to root rot. The plant prefers slightly moist, well-draining soil. When watering, pour water directly onto the soil, avoiding getting the foliage wet. It is recommended to water in the morning or evening when the temperature is cooler to reduce the risk of evaporation. The amount and frequency of watering will depend on the climate, humidity, and soil type. It is important to monitor the plant's soil moisture levels and adjust watering accordingly.
To fertilize this plant, use a balanced, water-soluble fertilizer and dilute it to half strength. Apply the fertilizer every two weeks during the growing season, which typically spans spring and summer. Do not fertilize during the fall and winter months, as the plant is dormant during this time. Water the plant thoroughly before and after applying the fertilizer to prevent burning the roots.
The ideal soil for Didymochlaena Truncatula plant should be well-draining and rich in organic matter. It should have a slightly acidic to neutral pH (6.0 to 7.0). The soil also needs to be moist, but not waterlogged, as the plant requires consistent moisture to thrive. A mix of peat moss, perlite, and vermiculite can provide the right drainage and moisture retention for the plant. Alternatively, a mix of topsoil, compost, and sand can also work well. It is important to use soil that is free from pests and diseases to prevent any issues from spreading to the plant.
To propagate this particular plant, you will need to start by taking a cutting from a mature specimen. The cutting should be approximately 5-7 inches long, and it should have at least two leaves attached to it.
Next, you will need to prepare a potting mix for the cutting. Use a mix of equal parts sand, perlite, and peat moss. This will provide the cutting with the drainage and moisture retention it needs to establish roots.
Take the cutting and dip the end of the stem into rooting hormone. This will help to stimulate the growth of new roots. Place the cutting into the potting mix, burying it deep enough that the bottom set of leaves is just above the surface of the soil.
Water the cutting thoroughly and place it in a location that receives bright, indirect sunlight. Keep the soil moist, but not overly wet, as you do not want to cause the cutting to rot. Within a few weeks, you should start to see new growth emerging from the top of the cutting, indicating that roots have established and the plant is successfully propagating.
Common pests of the mahogany fern include Mealybugs, spider mites, aphids. Make a habit of checking your mahogany fern frequently for pests so that any infestations can be caught and managed early.


