Plant Overview
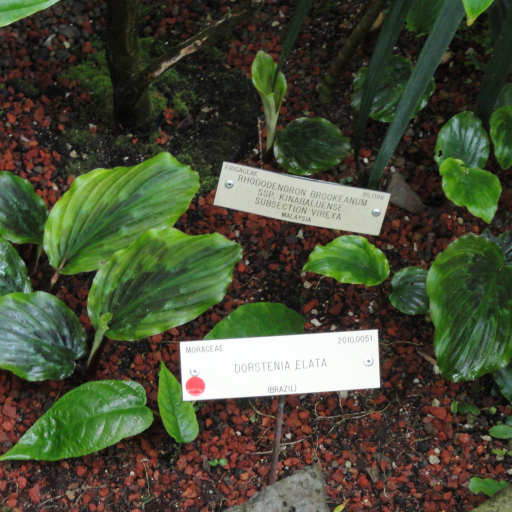
Meet the "Fried Egg Plant," a botanical oddity hailing from the lush, shaded undergrowth of the Brazilian rainforests. While it may look like something from a science fiction film, Dorstenia elata is a charming perennial beloved for its architectural foliage and truly bizarre reproductive strategy. It is a member of the Moraceae (Mulberry) family, though its unique "flowers" look nothing like a typical berry or blossom.
🔍 How to Identify
- 🍃 Lush Foliage: The leaves are large, vibrant green, and elongated with deeply set veins, giving the plant a prehistoric, tropical texture.
- 🍳 The "Fried Egg": Instead of traditional petals, it produces a flat, shield-shaped green disc called a hypanthodium. This platform holds the tiny, almost invisible true flowers.
- 📏 Growth Habit: It typically grows in an upright, clump-forming fashion, reaching about 12 to 18 inches in height, making it an ideal size for indoor collections.
🏡 In Your Garden
- ☁️ Humidity Lover: Because it originated in the humid tropics, this plant craves moisture in the air. It is a fantastic candidate for a bathroom with a window or a dedicated plant room with a humidifier.
- 🚀 Ballistic Seeding: Be prepared for surprises! When its seeds are ripe, the plant uses hydrostatic pressure to literally "shoot" them out. You may find baby Dorstenias popping up in neighboring pots several feet away.
- ⛅ Understory dweller: In the wild, it lives beneath tall tree canopies. In your home, it prefers bright, filtered light. Direct afternoon sun will quickly scorch its tender, glossy leaves.
⚠️ Safety & Toxicity
- 🧪 Irritating Sap: Like many plants in the Fig family, Dorstenia elata contains a milky white latex sap. This can cause mild skin irritation or dermatitis if it gets on your hands during pruning.
- 🐾 Keep Away from Pets: While not considered "deadly," the sap can cause oral irritation and digestive upset if chewed on by curious cats or dogs. It is best kept on a high shelf or in a protected terrarium.
✨ Fun Fact
The Dorstenia genus is named after the German botanist Theodor Dorsten. Its seed-dispersal method is so effective that in some tropical greenhouses, it is considered a "friendly weed" because it travels so easily from pot to pot without any human help!

Detailed Care Instructions
| Lighting | Part Sun |
| Hardiness Zones | 9B - 11 |
To grow Dorstenia elata, also known as the "Peanut Cactus" or "Elkhorn," follow these steps:
- Obtain a Dorstenia elata plant: Look for a nursery or reputable online seller to obtain a healthy plant. Alternatively, you can propagate one from a mature Dorstenia elata plant.
- Select a suitable pot: Choose a well-draining pot with drainage holes. The pot should be large enough to accommodate the plant's roots.
- Prepare the potting mix: Create a well-draining mix by combining equal parts of perlite, cactus soil, and pumice or sand. This mixture helps prevent the roots from sitting in water.
- Plant the Dorstenia elata: Gently place the plant in the prepared potting mix, ensuring the roots are adequately covered. Pat down the soil to secure the plant and remove any air pockets.
- Provide the right environment: Position the pot in an area that receives bright indirect sunlight or partial shade. Dorstenia elata prefers temperatures between 60-80°F (15-27°C).
- Watering: Water the plant when the top inch of the soil feels dry. Be careful not to overwater, as Dorstenia elata is susceptible to root rot. Allow the excess water to drain out of the pot.
- Humidity: Dorstenia elata prefers moderately high humidity. You can increase humidity by placing a tray filled with water near the plant or mist the leaves regularly, especially during drier seasons.
- Fertilizing: Feed the plant with a balanced, diluted liquid fertilizer once a month during the spring and summer growing season. Reduce or stop fertilizing during the fall and winter months.
- Pruning: Prune any dead or overgrown parts of the plant to encourage new growth and maintain its shape.
- Propagation: To propagate Dorstenia elata, carefully remove offsets (baby plants) that form around the base of the mother plant and plant them in separate containers using the same potting mix.
With proper care, your Dorstenia elata should thrive and grow into a beautiful and unique succulent plant.

Place in a window with dappled sun or a spot in the middle of a room. Or directly in a window facing west or east.

To water this plant, you should first check the soil's moisture level before watering. You can do this by sticking your finger into the soil to see if it feels dry or moist. If the soil is dry, you can water the plant thoroughly, being sure to saturate the soil completely. However, if the soil is still moist, you may want to wait a few days before watering again to avoid over-watering the plant. Additionally, you should only water the plant when the top layer of soil has completely dried out. Finally, it is important to ensure that the plant's pot has good drainage to avoid waterlogging the roots.
To fertilize the Dorstenia Elata plant, mix a balanced, water-soluble fertilizer and apply it to the soil once a month during the growing season. Avoid over-fertilizing, as it may cause damage to the plant. Additionally, make sure the soil is well-draining and moist before applying fertilizer, and always follow the manufacturer's instructions for application rates.
Dorstenia elata requires well-drained soil that is rich in organic matter. The soil should be acidic to neutral with a pH level ranging from 5.5 to 7.5. A mix of peat moss, perlite, and vermiculite may be suitable for this plant as it provides excellent drainage while retaining enough moisture. Alternatively, a sandy loam soil with good drainage can also be used. It is crucial to avoid overwatering this plant as it can easily rot in wet and soggy soil. A well-draining pot with drainage holes should be used, and the excess water drained out after watering. Additionally, regular fertilization can improve the soil quality and promote healthy growth of the plant.
To propagate this plant, first select a healthy stem or leaf cutting. Make sure the cutting is at least 4 inches long and has a few leaves.
Next, prepare a pot with well-draining soil and water the soil until it is evenly moist.
Remove the lower leaves from the cutting and dip the end of the stem or leaf in rooting hormone.
Make a hole in the soil with your finger or a pencil and insert the cutting, making sure it is firmly in place.
Finally, cover the pot with a clear plastic bag or place it in a humidity dome to create a moist environment for the cutting to root.
Place the pot in a bright spot, but away from direct sunlight. Check on the cutting every few days and mist it with water if the soil feels dry.
After several weeks, the cutting should start to grow new leaves, indicating that it has successfully rooted. At this point, you can remove the plastic bag or humidity dome and begin caring for the plant as usual.
Common pests of the mattress button plant include Mealybugs, aphids. Make a habit of checking your mattress button plant frequently for pests so that any infestations can be caught and managed early.


