Plant Overview
Often called the Lace Flower Vine, this delicate beauty looks like it was plucked straight from a Victorian embroidery kit. Originating from the humid forests of Mexico and Central America, it is a prized gem for indoor gardeners who love "miniature" tropicals. Its most striking feature is its ornate, fringed white flowers that seem almost too intricate to be real.
🔍 How to Identify
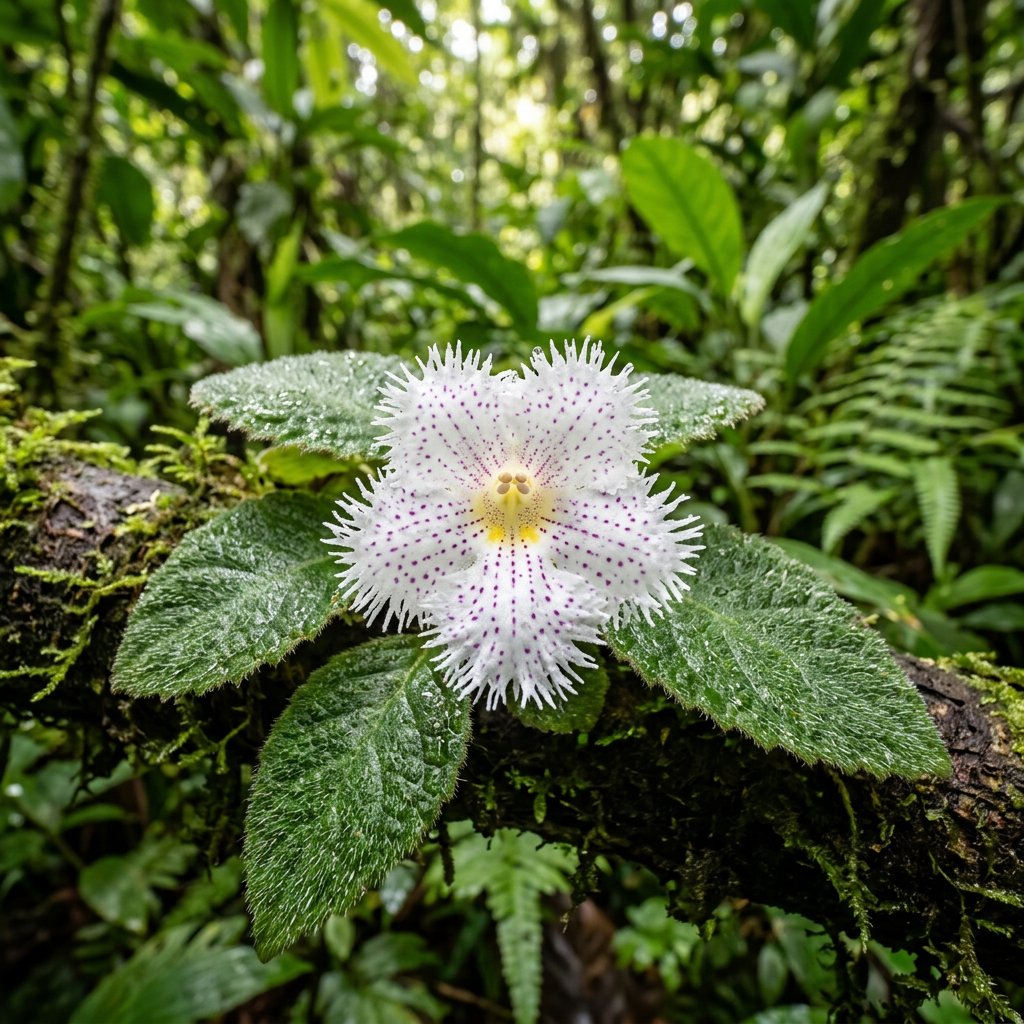
- 🌸 The "Lace" Blooms: Pure white, tubular flowers that flare out into five deeply fringed or "fimbriated" petals, resembling delicate lace or miniature carnations.
- 🍃 Velvety Foliage: Small, oval, dark green leaves with a soft, fuzzy texture and slightly scalloped edges that grow in neat rosettes.
- 🧶 Trailing Stolons: The plant sends out thin, reddish runners (stolons) similar to a strawberry plant, allowing it to "creep" across soil or hang elegantly from a pot.
🏡 In Your Garden
- 💧 The Humidity Factor: Unlike some of its hardier cousins, the Lace Flower Vine craves high humidity. If the air is too dry, the leaf edges will brown and crisp; it is a perfect candidate for a bright bathroom or a terrarium.
- 🧺 Hanging Habit: Because it spreads via runners, it is best displayed in a hanging basket where it can form a lush "curtain" of green. It dislikes being moved frequently, as its stems can be somewhat brittle.
- ☀️ Light Nuance: It prefers bright, filtered light. Direct afternoon sun will scorch its velvet leaves, while too much shade will prevent those iconic lacy flowers from blooming.
⚠️ Safety & Toxicity
- 🐾 Pet Friendly: Good news for furry friends! Episcia dianthiflora is generally considered non-toxic to cats, dogs, and horses.
- 👶 Safe for Kids: This plant lacks thorns, prickles, or irritating saps, making it a "worry-free" addition to a household with curious children.
✨ Fun Fact
The specific epithet dianthiflora literally translates to "flowers like a Dianthus." It was named this because its fringed petals perfectly mimic the "pinked" edges of carnations and garden pinks!

Detailed Care Instructions
To grow Episcia dianthiflora, also known as flame violet, you can follow the steps below:
- Choose a suitable planting location: Flame violets prefer bright but indirect sunlight. They can be grown indoors near a window that receives bright, filtered light. If growing outdoors, choose a spot with partial shade.
- Prepare the soil: Flame violets prefer well-draining soil that is rich in organic matter. You can use a mixture of peat moss, sand, and perlite to create a loose and well-draining soil.
- Planting: Select a small pot with drainage holes to prevent overwatering. Place a small layer of gravel or broken pottery pieces at the bottom for additional drainage. Fill the pot with the prepared soil mixture. Plant one flame violet cutting in the pot, making sure the roots are covered and the plant is held upright.
- Watering: Flame violets prefer evenly moist soil, but they don't like to sit in waterlogged soil. Water the plant when the top inch of soil feels dry to the touch. Avoid overwatering, as it can lead to root rot.
- Humidity: These plants appreciate higher humidity levels. To increase humidity, you can place a tray filled with water near the plant or use a humidifier.
- Fertilizer: Feed your flame violet with a balanced houseplant fertilizer once a month during the growing season (spring and summer). Follow the instructions on the fertilizer package for proper dilution ratios.
- Pruning: Occasionally, trim back any leggy or straggling stems to encourage a bushier growth habit. Pinch off the tips of stems to promote branching.
- Propagation: Flame violets can be easily propagated by stem cuttings. Simply take a cutting with several nodes and place it in a small pot with moist, well-draining soil. Keep the soil consistently moist and provide bright, indirect light until roots develop.
- Disease and pest control: Keep an eye out for common houseplant pests such as aphids, spider mites, and mealybugs. If you notice any signs of infestation, treat the plant with a suitable organic insecticide or insecticidal soap.
By following these steps, you should be able to successfully grow and care for your Episcia dianthiflora plant.
To water this plant, thoroughly soak the soil until water runs out of the drainage holes at the bottom of the pot. Allow the soil to dry out slightly before watering again, usually every 1-2 weeks depending on the temperature and humidity of its environment. Avoid letting the soil completely dry out or stay constantly wet, as both can harm the plant. Use room temperature water and avoid getting water on the leaves, as this can cause leaf spotting or fungal diseases. Overall, monitor the soil moisture and adjust the watering schedule as needed for optimal growth.
To properly fertilize this plant, use a balanced fertilizer with equal parts nitrogen, phosphorus, and potassium. Apply the fertilizer every two weeks during spring and summer, and reduce the frequency to once a month during fall and winter. Dilute the fertilizer to half its recommended strength and apply it to the soil around the plant, ensuring it does not get on the foliage. Avoid over-fertilizing, as it can cause burning and damage to the plant.
The ideal soil to use with this plant should be well-draining and rich in organic matter. It should have a slightly acidic to neutral pH level of around 6.0 to 7.0. A balanced mix of peat moss, perlite, and vermiculite can be a good option. Additionally, adding some compost or aged manure can further improve the soil fertility and water-holding capacity. The soil should also provide good aeration to the roots and prevent waterlogging, as the plant does not tolerate soggy conditions.
To propagate this plant, you will need to first take cuttings from the stems of a mature plant. These cuttings should be approximately 4-6 inches long and should have at least two or three leaves on them. Using a clean, sharp knife or scissors, make a clean cut just below a node on the stem.
Next, remove the leaves from the bottom half of the cutting, leaving only a few leaves at the top. Dip the cut end of the stem into rooting hormone powder and shake off any excess.
Prepare a pot with well-draining soil mix and make a hole in the soil. Insert the treated cutting into the hole, making sure it is snugly pressed into place. Water the cutting lightly and cover it with a plastic bag to create a humid environment. Place the pot in a bright, warm location, out of direct sunlight.
Check the cutting after a few weeks to see if it has developed roots. You can gently tug on the stem to check if it is anchored in the soil. Once the cutting has developed a root system, you can remove the plastic bag and treat it like a mature plant.


