Plant Overview
Often called the Long-beaked Stork's-bill, this Mediterranean native is a master of biological engineering. While its delicate lilac flowers look like classic wild geraniums, it is best known for its incredible fruit—a long, needle-like beak that resembles the head of a wading bird. It is a resilient "pioneer" species, often being the first to colonize dry, sandy patches where other plants struggle.
🔍 How to Identify
- 🌿 Fern-like Foliage: The leaves are deeply lobed and feathery, often forming a lush, green rosette that hugs the ground before the flowering stems shoot upward.
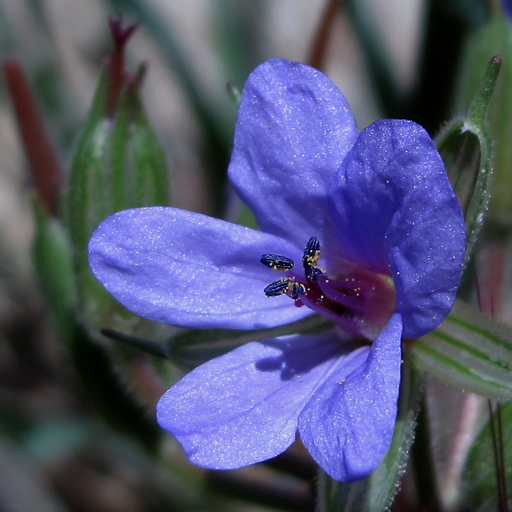
- 🌸 Five-Petal Flowers: Small, dainty blossoms in shades of lilac or soft blue-violet, often featuring fine, darker veins that act as "nectar guides" for pollinators.
- 📍 The "Beak": The most striking feature is the seed pod, which can grow up to 10cm long, looking like a green needle pointing toward the sky.
🏡 In Your Garden
- 🏜️ Drought Specialist: Because it originates from dry, sunny regions, it thrives in well-draining, sandy, or rocky soils. It’s a great choice for rock gardens or "wild" corners where the soil is poor.
- ☀️ Full Sun Lover: This plant requires plenty of direct light to produce its signature long beaks. It has a deep taproot, which means it hates being moved once it has settled into its home.
⚠️ Safety & Toxicity
- ✅ Safe Status: Erodium ciconium is generally considered non-toxic to humans and common household pets like cats and dogs.
- 🐾 Physical Irritant: While not chemically toxic, the long, sharp "beaks" can become very stiff and dry. These can occasionally get tangled in long-haired pet fur or cause minor irritation if stepped on with bare feet.
✨ Fun Fact
The seeds of the Stork's-bill are "self-planting." When the seed pod dries, it coils into a tight spring. When it hits the ground and gets damp from dew or rain, the coil unwinds with enough force to literally drill the seed into the soil!

Detailed Care Instructions
To grow Erodium ciconium, also known as musk stork's bill or heron's bill, follow these steps:
- Climate and soil requirements: Erodium ciconium prefers a Mediterranean climate, with mild winters and hot, dry summers. It thrives in well-draining soil that is slightly alkaline.
- Seed germination: Start by collecting seeds from existing plants, as this plant tends to self-seed. Alternatively, purchase seeds from a reputable supplier. Soak the seeds in water for a few hours before planting to increase germination rates.
- Planting: Choose a location that receives full sun or partial shade. Prepare the soil by removing any weeds or rocks and loosening it to a depth of about 8 inches. Sow the seeds directly into the soil, covering them with a thin layer of soil or vermiculite. Space the seeds about 6-8 inches apart.
- Watering: Water the seeds gently immediately after planting to settle the soil. Then, water the seeds regularly to keep the soil moist but not waterlogged. Once the plants have established, water sparingly as Erodium ciconium is drought-tolerant.
- Fertilizing: Erodium ciconium generally does not require much fertilization. However, you can apply a balanced, slow-release fertilizer in spring or organic compost to improve soil fertility if desired.
- Maintenance: Remove any weeds that may compete with Erodium ciconium for nutrients and water. Once the plants start to grow, thin them out if needed to provide adequate space for each plant to develop fully.
- Pruning: Erodium ciconium does not require significant pruning. However, if you wish to shape the plant or encourage more bushy growth, you can lightly prune the tips of the stems.
- Propagation: Erodium ciconium can be propagated by dividing the plant, taking stem cuttings, or collecting and sowing seeds. Division and stem cuttings should be done in spring, while collecting and sowing seeds can be done once the seed capsules are fully developed and dry.
Remember to check for any specific guidelines or recommendations from local nurseries or gardening experts, as different climates and conditions may require slight adjustments to these general steps.

Place in a bright room that is sun drenched almost all day. Or directly in a south-facing window.

To properly care for this plant, it is important to understand its watering needs. It is recommended to water this plant deeply and infrequently, allowing the soil to dry out slightly between watering sessions. Overwatering can lead to root rot and other problems, so it is important to monitor the soil moisture level. It is also important to avoid getting water on the leaves and stems, as this can lead to fungal growth and other issues. Instead, it is best to water the soil directly at the base of the plant. The watering schedule may need to be adjusted based on the climate and growing conditions, but in general, err on the side of under-watering rather than over-watering.
To fertilize this plant, mix a balanced, slow-release fertilizer into the soil around the base of the plant. Be careful not to over-fertilize, as this can cause damage to the roots. Water the plant thoroughly after fertilizing. Repeat this process every 4-6 weeks during the growing season.
When planting Erodium Ciconium, it is important to use a soil that is well-draining and slightly acidic. The soil should be composed of a mix of organic matter, such as leaf mold or compost, and sand or other gritty material to improve drainage. It is also recommended to add a slow-release fertilizer to the soil to provide the plant with necessary nutrients throughout the growing season. The pH level of the soil should be between 5.5 and 7.0, as this is the range in which Erodium Ciconium thrives best. Overall, a light, well-draining soil with a slightly acidic pH level will provide the best growing conditions for this plant.
To propagate the plant, first collect healthy stem cuttings from a mature plant. Using a clean, sharp pair of pruning shears, cut a section of stem approximately six inches long. Remove any leaves from the bottom half of the cutting, leaving only a few near the top. Dip the cut end of the stem into rooting hormone powder to encourage root growth.
Next, prepare a pot with well-draining soil. Moisten the soil with water and make a small hole in the center. Place the cutting into the hole and gently pat the soil around it to secure the stem. Cover the pot with a clear plastic bag to create a humid environment for the cutting.
Place the pot in a warm, bright location but out of direct sunlight. The cutting should begin to root within a few weeks. Once it has established roots, remove the plastic bag and gradually acclimate the new plant to more light and less humidity.
Water the plant consistently, but avoid overwatering as this can cause the roots to rot. Fertilize with a balanced, water-soluble fertilizer every four to six weeks during the growing season to encourage healthy growth.


