Plant Overview
Often called the Sharp-leaf Spurge, Euphorbia oxyphylla is a structural gem hailing from the rocky landscapes of Southern Africa. Its name literally translates to "sharp-leaved," a nod to its elegant, lance-like foliage that gives it a more delicate appearance than its prickly cactus-like cousins. It is a favorite for collectors who want a plant that balances succulent hardiness with the lush look of a leafy shrub.
🔍 How to Identify
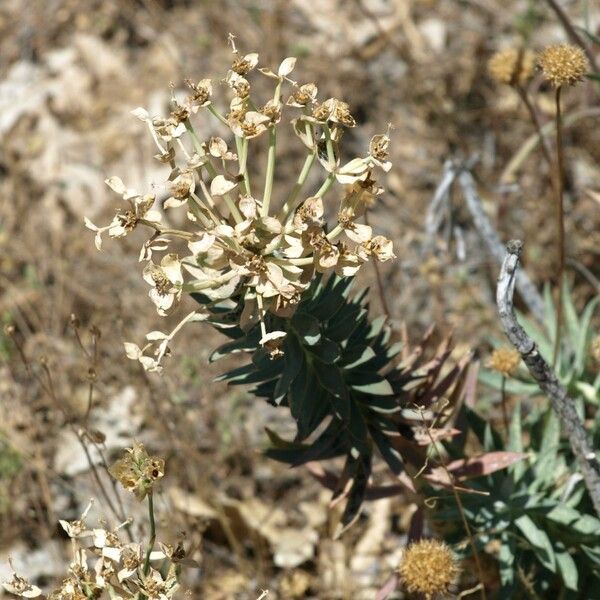
- 🍃 Pointed Foliage: Long, narrow, lance-shaped leaves that grow in a spiral pattern around the stems, tapering to a sharp-looking (but usually soft) point.
- 🌿 Succulent Stems: Beneath the greenery, the stems are thick and fleshy, acting as water reservoirs that allow the plant to survive in arid environments.
- 🌼 Yellow-Green Cyathia: It produces small, cup-like flower structures known as cyathia, which are typical of the Euphorbia family and appear in subtle, chartreuse clusters.
🏡 In Your Garden
- 🏜️ Drainage is Vital: This species is highly susceptible to root rot if left in standing water. It thrives best in a gritty, sandy potting mix that mimics its native rocky slopes.
- ☀️ Light Seeker: While it appreciates a bright spot, Euphorbia oxyphylla prefers "bright-indirect" light over scorching midday sun, which can cause the leaves to yellow or drop prematurely.
- ✂️ Minimalist Pruning: It naturally maintains a tidy, branching habit and rarely needs "shaping," making it an excellent low-maintenance choice for indoor shelves or xeriscaped gardens.
⚠️ Safety & Toxicity
- 🚫 Toxic Latex: Like almost all members of the Spurge family, this plant contains a thick, milky white sap (latex) that is highly irritating.
- 🛡️ Handle with Care: The sap can cause skin rashes (dermatitis) and is extremely dangerous if it touches the eyes. It is toxic if ingested by pets or children; always wear gloves when pruning and keep it out of reach of curious nibblers.
✨ Fun Fact
The genus Euphorbia is named after Euphorbus, the Greek physician to King Juba II of Numidia. Legend says the King named the plant after his doctor because Euphorbus used the potent sap for medicinal purposes—though today we mostly appreciate it from a safe distance!

Detailed Care Instructions
To grow Euphorbia Oxyphylla, also known as the Sierra Madre Spurge or Pincushion Euphorbia, you can follow these steps:
- Climate: Euphorbia Oxyphylla thrives in warm climates. Ensure that your area has a Mediterranean or desert-like climate with mild winters and hot summers. This plant is not frost-tolerant.
- Sunlight: Provide your Euphorbia Oxyphylla with plenty of sunlight. It prefers full sun or partial shade. Place it in a location where it will receive at least 6 hours of direct sunlight daily.
- Soil: Use well-draining soil for your Euphorbia Oxyphylla. It prefers sandy or loamy soil. Ensure the soil has good drainage to prevent waterlogging, as this can lead to root rot.
- Watering: Euphorbia Oxyphylla is drought-tolerant and should be watered sparingly. Water deeply once a week during the growing season and reduce watering during winter when the plant goes semi-dormant. Allow the soil to dry out between waterings.
- Fertilizer: Apply a balanced, slow-release fertilizer in spring. Alternatively, you can use a liquid fertilizer diluted to half-strength every 4-6 weeks during the growing season. Avoid over-fertilization, as it can lead to leggy growth.
- Pruning: Prune the plant lightly in early spring to remove any dead or damaged branches. This will promote healthy growth and maintain the plant's shape. Wear gloves when pruning, as the sap of Euphorbia Oxyphylla can be irritating to the skin and eyes.
- Propagation: Euphorbia Oxyphylla can be propagated from stem cuttings. Take cuttings in spring or early summer and allow them to callus for a few days before planting them in well-draining soil. Place the cuttings in a warm and bright location, but avoid direct sunlight until they are established.
- Pests and diseases: Euphorbia Oxyphylla is generally resistant to pests and diseases. However, keep an eye out for mealybugs, aphids, or spider mites. If you notice any infestation, use an appropriate insecticide or wash them off with a strong jet of water.
Remember, Euphorbia Oxyphylla can be toxic if ingested, so keep it out of reach of children and pets.
When watering this plant, it is important to allow the soil to dry out completely between watering sessions. Ensure that you do not overwater the plant as it can be susceptible to root rot. Water the plant thoroughly when watering, making sure that the water reaches the roots. It is recommended to water this plant once a week during the growing season and to reduce the frequency during the winter months. Use a watering can or hose with a fine spray to water this plant gently. Be careful when handling this plant as it can produce a milky sap that can irritate the skin and eyes.
To fertilize this plant, use a balanced liquid fertilizer diluted to half strength every two weeks during the active growing season. Be careful not to over-fertilize as this can lead to root burn and damage the plant. During the dormant season, reduce fertilizing to once a month. Ensure the soil is moist before fertilizing, and do not fertilize a dry plant. Observe the plant for any signs of stress or salt buildup, and adjust your fertilizing frequency accordingly.
When planting Euphorbia Oxyphylla, it is recommended to use a well-draining soil mixture that is composed of equal parts of sand, perlite, and peat moss or coco coir. It is important to ensure that the soil has good aeration to prevent waterlogging, which can cause root rot. The soil should be slightly acidic to neutral, with a pH range of 6.0 to 7.0. To improve the soil structure and nutrients, it is advisable to add compost or a slow-release fertilizer to the soil. When selecting soil, avoid using heavy clay or dense soils as they can lead to poor plant growth and development.
To propagate this plant, you will need to take stem cuttings and root them in a well-draining soil mix. First, choose a healthy stem from the mother plant that is at least 4 inches long and has several leaves attached. Using a sharp, sterilized knife, cut the stem at a 45-degree angle just below a node. Remove any leaves from the bottom third of the cutting.
Next, dip the cut end of the stem in rooting hormone powder, gently tapping off any excess. Place the cutting in a well-draining soil mix, making sure the bottom third is buried and the remaining leaves are above the soil. Water the cutting thoroughly and cover it with a clear plastic bag or dome to create a humid environment.
Place the cutting in a bright, indirect light location and maintain a consistent temperature between 65-75°F. Keep the soil moist but not soggy, making sure to avoid overwatering as this can cause the cutting to rot.
After a few weeks, the stem should start to produce roots. It's important to wait until a strong root system has developed before transplanting the new plant into a larger pot or outdoors. Once the roots have established, gradually acclimate the new plant to its new environment by removing the plastic cover for longer periods of time each day until it can grow on its own.


