Plant Overview
Often called the "Canary Island Broom," this vibrant evergreen shrub is like a burst of bottled sunshine for the garden. Native to the volcanic slopes of the Canary Islands, it is beloved for its prolific, fragrant yellow blooms that smell remarkably like sweet peas. While it is a hardy Mediterranean favorite, it carries a rebellious streak, often escaping garden borders to colonize wild landscapes with its vigorous growth.
🔍 How to Identify
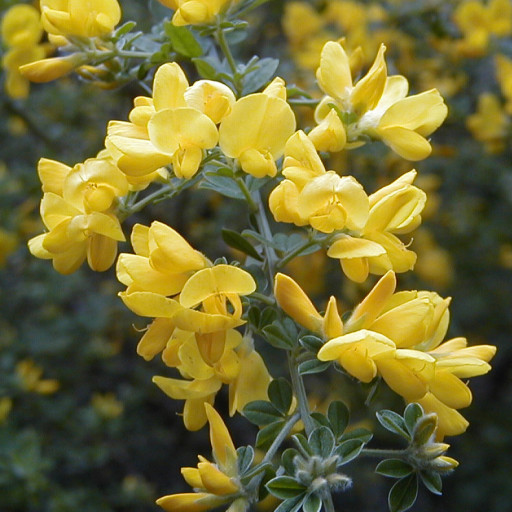
- 🌼 Golden Blooms: It features dense, terminal clusters of bright yellow, "pea-shaped" flowers that can almost entirely hide the foliage during peak spring.
- ☘️ Trifoliate Leaves: The small, bright green leaves are divided into three distinct leaflets, closely resembling a tiny clover or wood sorrel leaf.
- 🌬️ Silvery Stems: Younger stems and the undersides of leaves are often covered in fine, silky hairs, giving the plant a subtle silvery-grey sheen in the sunlight.
🏡 In Your Garden
- ☀️ The Sun Seeker: This plant thrives in "high-energy" spots. It requires full, direct sun to produce its signature flower show; in the shade, it quickly becomes leggy, sparse, and prone to pests.
- 🏜️ Root Sensitivity: Like many members of the Broom family, it develops a deep taproot. This makes it incredibly drought-tolerant once established, but it also means it hates being moved. It is best to plant it young and leave it in its permanent home.
- ✂️ Pruning Nuance: To prevent the plant from becoming a tangled, woody mess, it should be lightly sheared after the flowers fade. However, be careful not to cut back into the old, leafless wood, as the plant often struggles to regenerate from "dead" branches.
⚠️ Safety & Toxicity
- 🚫 Toxic Status: All parts of the plant, especially the seeds, contain quinolizidine alkaloids (such as cytisine).
- 🐾 Pet & Livestock Warning: It is toxic to dogs, cats, and horses. Ingestion can lead to vomiting, excitement followed by coordination loss, and in severe cases, respiratory distress. It is best kept away from grazing areas or curious pets.
✨ Fun Fact
The Genista genus is the namesake of the "Plantagenet" royal dynasty of England. Count Geoffrey of Anjou, the father of King Henry II, famously wore a sprig of common broom (Planta genista) in his hat, eventually leading to a name that defined a centuries-long era of kings!

Detailed Care Instructions
To grow Genista Canariensis, also known as the Canary Islands broom, follow these steps:
- Climate: Ensure you live in a suitable climate for this plant. Genista Canariensis thrives in subtropical or Mediterranean climates with mild winters and hot, dry summers.
- Soil: Choose well-draining soil that is slightly acidic to neutral (pH 6.0 to 7.5). Add organic matter like compost to improve soil fertility and drainage.
- Location: Select a sunny spot for the plant as it requires full sun for at least six hours a day.
- Planting: Dig a hole slightly larger than the plant's root ball. Place the plant in the hole, making sure it sits at the same level as it did in its container or nursery pot. Backfill the hole with soil, gently firming it around the roots.
- Watering: For the first few weeks after planting, water the Genista Canariensis regularly, keeping the soil moist but not waterlogged. Once established, it is relatively drought-tolerant and does not require frequent watering. Only water when the top few inches of soil feel dry.
- Mulching: Apply a layer of organic mulch around the base of the plant to help retain moisture, suppress weed growth, and provide insulation.
- Pruning: Prune the plant after flowering to maintain its shape and promote bushiness. Remove any dead or damaged branches. Light trimming during the growing season can also help maintain the desired shape.
- Fertilization: Genista Canariensis doesn't typically require heavy fertilization. However, you can apply a balanced slow-release fertilizer in early spring to provide necessary nutrients.
- Pest and disease control: This plant is generally resistant to pests and diseases. However, keep an eye out for common garden pests like aphids, spider mites, or scale insects. If necessary, use a suitable organic or chemical pesticide to control them.
- Propagation: Genista Canariensis can be propagated by seeds or cuttings. Collect seeds after the plant has finished flowering and sow them in well-draining seed starting mix. Alternatively, take semi-hardwood cuttings in late spring or early summer and root them in a moist, well-draining medium.
Remember to check local regulations before planting Genista Canariensis, as it can be invasive in some areas.

Place in a window with dappled sun or a spot in the middle of a room. Or directly in a window facing west or east.

Genista Canariensis plant should be irrigated regularly but not excessively. Water the soil around the plant to keep it moist, but not waterlogged. You should avoid watering the leaves directly to prevent the risk of fungal disease. The frequency of watering will depend on several factors such as temperature, humidity, and soil drainage. In general, you should water the plant when the top inch of soil is dry to the touch. Use a watering can or a hose with a soft spray nozzle to provide a gentle watering to the soil. In periods of hot weather or prolonged drought, you may need to water the plant more frequently. Remember, it's important to maintain consistent moisture levels, so avoid allowing the soil to completely dry out or become waterlogged.
- Select a balanced, water-soluble fertilizer suitable for use on flowering shrubs.
- Dilute the fertilizer according to the manufacturer's instructions.
- Apply the diluted fertilizer evenly around the base of the plant.
- Water the plant thoroughly after fertilizing.
- Repeat every two to three weeks during the growing season, adjusting frequency and concentration based on plant response and environmental conditions.
Genista Canariensis plant requires a well-draining soil with a pH range of 6.5 to 7.5. The soil should be rich in organic matter and have good water-retention capacity. It is recommended to mix equal parts of sand, peat moss, and perlite to create a suitable potting mix. Additionally, adding some compost or aged manure can help enhance soil fertility. The plant prefers to grow in full to partial sunlight and requires regular watering, especially during the growing season. Overwatering and waterlogged soil can lead to root rot, so it's essential to ensure adequate drainage. Furthermore, it's best to fertilize the plant with a balanced fertilizer during the growing season to promote healthy growth.
To propagate this plant, begin by selecting a healthy stem cutting that is approximately 4-6 inches long. Use a clean, sharp pair of pruning shears to make a clean cut at a 45-degree angle just below a leaf node.
Remove the leaves from the bottom 2-3 inches of the stem, leaving only a few leaves at the top. Dip the cut end of the stem into rooting hormone powder and tap off any excess.
Next, prepare a well-draining potting mix of peat moss, perlite, and sand in a container that has drainage holes. Moisten the mix with water until it is evenly moist but not waterlogged.
Using a pencil or a dibber, make a hole in the potting mix, and gently insert the cutting into the hole. Lightly press the soil around the stem to ensure good contact.
Cover the pot with a clear plastic bag to create a mini greenhouse and place it in a bright, but not direct, light. Keep the soil moist but not waterlogged and mist the cutting periodically to maintain humidity.
After approximately 4-6 weeks, the cutting should have developed roots and can be transplanted into a larger container or into the garden.
Common pests of the canary island broom include Scale insect, mealybugs, spider mites. Make a habit of checking your canary island broom frequently for pests so that any infestations can be caught and managed early.


