Plant Overview
The Geranium Cinereum, affectionately known as the "Ashy Cranesbill," is a petite alpine treasure originating from the rocky slopes of the Pyrenees and the Balkans. Unlike its upright, bushy cousins, this hardy perennial forms low, silvery-green carpets that look as though they’ve been dusted with fine volcanic ash. It is a favorite for rock gardens and "crevice" planting, where its delicate, dark-veined flowers can spill over stones like a living tapestry.
🔍 How to Identify
- 🩶 The Foliage: Small, deeply lobed leaves that carry a distinct grayish-green or "ashy" tint due to a fine coating of silvery hairs.
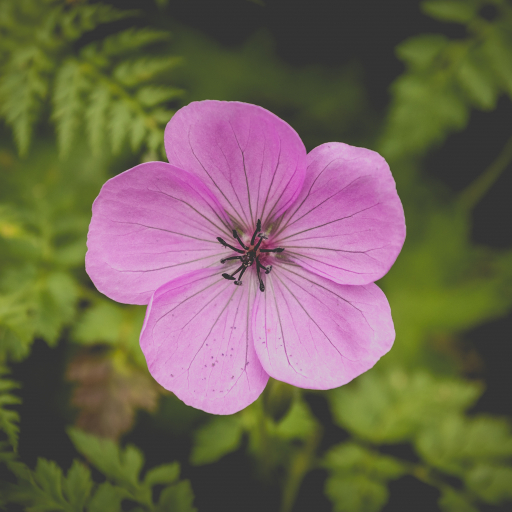
- 🌸 The Blooms: Five-petaled, cup-shaped flowers that typically feature a dark, dramatic center with intricate "pencil-mark" veining radiating outward.
- 🌱 Growth Habit: A compact, mounding plant that rarely exceeds 6 inches in height, making it an ideal groundcover for small spaces.
🏡 In Your Garden
- ⛰️ Alpine Roots: Because it naturally grows in mountain crevices, this plant demands exceptional drainage. If its "feet" stay wet during the winter, it may succumb to root rot; adding grit or gravel to your soil is a must.
- ✂️ The "Chelsea Chop": While it is a repeat bloomer, shearing the plant back lightly after the first flush of flowers in early summer encourages a fresh carpet of leaves and a second wave of color in late summer.
⚠️ Safety & Toxicity
- ✅ Pet & Human Safe: Geranium cinereum is generally considered non-toxic to dogs, cats, and horses, making it a "worry-free" addition to family gardens.
- 🌿 Skin Sensitivity: While not poisonous, the fuzzy texture of the leaves can occasionally cause very mild skin irritation for people with highly sensitive skin. Gardening gloves are recommended during heavy pruning.
✨ Fun Fact
The common name "Cranesbill" comes from the plant's unique seed pods. After the flower fades, the seed head elongates into a sharp, pointed shape that looks remarkably like the long beak of a crane!

Detailed Care Instructions
To grow Geranium cinereum, also known as the Alpine Geranium or Crane's Bill, follow these steps:
- Choose a suitable location: Geranium cinereum prefers a sunny or partially shaded area. Ensure that the soil is well-draining and not overly wet, as this can lead to root rot.
- Prepare the soil: Before planting, amend the soil with organic matter such as compost or well-rotted manure to improve drainage and fertility. Loosen the soil to a depth of about 8-10 inches.
- Planting: Dig a hole slightly larger than the root ball of the plant. Place the Geranium cinereum in the hole, ensuring that the top of the root ball is level with or slightly above the soil surface. Backfill the hole with soil, gently firming it around the plant. Space each plant about 12-18 inches apart.
- Watering: After planting, give the Geranium cinereum a thorough watering to settle the soil. Water regularly but avoid overwatering, as excessive moisture can lead to root damage. Allow the soil to dry slightly between waterings.
- Mulching: Apply a layer of organic mulch, such as bark chips or straw, around the base of the plant. Mulching helps retain moisture, suppresses weeds, and regulates soil temperature.
- Fertilization: Geranium cinereum generally doesn't require excessive fertilization. However, you can apply a balanced fertilizer (10-10-10 or 14-14-14) once in spring and once in mid-summer to encourage healthy growth and blooming.
- Pruning: Trim back any dead or faded flowers to encourage repeat blooming and maintain a tidy appearance. In early spring, you can also cut back any old or damaged growth to stimulate new growth.
- Pest and disease control: Geranium cinereum is relatively resistant to pests and diseases. However, keep an eye out for common issues such as aphids, slugs, and powdery mildew. If necessary, use organic methods or appropriate insecticides/fungicides to control these problems.
Remember to regularly monitor the plant's water and sunlight needs and adjust accordingly. With proper care and maintenance, Geranium cinereum can grow and bloom beautifully.

Place in a bright room that is sun drenched almost all day. Or directly in a south-facing window.

To water this particular plant, you should first consider the soil moisture content. It is important not to overwater the plant, as this can lead to root rot and other diseases. The soil should be slightly moist but not waterlogged. It is recommended to let the soil dry out slightly between watering. When watering, it is important to water at the base of the plant, avoiding the leaves and flowers. This helps prevent water from sitting on the leaves and causing damage or disease. Depending on the climate and season, watering can vary from once a week to every other day. It is important to monitor the moisture level in the soil and adjust watering as needed.
To ensure optimal growth and health of this plant, it is recommended to fertilize it once a month during its growing season, which typically occurs from spring to early fall. Use a balanced fertilizer containing equal parts nitrogen, phosphorus, and potassium, with a ratio of 10-10-10 or 20-20-20. Mix the fertilizer with water according to the instructions on the package and apply the solution to the soil around the plant. Avoid applying fertilizer directly to the leaves or flowers to prevent burning. Water the plant immediately after fertilization to allow the nutrients to penetrate the soil.
Geranium Cinereum requires a well-draining soil with a pH level between 5.5 and 7.0. The soil should be rich in organic matter and have good moisture retention abilities. It is important to avoid soil that is compacted, as it can prevent water and nutrients from reaching the plant's roots. A sandy loam soil with a mix of compost or peat moss is ideal for Geranium Cinereum. The plant prefers a slightly alkaline soil, so a small amount of limestone can be added to adjust the pH level if necessary. Overall, the soil for Geranium Cinereum should be light and airy, with good drainage and nutrient retention properties.
Geranium Cinereum can be propagated by taking stem cuttings from a mature and healthy plant. To do this, choose a portion of the stem that is 3-4 inches long. This cutting should be taken during the spring or summer months, when the plant is actively growing.
Make a clean cut just below a node or leaf joint on the stem, and remove any leaves from the lower portion of the cutting. Dip the cut end of the stem into rooting hormone powder to help it form roots more quickly.
Next, fill a small pot or container with a well-draining soil mix. Insert the stem cutting into the soil and press gently around it to firm it in place. Water the soil well and cover the pot with a plastic bag or a clear plastic container to create a humid environment. This will help the cutting to form roots.
Place the pot in a warm, brightly lit area, but avoid direct sunlight. Keep the soil moist but not soaking wet, and mist the cutting and soil regularly to maintain humidity.
After a few weeks, check the cutting for signs of root growth. Once roots have developed, gradually reduce the humidity by removing the plastic bag or container over the pot. Transplant the new plant into a larger container or into the garden once it has established roots in its new container.
Common pests of the ashy cranesbill include Aphids, whiteflies. Make a habit of checking your ashy cranesbill frequently for pests so that any infestations can be caught and managed early.


