Plant Overview
Known as the "Jerusalem Artichoke," this plant is neither from Jerusalem nor is it an artichoke! It is actually a hardy North American sunflower. Native American tribes cultivated these "Sunroots" for centuries before European explorers brought them across the ocean, where they became a staple in French cuisine.
🔍 How to Identify
- 🌻 The Blooms: It features cheerful, bright yellow daisy-like flowers that sit atop tall stems. They look like miniature sunflowers, typically 2–4 inches across.
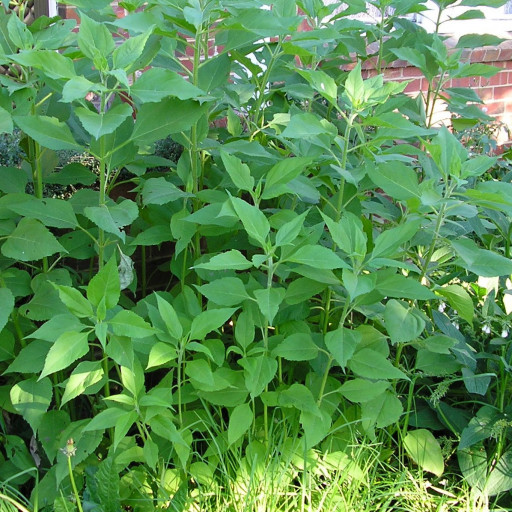
- 🌿 Rough Foliage: The leaves are large, ovate, and have a distinct sandpapery texture. If you run your finger along the stalk, it feels hairy and rugged.
- 🥔 The Tubers: Hidden underground are the real stars—knobby, pale brown or reddish tubers that look remarkably like ginger root but have the crisp texture of a water chestnut.
🏡 In Your Garden
- 🚧 The Great Colonizer: Be careful where you plant it! This plant grows from small rhizomes and can quickly take over a garden bed if not contained. Many gardeners prefer planting them in large sunken pots or dedicated "wild" corners.
- ✂️ Tall Stature: These can reach up to 10 feet tall. They make an excellent natural privacy screen or "living fence" during the summer months, but they may require staking if your area is prone to high winds.
- ❄️ Harvest Timing: For the sweetest flavor, wait until after the first or second frost to dig up the tubers. The cold temperatures trigger the plant to convert its starches into sugars.
⚠️ Safety & Toxicity
- 🍽️ Edible but Gassy: The tubers are safe and highly nutritious for humans, but they are famous for containing inulin. This prebiotic fiber is great for gut health but can cause significant flatulence in some people, earning it the nickname "the fartichoke."
- 🐾 Pet Friendly: Helianthus tuberosus is generally considered non-toxic to dogs, cats, and horses. However, consuming large amounts of the fibrous stalks might cause mild digestive upset.
✨ Fun Fact
The name "Jerusalem Artichoke" is actually a linguistic accident. It is believed to be a corruption of the Italian word for sunflower, Girasole (which means "turning to the sun"). Over time, English speakers heard "Girasole" and transformed it into "Jerusalem."

Detailed Care Instructions
| Invasive | Weed |
| Lighting | Full Sun |
| Hardiness Zones | Max 9B |
To grow Helianthus tuberosus, or more commonly known as Jerusalem artichoke, here are the steps you can follow:
- Climate and soil: Jerusalem artichokes grow best in cool to warm climates, thriving in USDA hardiness zones 3-9. Choose a spot with full sun exposure and well-draining soil.
- Planting: Plant the tubers in early spring, as soon as the soil can be worked. The tubers should be healthy and firm. Dig holes about 4-6 inches deep and place the tubers in the hole with the pointed end facing up. Space them about 12-18 inches apart, leaving at least 3 feet between rows.
- Soil preparation: Before planting, amend the soil with compost or well-rotted manure to improve fertility and drainage. However, avoid using fresh manure as it can cause the tubers to rot.
- Watering: Keep the soil consistently moist but not waterlogged. Water deeply when the top few inches of soil feel dry. Regular watering during the growing season is crucial for plant development.
- Mulching: Apply a layer of organic mulch around the base of the plants to help retain moisture, suppress weeds, and maintain an even soil temperature.
- Fertilizing: Jerusalem artichokes don't usually require heavy fertilization. However, you can apply a balanced organic fertilizer or compost in early spring to provide nutrients for healthy growth.
- Controlling weeds: Remove any weeds regularly, especially when the plants are young, to reduce competition for nutrients and water.
- Staking: As the plants grow taller, they may need staking to prevent them from toppling over in strong winds. Use stakes and ties to support the stems if necessary.
- Harvesting: Wait until the foliage starts to die back in late autumn or early winter before harvesting. Gently dig around the base of the plant and lift the tubers. Small tubers can be left in the ground to grow and harvested later.
- Storage: After harvesting, store the tubers in a cool, dark, and dry place. They can be consumed fresh or stored for several months.
Remember to check with your local agricultural extension office for any specific tips or recommendations based on your region to optimize the growth of Helianthus tuberosus.

Place in a bright room that is sun drenched almost all day. Or directly in a south-facing window.

The Helianthus Tuberosus plant prefers to be watered deeply and infrequently. One way to do this is to use a hose or watering can to slowly water the base of the plant until the soil is moistened to a depth of about 6 inches. It's important to avoid getting water on the leaves as this can promote disease and sunburn.
The frequency of watering will depend on the weather and soil type. In general, the plant should be watered when the top inch of soil feels dry to the touch. During hot and dry weather, it may need to be watered more frequently.
It's also important to provide good drainage for the plant. If the soil becomes waterlogged, it can lead to root rot and other problems. Consider planting the Helianthus Tuberosus in raised beds or adding organic matter to improve the soil's drainage.
Finally, it's a good idea to water the plant in the morning so that any excess water can evaporate during the day. This will help prevent fungal growth and other issues.
To fertilize this plant, apply a balanced fertilizer with equal amounts of nitrogen, phosphorus, and potassium. Spread the fertilizer around the base of the plant and gently work it into the soil. Water the plant thoroughly after fertilizing to help the nutrients soak into the soil. Avoid over-fertilizing as this can cause the plant to produce too many leaves at the expense of flowers. Fertilize once a month during the growing season.
The best soil for Helianthus Tuberosus plants is loose and well-drained. It should have a slightly acidic pH between 6.0 and 6.5. The soil should also be rich in organic matter and nutrients, such as nitrogen, phosphorus, and potassium. This can be achieved by adding compost, well-rotted manure, or a balanced fertilizer before planting. Additionally, the soil should be well-aerated and not compacted to allow for proper root growth. A sandy loam or loamy soil type is ideal for growing this plant.
Helianthus Tuberosus is a plant species that belongs to the Asteraceae family. It is a perennial plant that is widely cultivated for its edible tubers. Propagation of this plant can be done through various means, such as division, stem cuttings, and seeds.
To propagate Helianthus Tuberosus through division, the plant is lifted from the ground and the root ball is divided into smaller sections, each with its own set of stems and leaves. These smaller sections are then replanted into prepared soil, ensuring that they are watered well and placed in a sunny location.
Another method of propagating Helianthus Tuberosus is through stem cuttings. Select healthy stems from the plant, and cut them into sections measuring around 6-8 inches long. Remove the leaves from the lower half of each cutting and dip the cut end into rooting hormone powder. Insert the cuttings into a pot filled with well-draining soil, and keep them moist.
Seeds can also be used to propagate Helianthus Tuberosus, although this method takes longer. Harvest the seeds from mature plants, dry them, and store them in an airtight container until ready to plant. Sow the seeds in prepared soil in the spring, and keep the soil moist until the seedlings are well established.
Overall, ensuring that the newly propagated plants are watered well and placed in a sunny location will promote healthy growth and development.
Common pests of the jerusalem artichoke include Spider mites, thrips, whiteflies. Make a habit of checking your jerusalem artichoke frequently for pests so that any infestations can be caught and managed early.


