Plant Overview
Known as the "Round Leaf Wax Plant," Hoya obovata is a darling of the indoor jungle for its architectural, coin-shaped leaves. Native to the tropical forests of Southeast Asia, this semi-succulent vine is prized for its hardy nature and its stunning "silver splash" variegation. Whether climbing a trellis or cascading from a hanging basket, it brings a sense of ancient tropical elegance to any modern home.
🔍 How to Identify
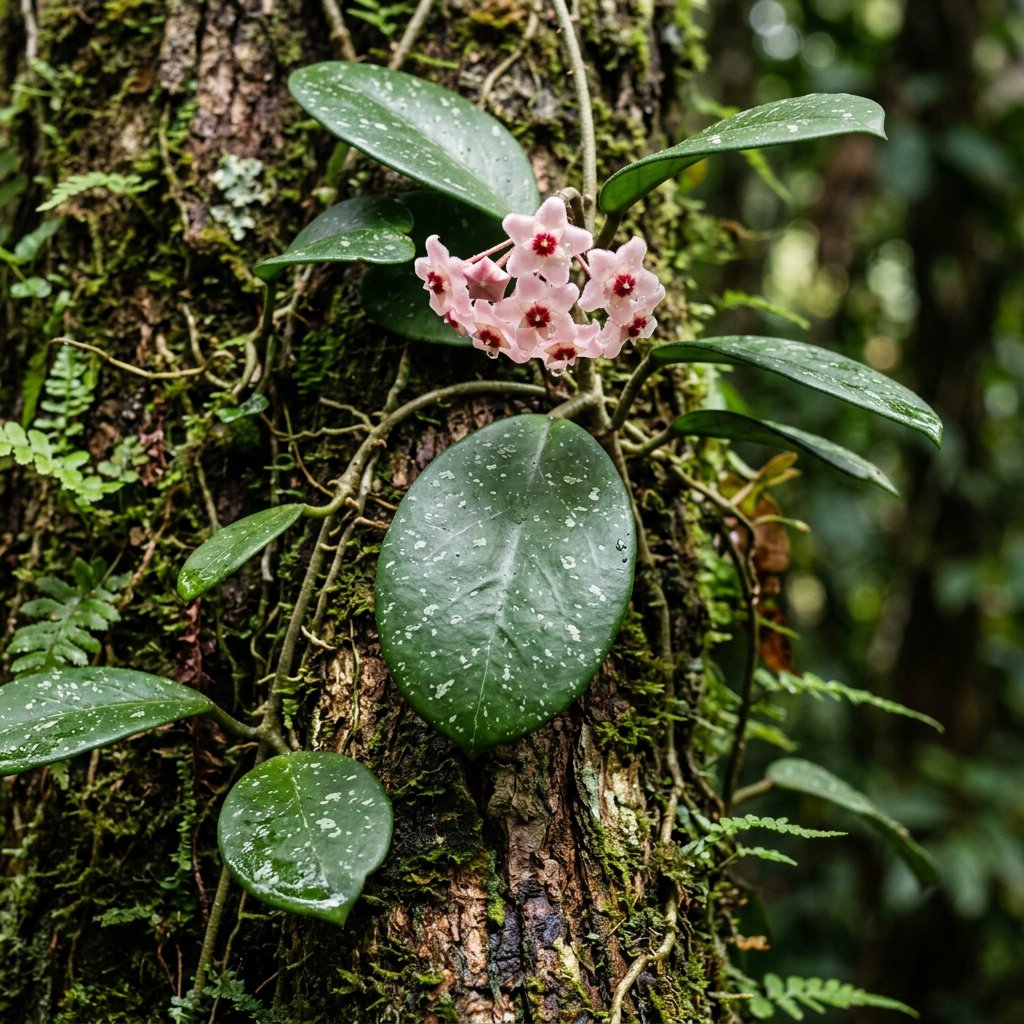
- 🍃 The Foliage: Look for thick, leathery, and perfectly round or slightly oval leaves that feel firm and succulent-like to the touch.
- ✨ Silver Splash: Most specimens feature random, constellation-like speckles of silvery-white across the deep, forest-green surface of the leaves.
- 🌸 The Bloom: It produces clusters (umbels) of fuzzy, star-shaped flowers that are typically creamy white or pale pink with striking deep-rose centers.
🏡 In Your Garden
- ☀️ Light Logic: This Hoya is a sun-lover compared to its cousins. It thrives in bright, indirect light; without enough sun, those iconic silver speckles may fade, and the plant will likely refuse to produce its fragrant flowers.
- 🪴 Drought Tolerance: Because it stores significant water in its fleshy leaves, it prefers to dry out almost completely between waterings. It is far more likely to suffer from "kindness" (overwatering) than from a missed watering session.
⚠️ Safety & Toxicity
- 🐾 Pet Friendly: Great news for furry families! Hoya obovata is generally considered non-toxic to cats and dogs, making it a safe choice for low-shelf placement.
- 💧 Sap Sensitivity: When stems are cut or broken, the plant bleeds a white, milky latex sap. While not deadly, this sap can cause mild skin irritation for humans and should be kept away from the eyes.
✨ Fun Fact
When Hoya obovata finally decides to bloom, the flowers release a potent, sweet fragrance that many collectors describe as a mixture of chocolate and roses. The scent is most intense at night to attract nocturnal pollinators in the wild!

Detailed Care Instructions
| Color | Light Pink, White |
| Soil Ph | 6.1-7.3 |
| Humidity | Normal |
| Lighting | Part Sun |
| Toxicity | Non-Toxic |
| Soil Type | Rich, Well-Draining |
| Bloom Time | Spring, Summer |
| Difficulty | Easy |
| Plant Type | Epiphyte |
| Mature Size | 12-20 Ft In Length |
| Native Area | Indonesia |
| Temperature | 18°C - 25°C |
| Sun Exposure | Full Sun-Bright, Indirect Light |
| Hardiness Zones | 10A - 11B |
To grow a Hoya obovata plant, follow these steps:
- Choose a healthy plant: Look for a Hoya obovata plant with vibrant leaves and no signs of pests or diseases.
- Select suitable growing conditions: Hoya obovata plants prefer bright, indirect light. They can also tolerate light shade, but avoid placing them in direct sunlight. The temperature should be around 68-77°F (20-25°C).
- Potting and soil: Use a well-draining soil mix that contains peat moss, perlite, and orchid bark. Consider using a pot with drainage holes to prevent waterlogging.
- Watering: Allow the soil to dry out between waterings to avoid overwatering. Water the plant thoroughly, making sure excess water drains out of the pot, and then wait for the top inch of the soil to dry before watering again.
- Humidity: Hoya obovata plants thrive in high humidity. Increase humidity levels by misting the leaves regularly or placing the pot on a tray filled with water and pebbles.
- Fertilization: Fertilize the plant during the growing season (spring and summer) with a balanced, water-soluble fertilizer. Follow the instructions on the fertilizer packaging for dosage and frequency.
- Pruning: Trim the plant to promote bushier growth and remove any leggy or weak stems. Pruning can also help control the size and shape of the plant.
- Support: As Hoya obovata plants grow, they tend to vine and climb. Provide support such as a trellis or moss pole for the plant to climb on.
- Propagation: Hoya obovata plants can be propagated through stem cuttings. Take a cutting and allow it to callus for a few days before placing it in well-draining soil or water until roots form.
- Pests and diseases: Monitor the plant regularly for pests such as mealybugs or spider mites. Treat infestations by wiping the leaves with a damp cloth or using an insecticidal soap.
Remember to be patient when growing Hoya obovata plants, as they can take some time to establish and start growing actively.

Place in a window with dappled sun or a spot in the middle of a room. Or directly in a window facing west or east.

Hoya Obovata plant should be watered thoroughly, allowing the soil to become moderately dry between watering. Avoid overwatering as it can lead to root rot. Use room temperature water and water the plant at the base, avoiding getting the leaves wet. Drain excess water from the pot after watering. In the winter season, reduce watering and allow the soil to dry out slightly more between watering.
- Use a high-quality liquid fertilizer specifically made for houseplants.
- Dilute the fertilizer to half the recommended strength.
- Water the plant thoroughly before applying the fertilizer.
- Pour the diluted fertilizer onto the soil around the base of the plant.
- Allow the soil to absorb the fertilizer for about an hour.
- Water the plant again with plain water to flush any excess fertilizer out of the soil.
- Fertilize every 2-3 months during the plant's growing season (spring and summer).
Hoya obovata plants prefer a well-draining soil mix to prevent waterlogging and root rot. A good potting mix for Hoya obovata should be lightweight and porous, allowing for adequate aeration to the roots. A mixture of peat moss, perlite, and coarse sand or orchid bark is recommended to provide the right balance of moisture retention and drainage. Avoid using heavy soils or those that compact easily, as they can suffocate the plant's roots. Additionally, adding some organic matter like compost or leaf mold can help improve the soil structure and provide essential nutrients for the plant's growth. Remember to repot your Hoya obovata every couple of years to refresh the soil and promote healthy root development.
To propagate this plant, you can start by taking a stem cutting from the mature plant. It's important to make a clean cut at a 45-degree angle and remove any leaves that might be too close to the cut. Afterward, you can dip the cut end into rooting hormone to stimulate root growth.
The next step is to prepare a pot with well-draining soil, such as a mixture of peat moss, perlite, and sand. Make a hole in the soil with a pencil and gently insert the cutting. If you're propagating several cuttings at once, make sure to space them out evenly in the pot.
After planting, water the soil and cover the pot with a plastic bag or a propagator dome to create a humid environment. Place the pot in a bright spot but out of direct sunlight to avoid burning the leaves. Over the next several weeks, keep the soil moist but not overly wet and watch for new growth.
Once the new plant has matured and has become established, you can transplant it into a larger pot with fresh soil. At this point, it can be treated like a mature plant and will continue to grow.
Common pests of the sweetheart hoya include Scale insect, mealybugs, spider mites. Make a habit of checking your sweetheart hoya frequently for pests so that any infestations can be caught and managed early.


