Plant Overview
Known as the "Savin Juniper," this hardy evergreen has a history that stretches back to ancient Rome. While it looks like a friendly, low-growing groundcover, its pungent aroma—often described as sharp or "catty"—hints at its potent chemical nature. It is a rugged survivor, naturally occurring in the high mountains of Central and Southern Europe, where it clings to rocky slopes and defies the wind.
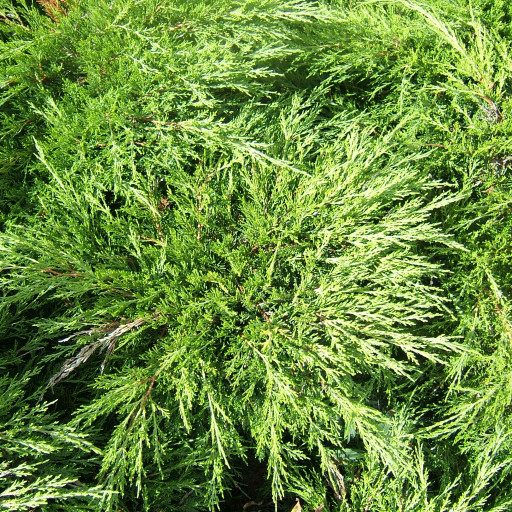
🔍 How to Identify
- 🌿 The Foliage: It features two types of leaves; young plants have needle-like "juvenile" leaves, while mature plants develop soft, scale-like leaves that overlap like shingles on a roof.
- 🫐 The "Berries": Technically fleshy cones, these small, brownish-blue or black globes are covered in a waxy, white coating (bloom) and hang from curved stalks.
- 🪵 Growth Habit: It typically grows as a spreading, prostrate shrub, hugging the ground and creating a dense, dark green carpet, though some older specimens can develop twisted, woody trunks.
🏡 In Your Garden
- 🏜️ Tough as Nails: This plant is the ultimate "set it and forget it" shrub for difficult spots. It thrives in poor, rocky, or sandy soils and is remarkably drought-tolerant once established.
- 🌬️ Erosion Expert: Because of its creeping root system and dense mat-like growth, it is a favorite for stabilizing steep banks or acting as a windbreak in exposed, high-altitude gardens.
- 🍄 Fungal Host: Be mindful if you have apple trees nearby; Juniperus sabina is a known host for Cedar-Apple Rust, a fungus that jumps between junipers and fruit trees.
⚠️ Safety & Toxicity
- 🚫 High Toxicity: WARNING: All parts of the Savin Juniper are toxic if ingested. It contains "sabinene," a powerful essential oil that can cause severe gastrointestinal distress, kidney damage, and nervous system issues.
- 🐾 Pets & Kids: The dark berries can be enticing to children or curious pets. Keep this plant in areas where they are unlikely to graze on the foliage or fruit.
- 🧴 Skin Irritant: Many gardeners experience "Juniper dermatitis"—a red, itchy rash—after pruning. Always wear long sleeves and thick gloves when handling this plant.
✨ Fun Fact
In ancient folklore and early medicine, Savin was famously (and dangerously) known as the "herba sabina." It was used in medieval Europe in various potions, but because the line between a "cure" and a "poison" was so thin with this plant, it was eventually banned from many apothecary gardens.

Detailed Care Instructions
To grow Juniperus Sabina (Savin Juniper) plant, follow these steps:
- Choose a suitable location: Juniperus Sabina prefers full sun but can also tolerate partial shade. Ensure that the soil is well-draining and not overly fertile. It can adapt to various soil types, including sandy or rocky soils.
- Prepare the soil: Till the soil at least a foot deep to remove any weeds or debris. Amend the soil with organic matter, such as compost, to improve drainage and nutrient content if needed.
- Planting: Dig a hole that is twice as wide and deep as the root ball of the plant. Gently remove the Juniperus Sabina from its container and place it in the hole, ensuring the top of the root ball is level with the soil surface. Backfill the hole with soil, firming it gently around the roots.
- Watering: Water the plant thoroughly after planting to settle the soil and ensure good root-to-soil contact. Water regularly, especially during dry periods, for the first year to establish the plant. Once established, Juniperus Sabina is drought-tolerant and does not require frequent watering.
- Mulching: Apply a layer of organic mulch around the base of the plant to help conserve moisture, suppress weed growth, and moderate soil temperature. Keep the mulch a few inches away from the plant's trunk to prevent rot.
- Pruning: Juniperus Sabina typically requires minimal pruning. However, if desired, light pruning can be done in late spring or early summer to maintain the desired shape and remove any dead or overgrown branches.
- Fertilizing: Juniperus Sabina usually does not require regular fertilization. If soil tests indicate nutrient deficiencies, you can apply a balanced slow-release fertilizer in early spring.
- Pest and disease control: Juniperus Sabina is generally resistant to pests and diseases. However, occasional pests like spider mites or scale insects may infest the plant. Inspect the plant regularly and take appropriate measures if needed, such as applying insecticidal soap or horticultural oil.
- Winter care: Juniperus Sabina is hardy and can tolerate winter temperatures. However, in colder regions, protect the plant from harsh winds and extreme temperature fluctuations by covering it with burlap or winterizing fabric.
- Monitoring and maintenance: Regularly monitor the plant for any signs of stress, diseases, or pests. Provide adequate care and maintenance, such as removing weeds, ensuring proper water drainage, and monitoring its growth and health.
By following these guidelines, you can successfully grow and care for Juniperus Sabina plant.

Place in a bright room that is sun drenched almost all day. Or directly in a south-facing window.

To water this specific plant, it is important to ensure the soil remains moist but not overly saturated. The water should be delivered slowly and evenly at the base of the plant, avoiding getting water on the needles or foliage. It is recommended to water deeply when the top inch of soil feels dry to the touch, but be careful not to overwater as this can lead to root rot. During hotter months, the plant may require more frequent watering, while in cooler weather, it may require less. It is important to monitor the plant and adjust watering as needed to ensure optimal health.
To fertilize the plant, apply a balanced fertilizer with an N-P-K ratio of 10-10-10. Apply the fertilizer once a month during the growing season (spring and fall). Water the plant thoroughly before and after applying the fertilizer to avoid root burn. Avoid over-fertilizing as this can lead to plant damage.
The Juniperus Sabina plant requires well-draining soil that is rich in nutrients. It prefers soil that is loose, sandy, or loamy, with a pH level that ranges from neutral to slightly alkaline. The soil must be able to retain moisture, while also allowing for proper water drainage. It is recommended to mix organic matter such as compost or peat moss into the soil before planting to improve soil quality. The soil should be free of any rocks or debris as it can affect the growth of the Juniperus Sabina plant. It is also important to avoid using heavy clay soils or soils that have poor drainage as it can lead to root rot.
To propagate this plant, you will need to obtain cuttings from a healthy, mature plant. The cuttings should be approximately 4-6 inches long and taken from the softwood (new growth) of the plant in the spring or early summer. Remove the lower leaves from the cutting and make a clean cut at the bottom.
After preparing the cuttings, dip the end of the cutting in rooting hormone and plant it in a well-draining soil mixture. Place the cutting in a warm, humid location with partial sun exposure. Keep the soil moist and mist the cutting frequently to maintain humidity.
It may take several weeks for the cutting to root and develop new growth. Once the cutting has established roots and new growth, it can be transplanted into a larger pot or outdoors in a suitable location.


