Plant Overview
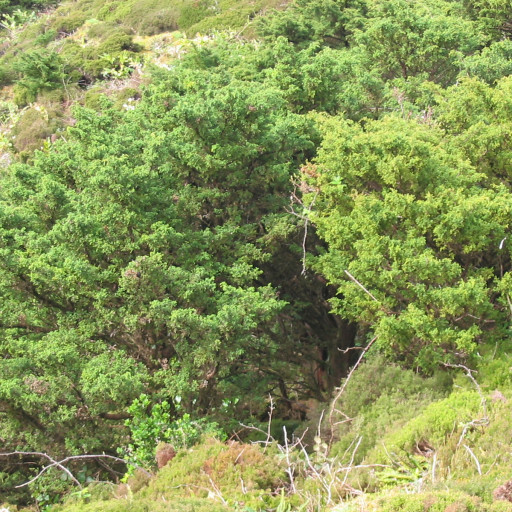
Known as the rugged "Guardian of the Hills," Junipers are ancient evergreens that have survived for millions of years. From the low-growing "Blue Star" carpets to the towering spires used in Italian landscapes, these plants are beloved for their aromatic wood and blue-tinted foliage. Historically, they were burned in homes to purify the air and were often planted near front doors to ward off unwanted energy.
🔍 How to Identify
- 🌿 Leaf Texture: Look for two types of foliage—juvenile leaves are sharp and needle-like, while adult leaves are soft, overlapping scales that look like braided cord.
- 🫐 Faux-Berries: They don't produce fruit; instead, they have fleshy, berry-like cones that are typically dusty blue or purple with a waxy coating.
- 🪵 Shredding Bark: On mature specimens, the bark is thin and fibrous, often peeling away in long, vertical strips that reveal a cinnamon-colored interior.
🏡 In Your Garden
- ☀️ Sun Seekers: Junipers are "obligate sun-lovers," meaning they need full light to keep their dense shape. In the shade, they become leggy, sparse, and prone to fungal issues.
- 💧 The "Tough Love" Rule: These plants thrive on neglect once established. They prefer rocky, well-draining soil and are highly susceptible to root rot if kept in standing water or heavy clay.
- 🌬️ Living Snow Fences: Because they are incredibly wind-tolerant and keep their foliage year-round, they are the gold standard for creating privacy screens or windbreaks in harsh climates.
⚠️ Safety & Toxicity
- 🐕 Mildly Toxic: Most species contain oils (like thujone) that can cause vomiting or diarrhea in dogs, cats, and horses if eaten in significant quantities.
- 🧤 Contact Rash: The prickly needles and volatile oils can cause "Juniper Dermatitis," a red, itchy skin rash. It is highly recommended to wear long sleeves and gloves when pruning.
- 🤰 Pregnancy Warning: Historically, certain species were used as abortifacients; pregnant individuals should avoid handling high concentrations of the berries or essential oils.
✨ Fun Fact
The "berries" of the Juniperus communis are the soul of the spirit world—they provide the primary flavoring for Gin! In fact, the name "Gin" is a shortened version of the Dutch word Jenever, which literally translates to Juniper.

Detailed Care Instructions
| Lighting | Full Sun |
| Hardiness Zones | 4A - 8B |
To grow a Juniperus plant, follow these steps:
- Choose a suitable location: Juniperus plants prefer full sun to partial shade. Ensure that the area has well-draining soil as they do not tolerate wet or waterlogged conditions.
- Select the right variety: There are many different types of Juniperus plants, so choose one that is suitable for your climate and the size you desire. Some common varieties include Juniperus chinensis, Juniperus scopulorum, and Juniperus virginiana.
- Prepare the soil: Juniperus plants can adapt to various soil types but generally prefer soil that is well-draining and slightly acidic. If necessary, amend the soil with organic matter like compost to improve drainage.
- Planting: Dig a hole that is slightly larger than the root ball of the Juniperus plant. Gently place the plant in the hole and backfill the soil, ensuring that the plant is at the same depth as it was in its container. Press the soil down firmly around the base of the plant to eliminate any air pockets.
- Watering: Initially, water the plant thoroughly after planting to establish strong root growth. Afterward, water the Juniperus plant regularly, especially during dry periods. Be careful not to overwater as excessive moisture can lead to root rot.
- Mulching and weed control: Apply a layer of organic mulch around the base of the plant to help retain moisture, regulate soil temperature, and deter weeds. Keep the area around the Juniperus plant weed-free to prevent competition for nutrients and water.
- Pruning: Juniperus plants generally have a compact and tidy growth habit, but regular pruning can help maintain their shape and control their size. Prune back any dead or diseased branches, and trim as necessary to achieve the desired shape.
- Fertilizing: Juniperus plants are generally low-maintenance and do not require heavy fertilization. However, you can apply a balanced slow-release fertilizer in spring to promote healthy growth.
- Pests and diseases: Juniperus plants are relatively resistant to pests and diseases. However, keep an eye out for common issues like spider mites, Juniper scale, and root rot. Treat them promptly using appropriate methods.
- Winter protection: Most Juniperus plants are hardy and can withstand cold temperatures. However, if you live in an extremely cold climate, consider providing some winter protection like burlap wrapping or a windbreak.
Remember, Juniperus plants are slow-growing, so be patient and provide proper care to encourage their growth over time.

Place in a bright room that is sun drenched almost all day. Or directly in a south-facing window.

When watering this plant, it is important to use a watering can or a hose with a gentle spray nozzle to avoid damaging the delicate foliage. The soil should be kept consistently moist but not waterlogged, and the plant should be allowed to fully drain before returning it to its location. It is also important to avoid getting water on the leaves as this can lead to fungal diseases. Finally, watering should be adjusted based on the season and the amount of sunlight the plant receives as this can affect its water needs.
To fertilize a Juniperus plant, please follow these instructions:
- Choose a slow-release, balanced fertilizer specifically formulated for evergreen trees and shrubs.
- Read the fertilizer label carefully for dosage instructions, as the amount may vary depending on the size and age of the Juniperus plant.
- Start fertilizing in early spring, just before new growth appears.
- Spread the fertilizer evenly around the plant's drip line, which is the outer edge of the branches.
- Use a garden rake or your hands to gently work the fertilizer into the soil surface without damaging the plant's roots.
- Water the plant thoroughly after applying the fertilizer to help it absorb the nutrients.
- Avoid over-fertilizing, as this can lead to excessive growth or root burn. Follow the recommended dosage and frequency mentioned on the fertilizer label.
- Repeat the fertilization process every 6 to 8 weeks during the growing season, up until late summer or early fall.
- Stop fertilizing at least 8 weeks before the first expected frost to prevent new growth from being damaged by freezing temperatures.
- Monitor the plant's response to fertilization and adjust the frequency or dosage if needed, considering the health and appearance of the Juniperus plant.
Remember, it's crucial to follow the specific instructions on the fertilizer packaging and consider the specific needs of your Juniperus plant to ensure successful fertilization.
For optimal growth and health, it is recommended to use a well-draining soil that has a slightly acidic to neutral pH level. The soil should be able to retain some moisture, but not become waterlogged as this can lead to root rot. A mixture of organic matter such as compost or peat moss, sand, and perlite can be used to create an ideal soil for the plant. It is also important to ensure that the plant is not sitting in water and has proper drainage.
Juniperus plants can be successfully propagated through various methods, allowing you to grow new plants from existing ones. Here is a detailed description of how to propagate Juniperus plants:
- Propagation by Seed:
- Collect mature cones from female Juniperus plants in the autumn.
- Place the cones in a paper bag or sack and store them in a warm and dry place for a few weeks until they completely dry out.
- Gently crush the cones to release the seeds and separate them from the cone scales.
- Soak the seeds in warm water for 24-48 hours to enhance germination.
- Fill seed trays or small pots with a well-draining seed-starting mix.
- Sow the Juniperus seeds on the surface of the soil and lightly cover them with a thin layer of soil.
- Mist the soil with water until it is evenly moist.
- Cover the pots or trays with a transparent plastic bag or plastic wrap to maintain humidity.
- Place the pots or trays in a warm location receiving indirect sunlight.
- Check the soil moisture regularly, misting when necessary to keep it consistently moist but not waterlogged.
- Germination can take several weeks to several months, so be patient.
- Once the seedlings have developed a few sets of true leaves, they can be transplanted into individual pots or containers.
- Collect mature cones from female Juniperus plants in the autumn.
- Propagation by Semi-Hardwood Cuttings:
- Select healthy, disease-free stems from the current season's growth.
- Cut a 4-6 inch (10-15 cm) section of stem just below a leaf node.
- Remove the lower leaves, leaving only a few at the tip.
- Dip the base of the cutting in a rooting hormone to enhance root formation (optional).
- Fill a pot or tray with a well-draining rooting medium, such as a mixture of perlite and peat moss.
- Insert the cut end of each cutting into the medium, ensuring at least one or two leaf nodes are below the surface.
- Mist the cuttings with water and cover the pot or tray with a plastic bag or a clear plastic dome to create a humid environment.
- Place the cuttings in a warm location with bright, indirect light.
- Check the moisture level regularly and mist if the medium feels dry.
- After a few weeks, gently tug on the cuttings to check for resistance, indicating root formation.
- Once rooted, transfer each cutting into an individual pot or container.
- Select healthy, disease-free stems from the current season's growth.
- Propagation by Layering:
- Select a low-growing branch with flexible stems near the base of the Juniperus plant.
- Make a small wound or nick on the stem where you want roots to form.
- Dig a shallow hole about 3-4 inches (7-10 cm) below the wound.
- Bury the wounded section of the stem in the hole, securing it with a U-shaped wire or a small stake if necessary.
- Cover the buried portion of the stem with soil, leaving the remaining portion exposed.
- Keep the soil consistently moist by watering regularly.
- In a few months, new roots will develop from the buried stem section.
- Once you see substantial root growth, cut the rooted stem from the parent plant and transplant it to its new location.
By following these propagation methods, you can successfully propagate Juniperus plants and enjoy the beauty of these evergreen conifers in your garden or landscape.
- Select a low-growing branch with flexible stems near the base of the Juniperus plant.


