Plant Overview
Often called the "Architect’s Green Wall," the Garden Privet is the unsung hero of the suburban landscape. Despite its common name "California Privet," this hardy shrub actually hails from Japan and was brought West for its incredible resilience. It has spent decades as the go-to choice for creating living fences, offering a dense, leafy shield that thrives where other plants might falter.
🔍 How to Identify
- 🍃 Glossy Foliage: The leaves are perfectly oval, thick, and a deep, waxy green that catches the light. In milder climates, they stay on the branch all year long.
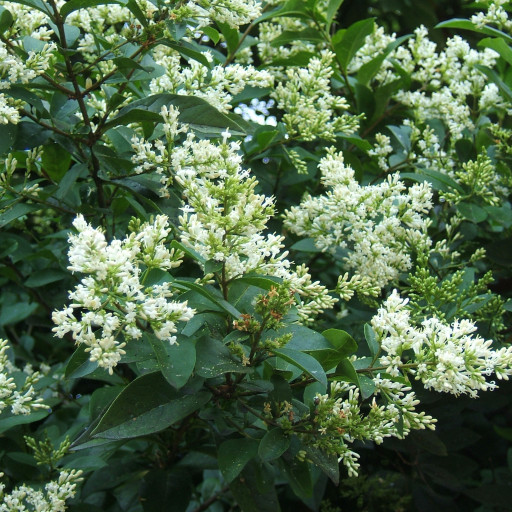
- 🌼 Scented Blooms: In mid-summer, it produces upright clusters of creamy-white flowers. They have a heavy, honey-like fragrance that some find enchanting and others find a bit overwhelming.
- 🫐 Ink-Black Berries: By autumn, the flowers turn into small, dark purple-to-black berries that often persist through the winter months.
🏡 In Your Garden
- ✂️ Pruning Power: This plant is incredibly forgiving; you can shape it into formal boxes, spheres, or even intricate topiary. It actually enjoys a "haircut" and will grow back thicker every time you trim it.
- 🌦️ Urban Survivor: It is remarkably resistant to air pollution and salt spray. This makes it a champion for city gardens or coastal properties where other plants struggle with wind and grime.
- 🌱 Soil Flexibility: While it prefers well-drained soil, it isn't a "diva." It can handle clay or sandy spots as long as it isn't sitting in a swamp.
⚠️ Safety & Toxicity
- 🚫 Toxic Status: All parts of the Garden Privet—especially the leaves and the dark berries—are poisonous to humans and most animals.
- 🐾 Pet & Child Risk: Ingestion can cause severe stomach upset, vomiting, and a racing heart. Because the berries look like small grapes or blueberries, it is best to keep this plant away from areas where small children or curious dogs play.
- 🧤 Skin Irritation: Some gardeners experience mild skin irritation (dermatitis) from the sap or pollen, so wearing gloves during pruning is a smart move.
✨ Fun Fact
🌍 Identity Crisis: Even though it’s widely known as the "California Privet," it has no biological roots in the Golden State. It earned the name because it became an overnight sensation in Californian landscaping during the early 20th century, forever linking its identity to the West Coast.

Detailed Care Instructions
To grow a Ligustrum Ovalifolium plant, also known as a California privet, you can follow these steps:
- Choose a suitable location: Ligustrum Ovalifolium can tolerate a range of soil types and light conditions. However, it prefers well-draining soil and full sun to partial shade. Ensure the location provides enough space for the plant to grow and mature, as it can reach heights of 10-15 feet (3-4.5 meters) with a spread of 5-10 feet (1.5-3 meters).
- Prepare the soil: Prior to planting, prepare the soil by removing any weeds, rocks, or debris. Dig a hole twice as wide and deep as the plant's root ball to allow for proper root growth.
- Planting: Place the Ligustrum Ovalifolium plant into the hole, ensuring the top of the root ball is level with the surrounding soil. Backfill the hole with soil, gently tamping it down to remove air pockets. Water thoroughly after planting.
- Watering: Keep the soil consistently moist but not waterlogged during the plant's first year of growth. After establishment, the plant is moderately drought-tolerant and should only require supplemental watering during prolonged dry spells.
- Fertilizing: Apply a balanced, slow-release fertilizer in early spring to promote healthy growth. Follow the manufacturer's instructions for dosage and application.
- Pruning: Prune Ligustrum Ovalifolium in early spring before new growth appears to shape the plant and remove any dead or damaged branches. Regular pruning will help maintain a compact shape and promote dense foliage.
- Mulching: Apply a layer of mulch around the base of the plant to help retain moisture, suppress weeds, and regulate soil temperature.
- Pests and diseases: Monitor your Ligustrum Ovalifolium for common pests such as aphids, mealybugs, and scale insects. Treat infestations promptly with an appropriate insecticide or insecticidal soap. Additionally, watch for signs of diseases like powdery mildew or leaf spot and take appropriate measures to control them.
By following these steps, you can successfully grow and maintain a healthy Ligustrum Ovalifolium plant.

Place in a bright room that is sun drenched almost all day. Or directly in a south-facing window.

To water this particular plant, it is important to first consider the soil conditions and weather. The plant prefers well-draining soil and moist conditions, but it is also tolerant of drought once established.
During periods of hot and dry weather, it is essential to provide adequate water to prevent wilting or stress on the plant. The goal is to keep the soil evenly moist, but not waterlogged.
One method is to water deeply once or twice a week, allowing the water to soak into the soil rather than just moistening the surface. This encourages the roots to grow deeper and become more resilient to drought conditions.
It is also beneficial to add a layer of mulch around the plant to retain moisture and regulate soil temperature.
Overall, the key to watering this plant is to monitor the soil conditions and adjust watering accordingly to promote healthy growth and development.
To fertilize this plant, apply a balanced fertilizer with equal amounts of nitrogen, phosphorus, and potassium. Spread the fertilizer evenly around the root zone of the plant, which is located directly under the foliage canopy. Avoid direct contact with the stem or leaves. Water the plant immediately after applying the fertilizer to help it absorb the nutrients. Fertilize every six to eight weeks during the growing season, which is typically from spring to fall.
The best soil to use with this plant is a well-draining, loamy soil that is enriched with organic matter. The pH level of the soil should be slightly acidic to neutral, with a range of 6.0 to 7.5. Avoid planting in heavy clay soils or soils with poor drainage as it can lead to root rot. Additionally, this plant prefers a soil that is kept consistently moist but not waterlogged. It is recommended to amend the soil with compost or other organic materials to improve soil fertility and drainage before planting.
To propagate this plant, you should first take a shoot cutting from a healthy and mature plant. This cutting should be about six inches long and include at least two sets of leaves. Remove the lower leaves from the cutting, leaving just the top two sets.
Next, dip the bottom of the cutting in a rooting hormone powder. This will help the plant develop roots more quickly.
Plant the cutting in a pot filled with potting soil, making sure that the bottom of the cutting is covered with soil. Water the cutting thoroughly, and place the pot in a warm and bright location. Keep the soil evenly moist and make sure the humidity around the plant is high.
After several weeks, roots should start to form on the cutting. You can gently tug on the cutting to check whether it has developed roots. Once the roots have formed, you can transplant the new plant into a larger pot or into your garden.
Common pests of the garden privet include Scale insect, mealybugs, spider mites, aphids. Make a habit of checking your garden privet frequently for pests so that any infestations can be caught and managed early.


