Plant Overview
Meet the rebel of the daffodil world. While most of its cousins are famous for signaling the arrival of spring, Narcissus cavanillesii prefers the cool, damp air of the Mediterranean autumn. Often called the Autumn Daffodil, this delicate yellow flower looks like a tiny golden star scattered across the rocky hillsides of Spain, Portugal, and North Africa. It is a rare gem that defies the "spring bulb" stereotype.
🔍 How to Identify
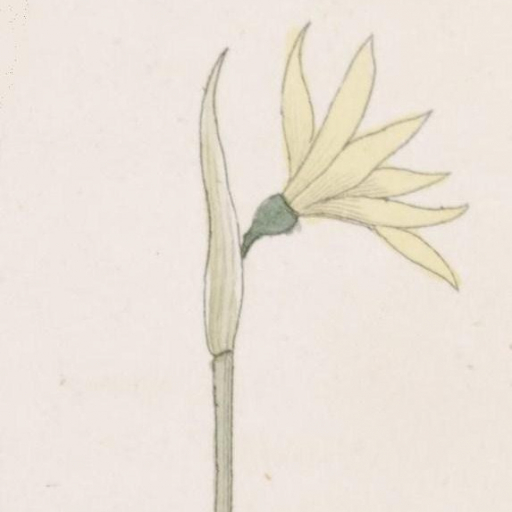
- 🌼 The Petals: Unlike the deep trumpets of garden daffodils, this species features six bright yellow, pointed petals that flare out widely, resembling a star.
- 🎺 The "Trumpet": You might miss it at first glance! The central corona (trumpet) is extremely reduced, often appearing only as a tiny, inconspicuous ring at the center of the petals.
- 🌿 The Foliage: The leaves are slender and grass-like. Interestingly, the flowers often burst through the soil before the leaves even emerge, or just as they begin to sprout.
🏡 In Your Garden
- ☀️ The Summer Bake: This plant follows a Mediterranean rhythm. It requires a hot, dry "dormancy" period during the summer months to trigger its autumn bloom. If the soil stays too wet in July, the bulb may rot or refuse to flower.
- ⛰️ Rock Garden Star: Because of its small stature and specific drainage needs, it thrives best in rock gardens or specialized alpine troughs. It hates "wet feet" and requires gritty, free-draining soil to mimic its native rocky slopes.
⚠️ Safety & Toxicity
- 🛑 Toxic if Ingested: Like all members of the Narcissus family, this plant contains lycorine, a toxic alkaloid. It should never be eaten.
- 🐾 Pet Safety: Keep this plant away from curious cats and dogs. Ingesting the bulbs or flowers can cause severe stomach upset, vomiting, and lethargy.
✨ Fun Fact
- 📜 The Great Identity Crisis: For a long time, botanists were so confused by its lack of a "trumpet" that they refused to call it a Narcissus at all, classifying it in its own genus called Tapeinanthus. Modern DNA testing finally proved it was indeed a daffodil, just a very unique one!

Detailed Care Instructions
Narcissus cavanillesii, commonly known as Cavanilles' daffodil, is a species of flowering plant in the amaryllis family. Here are some steps to help you grow it successfully:
1. Climate and Hardiness Zone
- Ensure that the plant is suited to your climate. Narcissus species generally thrive in USDA Hardiness Zones 5-9.
2. Soil Requirements
- Well-draining Soil: Use a loamy or sandy soil that drains well. Narcissus cavanillesii prefers a slightly acidic to neutral pH (6.0 to 7.0).
- Organic Matter: Incorporate some organic matter, such as compost, to improve soil fertility.
3. Location
- Sunlight: Choose a location that receives full sun to partial shade. Ideally, they prefer about 6 hours of sunlight per day.
- Shelter: Consider planting in a sheltered area to protect the plants from harsh winds.
4. Planting
- Bulb Planting: Plant the bulbs in the fall, about 4 to 6 inches deep and spaced about 6 inches apart.
- Depth and Positioning: Place the bulbs with the pointed end facing upward.
5. Watering
- Initial Watering: Water the bulbs gently after planting to settle the soil.
- Ongoing Care: Water during dry spells, especially if the plants are young, but avoid waterlogging. Allow the soil to dry out between waterings.
6. Fertilization
- Balanced Fertilizer: Use a balanced, slow-release fertilizer in the spring when new growth appears.
- Avoid Excessive Nitrogen: Too much nitrogen can lead to foliage growth at the expense of flowering.
7. Maintenance
- Mulching: Apply a layer of mulch to conserve moisture, suppress weeds, and maintain a consistent soil temperature.
- Deadheading: Remove spent flowers after blooming to encourage bulb energy conservation for next year’s growth.
8. Pest and Disease Management
- Watch for common pests like aphids or diseases like bulb rot. Ensure good air circulation and avoid overcrowding to reduce risks.
9. Post-Bloom Care
- Allow the foliage to die back naturally after flowering, as this will help the bulb store energy for the next growing season.
10. Dividing Bulbs
- Every few years, you may divide the bulbs to prevent overcrowding and promote healthier growth. Do this in late summer or early fall when the foliage has died back.
By following these guidelines, you can effectively cultivate Narcissus cavanillesii in your garden. Happy gardening!

Place in a bright room that is sun drenched almost all day. Or directly in a south-facing window.

The most effective method for watering this plant involves using a deep watering technique. This means that you should water the base of the plant, allowing the water to soak down to the roots, rather than simply watering the surface. To do this, slowly apply water at the base of the plant until you see it start to soak in. Wait a few minutes and repeat the process until the soil is moist to a depth of at least 6 inches.
It's important not to overwater this plant. It prefers well-draining soil and can be susceptible to root rot if the soil is too wet for long periods of time. Allow the soil to dry out somewhat between waterings, but don't let it completely dry out.
If you're growing this plant in a container, ensure that the pot has drainage holes and that excess water can drain away. Water the plant from the top until water starts to drain out the bottom of the pot.
If you're growing this plant in a hot, dry climate, it may need more frequent watering. Use your judgement and adjust your watering schedule as needed based on the conditions of your environment.
Fertilizing instructions for Narcissus Cavanillesii are as follows:
- Timing: Fertilize during the growing season, typically in early spring as the plant begins to emerge from dormancy. You may also apply a light feed after the flowers have bloomed to support the next growth phase.
- Type of Fertilizer: Use a balanced, slow-release fertilizer with equal parts nitrogen, phosphorus, and potassium (e.g., 10-10-10 or similar). Alternatively, a fertilizer specifically formulated for bulb plants can be beneficial.
- Application Rate: Follow the instructions on the fertilizer label for the application rate. Generally, a rate of about 1 tablespoon per square foot is appropriate for most garden settings.
- Method: Apply the fertilizer evenly around the base of the plant. Avoid direct contact with the bulbs to prevent burning.
- Watering: After applying the fertilizer, water the area thoroughly to help dissolve the nutrients and facilitate absorption into the soil.
- Frequency: Depending on the soil quality and growth, you may fertilize once in the spring and again after flowering. Avoid excessive fertilization, as this can lead to weak growth.
- Soil Testing: It can be beneficial to conduct a soil test before fertilizing to determine existing nutrient levels and pH, which can guide appropriate fertilization practices.
By following these guidelines, you can provide the necessary nutrients to support the healthy growth and flowering of Narcissus Cavanillesii.
For the Narcissus Cavanillesii plant, it is recommended to use a well-draining soil that is moist but not waterlogged. The soil should be rich in organic matter and have a slightly acidic to neutral pH level. It is important to use soil that is free from contamination and pests, as the Narcissus Cavanillesii plant can be sensitive to these factors. Soil that is too compact or heavy may inhibit proper root growth and development, so adding some sand or perlite to improve soil drainage may be beneficial. Overall, choosing the right soil is crucial for the growth and health of the Narcissus Cavanillesii plant.
To propagate Narcissus cavanillesii, you can use several methods, primarily through bulbs and seeds. Here’s a detailed guide for each method:
Bulb Division
- Timing: The best time to propagate through bulbs is in late summer or early fall after the foliage has died back, which allows the bulbs to store energy for the next growing season.
- Harvesting Bulbs:
- Carefully dig up the bulbs using a garden fork or spade, taking care not to damage them.
- Shake off excess soil to expose the bulbs.
- Carefully dig up the bulbs using a garden fork or spade, taking care not to damage them.
- Division:
- Inspect the bulbs for offsets (smaller bulbs that have formed around the main bulb).
- Gently separate the offsets from the main bulb, ensuring each offset has some roots attached.
- Inspect the bulbs for offsets (smaller bulbs that have formed around the main bulb).
- Preparation:
- Allow the harvested bulbs and offsets to dry in a cool, shady place for a few days. This helps heal any wounds and prevents rot during storage.
- Allow the harvested bulbs and offsets to dry in a cool, shady place for a few days. This helps heal any wounds and prevents rot during storage.
- Planting:
- Choose a well-draining location in your garden, preferably in full sun.
- Plant the bulbs about 4-6 inches deep and ensure that the pointed end is facing upward.
- Space the bulbs 6-8 inches apart to allow for growth.
Seed Propagation
- Choose a well-draining location in your garden, preferably in full sun.
- Seed Collection:
- After flowering, allow the seed capsules to mature fully on the plant. Wait until they turn brown and dry out.
- Carefully collect seeds from the dried capsules.
- After flowering, allow the seed capsules to mature fully on the plant. Wait until they turn brown and dry out.
- Preparing for Sowing:
- Seeds can be sown immediately or stored in a cool, dry place until the following spring.
- If sowing immediately, lightly scarify the seeds to encourage germination.
- Seeds can be sown immediately or stored in a cool, dry place until the following spring.
- Sowing Seeds:
- Fill seed trays or pots with a well-draining potting mix.
- Scatter the seeds on the surface and lightly cover them with soil (about ¼ inch deep).
- Fill seed trays or pots with a well-draining potting mix.
- Watering and Care:
- Water the seeds gently using a spray bottle to avoid displacing them.
- Keep the soil consistently moist but not soggy.
- Place the trays in a warm location with indirect sunlight.
- Water the seeds gently using a spray bottle to avoid displacing them.
- Germination:
- Seeds may take several weeks to germinate, so be patient and ensure the conditions remain stable.
- Once the seedlings have grown enough to handle, you can transplant them into individual pots or directly into the garden, usually after a year.
General Care Post-Propagation
- Seeds may take several weeks to germinate, so be patient and ensure the conditions remain stable.
- Watering: Water the newly planted bulbs and seedlings until they establish roots. Once established, they are relatively drought-tolerant.
- Fertilizing: Apply a balanced fertilizer in early spring as the foliage begins to emerge to promote healthy growth.
- Pests and Diseases: Monitor for any signs of pests or disease and take appropriate measures, such as removing affected plants or applying organic pest control methods if necessary.
With proper care, both methods of propagation can yield healthy plants that will flourish in your garden.


