Plant Overview
Often called Love-in-a-Mist, this Mediterranean native looks like a delicate cluster of stars floating in a soft, green cloud. It has been a cottage garden favorite for centuries, prized for its ethereal blue flowers and Victorian-era charm. Interestingly, once the petals fall, the plant takes on its darker nickname, "Devil-in-a-Bush," as its striking, horned seed pods take center stage.
🔍 How to Identify
- 🌸 The Bloom: Jewel-toned flowers (usually sky blue, but also white or pink) are nestled inside a "mist" of fine, thread-like green bracts.
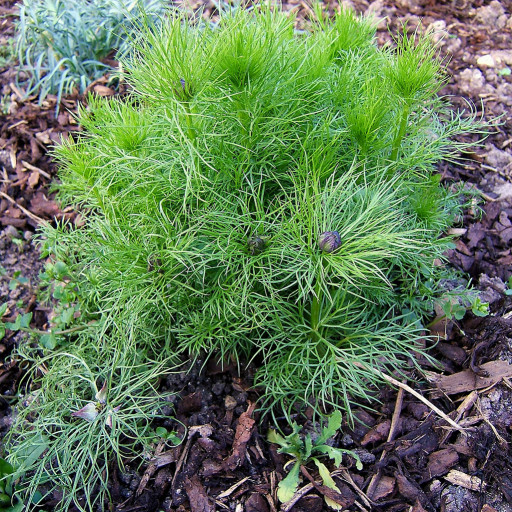
- 🌿 The Foliage: Wispy, lace-like leaves that resemble fennel or dill, giving the entire plant an airy, light-as-air texture.
- 🎈 The Pods: After flowering, the plant develops large, balloon-shaped seed capsules with purple stripes and tiny "horns" protruding from the top.
🏡 In Your Garden
- 🌱 Root Sensitivity: This plant grows a deep taproot very quickly, which means it hates being moved. It is best to sow seeds directly into the garden soil rather than starting them in pots.
- ⏳ The Successive Secret: The blooming period is relatively short. To keep the "mist" in your garden all summer, sow a new batch of seeds every two to three weeks during the spring.
- 🌬️ Natural Resilience: It is a prolific self-seeder. If you leave the dried pods on the stems, they will crack open in the wind and plant next year's garden for you automatically.
⚠️ Safety & Toxicity
- 🐾 Mildly Toxic: The plant contains certain alkaloids that can cause digestive upset if eaten. It is best to keep it away from curious pets like cats and dogs who enjoy chewing on wispy greenery.
- 👶 Skin & Stomach: While not life-threatening, ingesting the seeds or foliage can lead to nausea in humans. Some gardeners with sensitive skin may also experience mild irritation when handling the sap.
✨ Fun Fact
- 📜 The Language of Flowers: In the Victorian era, giving someone a sprig of Nigella symbolized "Perplexity." Because the flower is so deeply shrouded in its feathery greenery, it was seen as a plant that was "hiding" its true heart from the world.

Detailed Care Instructions
| Color | Blue, Purple, Pink, White |
| Soil Ph | 6.6-7.5 |
| Toxicity | Non-Toxic |
| Soil Type | Average, Well-Drained Soil |
| Bloom Time | Late Spring To Fall |
| Plant Type | Annual Flowering Plant |
| Mature Size | 8 To 20 Inches Tall, 3 To 6 Inches Wide |
| Native Area | Southern Europe, North Africa, Southwest Asia |
| Sun Exposure | Full Sun, Partial Shade |
| Hardiness Zones | 2-11 |
To grow Nigella Damascena, also known as love-in-a-mist, you can follow these steps:
- Choose a suitable location: Nigella Damascena plants prefer full sun, so select an area in your garden that receives at least 6 hours of direct sunlight per day. The soil should be well-draining and moderately fertile.
- Prepare the soil: Clear any weeds or debris from the area. Loosen the soil using a garden fork or tiller to a depth of around 8-10 inches. Add compost or organic matter to improve the soil structure and fertility.
- Sow the seeds: Nigella Damascena seeds can be sown directly in the garden bed. Scatter the seeds on the prepared soil and lightly press them into the soil surface. Space them around 6-8 inches apart.
- Water properly: After sowing the seeds, water the area gently to ensure that the soil is evenly moist. Avoid overwatering, as Nigella Damascena prefers drier conditions once established.
- Thin the seedlings: When the seedlings emerge, thin them out to provide enough space for proper growth. It is recommended to leave one healthy seedling every 6-8 inches.
- Mulch and weed control: Apply a layer of organic mulch around the base of the plants to conserve moisture, suppress weed growth, and maintain a more even soil temperature.
- Provide support (optional): Nigella Damascena plants are generally self-supporting, but if your location experiences strong winds, you may want to provide support by inserting small stakes or using plant rings around them.
- Care and maintenance: Once established, Nigella Damascena requires minimal care. Keep the soil slightly moist but avoid overwatering. Remove any weeds that compete for nutrients and space. Deadhead faded flowers to encourage continuous blooming.
- Harvest seeds (optional): If you wish to collect seeds for future planting, wait until the seed pods turn brown and start to dry on the plants. Cut the entire seed head and place it in a paper bag. Leave it in a cool, dry place for a few weeks until the seeds naturally release from the pods.
By following these steps, you can successfully grow Nigella Damascena plants and enjoy their unique flowers in your garden. Happy gardening!

Place in a window with dappled sun or a spot in the middle of a room. Or directly in a window facing west or east.

To properly water this specific plant, it is important to first check the moisture level in the soil. One way to do this is by sticking a finger about an inch into the soil to feel for any dryness or wetness.
If the soil feels dry, it is time to water the plant. It is recommended to provide a deep watering, ensuring that the soil is moistened all the way down to the roots. Be careful not to over water the plant as this can lead to root rot.
It is also important to avoid getting water on the leaves as this can cause the plant to develop diseases. It is best to water at the base of the plant, either with a watering can or a drip irrigation system.
Lastly, it is important to only water when needed, as over-watering can cause harm to the plant. It may be beneficial to create a watering schedule to ensure that the plant receives the right amount of water at the right time.
For optimal growth, it is recommended to fertilize this plant with a balanced fertilizer once a month during its growing season. Be sure to dilute the fertilizer according to the package instructions to prevent burning the roots. Additionally, incorporating organic matter into the soil can also help to provide nutrients to the plant. Avoid fertilizing during periods of drought or when the plant is experiencing stress.
The best soil to use for this particular plant is one that is well-draining with a neutral to slightly alkaline pH. It should also be rich in organic matter and contain adequate levels of nitrogen, phosphorus, and potassium. A combination of compost, peat moss, and sand can be added to the soil to create a nutrient-rich and well-draining blend. It is important to ensure that the soil is moist but not overly saturated to avoid root rot or other fungal diseases. Regular fertilization with a balanced fertilizer can also help promote healthy growth and blooming.
To propagate this plant, first collect the seeds from the mature plant. Prepare a seedbed in a well-draining, fertile soil mix. Sow the seeds on the surface and sprinkle a thin layer of soil over them. Keep the soil moist and place the seedbed in a location where it will receive indirect sunlight. The seeds should germinate in approximately one to two weeks.
As the seedlings grow, thin them out to allow for healthy spacing. When the plants are several inches tall, they can be transplanted to their permanent location in the garden. Ensure that the soil is well-draining and fertile for the best growth.
Alternatively, this plant can also be propagated through root division. This involves carefully digging up an established clump of the plant and separating it into several smaller sections, each with their own roots and shoots. These new sections can then be replanted in their own location. Ensure that the soil around the root ball is kept moist during the transplant process to minimize plant shock.
Common pests of the love-in-a-mist include Spider mites, aphids, thrips, whiteflies. Make a habit of checking your love-in-a-mist frequently for pests so that any infestations can be caught and managed early.


