Plant Overview
Known as the Morning Iris, this Australian beauty is a master of the "short and sweet" strategy. Its sky-blue blossoms are early risers, opening at dawn to greet the sun and fading by the afternoon, only to be replaced by a fresh batch the following morning. It is a favorite for coastal gardens where its grass-like foliage provides year-round structure.
🔍 How to Identify
- 🌸 The Bloom: Soft, five-petaled flowers in shades of lavender-mauve or striking sky-blue, appearing on rigid, upright stalks.
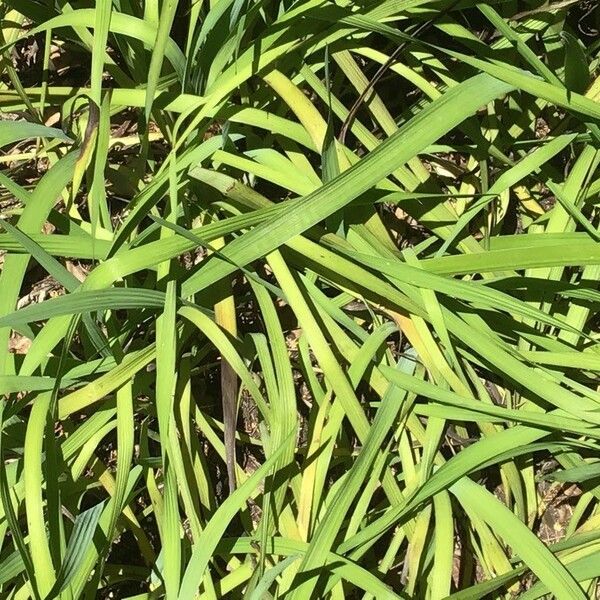
- 🍃 The Foliage: Dense, clumping fans of narrow, sword-shaped leaves that resemble ornamental grass or a miniature flax.
- 📏 The Habit: Grows in neat, fountain-like tufts, usually reaching about 20 to 30 inches in height when in full flower.
🏡 In Your Garden
- 🌱 Coastal Toughness: This plant is incredibly salt-tolerant and wind-resistant, making it a "set-and-forget" choice for seaside landscapes or rocky slopes.
- ☀️ The Light Dance: While it loves the sun, in very hot inland climates, it appreciates a bit of afternoon dappled shade to keep its delicate petals from scorching.
- 💧 Soil Nuance: It demands excellent drainage. If its "feet" stay wet in heavy clay, the rhizomes are prone to rot; planting it on a slight mound or in sandy soil is the secret to success.
⚠️ Safety & Toxicity
- 🟢 Status: Generally considered low-risk and non-toxic.
- 🐾 Details: While not known to be deadly, like many members of the Iris family, the rhizomes (roots) can cause mild stomach upset if ingested by curious pets or toddlers. It is best treated as an ornamental rather than an edible plant.
✨ Fun Fact
The name Orthrosanthus comes from the Greek words orthros (morning) and anthos (flower). True to its name, on a cloudy day, the flowers may refuse to open at all, waiting for the perfect morning light to reveal their color!

Detailed Care Instructions
To grow Orthrosanthus multiflorus, also known as Morning Iris, follow these steps:
- Choosing the right location: Select a spot in your garden that receives full sun to light shade. Morning Iris plants prefer well-draining soil and can tolerate a range of soil types, including sandy, loamy, or clay soils.
- Planting: Dig a hole that is slightly larger than the root ball of the plant. Place the plant in the hole and backfill with soil, gently tamping it down around the roots. Make sure the crown of the plant is level with or slightly above the soil surface.
- Watering: Water the plant deeply after planting to settle the soil and help establish the roots. Morning Iris plants require regular watering, especially during the dry periods, but they dislike waterlogged soil. Provide enough water to keep the soil moist but not saturated.
- Mulching: Apply a layer of organic mulch around the plant to help retain moisture, suppress weeds, and regulate soil temperature. Leave a small gap between the plant's stem and the mulch to prevent rot.
- Fertilizing: Apply a balanced, slow-release fertilizer in early spring when new growth emerges. Follow the instructions on the fertilizer package for the proper dosage based on your plant's size.
- Pruning: Trim off any dead or damaged leaves and flowers throughout the growing season to maintain the plant's appearance. After the flowering season, cut back the spent flower stems to promote new growth.
- Protecting from frost: Morning Iris plants are generally hardy but can be damaged by severe frost. Protect them by covering them with a frost cloth or bringing potted plants indoors during extreme cold spells.
- Propagation: If desired, multiply your Morning Iris plants by division. Lift the plant in early spring or fall, separate the clumps into individual plants, and replant them.
- Pest and disease control: Monitor the plant regularly for pests such as aphids or snails. Use organic pest control methods or insecticidal soaps if necessary. Morning Iris is generally resilient against diseases but may occasionally face issues like root rot due to overwatering or poor drainage.
With proper care and attention to the plant's needs, your Orthrosanthus multiflorus should thrive and produce beautiful flowers year after year.

Place in a bright room that is sun drenched almost all day. Or directly in a south-facing window.

Orthrosanthus Multiflorus plant requires frequent watering to keep its soil moist, but not waterlogged. It is important to water the plant deeply so that the water reaches the roots and promotes healthy growth. Watering should be done early in the morning or late in the evening to avoid evaporation and to prevent the plant from being scorched by the sun. The plant should be watered more often during hot and dry weather, and less during cooler and wetter periods. Avoid getting water on the leaves or flowers as this can cause fungal diseases. Use a watering can or a hose with a soft spray nozzle and gently water around the base of the plant.
To fertilize the Orthrosanthus Multiflorus plant, you can follow these instructions:
- Select a balanced, slow-release fertilizer with an N-P-K ratio of 10-10-10 or similar. This ratio represents the percentage of nitrogen (N), phosphorus (P), and potassium (K) in the fertilizer.
- Apply the fertilizer during the growing season, which is usually in spring or early summer. Avoid fertilizing during the dormant winter period.
- Water the plant thoroughly before applying fertilizer to moisten the soil.
- Sprinkle the fertilizer evenly around the base of the plant, following the recommended dosage provided on the fertilizer packaging. Avoid direct contact with the plant stems or leaves.
- Use a garden fork or a hand cultivator to lightly mix the fertilizer into the top layer of soil to help it reach the plant's roots. Be careful not to damage the plant's shallow roots.
- Water the plant again after fertilizing to ensure the nutrients are properly absorbed into the soil.
- Repeat the fertilization process every 4-6 weeks during the growing season, or as instructed by the fertilizer manufacturer.
Remember, it is essential to read the specific instructions on the fertilizer packaging and adjust the dosage and frequency based on the plant's individual needs and the manufacturer's recommendations.
Orthrosanthus Multiflorus is a plant that requires a well-draining soil. It prefers a soil that is slightly acidic to neutral and can tolerate a range of soil types, including sandy or loamy soils. Organic matter, such as compost or peat, can be mixed into the soil to improve its nutrient content and water-holding capacity.
When planting Orthrosanthus Multiflorus, the soil should be loosened and any weeds or debris removed. The plant should be placed in the soil so that the top of the root ball is level with the soil surface. After planting, the soil should be gently pressed down around the plant to ensure good contact.
To maintain healthy growth and flowering, Orthrosanthus Multiflorus should be fertilized regularly with a balanced, water-soluble fertilizer. It should also be watered deeply and infrequently, allowing the soil to dry slightly between waterings. Overwatering can cause root rot and other problems, so it is important to monitor soil moisture levels carefully.
Overall, Orthrosanthus Multiflorus is an easy-to-grow plant that can thrive in a variety of soil types. With proper planting and care, it can provide year-round beauty in the garden.
Orthrosanthus Multiflorus is a perennial plant that is commonly propagated through division or seed propagation. Here are the details on how to propagate this plant without using its common names:
- Division:
a. Choose a mature Orthrosanthus Multiflorus plant that has been growing for at least two to three years.
b. Carefully dig around the base of the plant to expose the roots.
c. Gently separate the plant into smaller clumps, ensuring each clump has strong roots and shoots.
d. Replant the clumps in prepared soil or pots, making sure they are at the same depth as they were initially grown.
e. Water the newly divided plants thoroughly and provide proper care until they establish themselves.
- Seed Propagation:
a. Collect ripe seed pods from a healthy Orthrosanthus Multiflorus plant. These seed pods are usually brown and dry when mature.
b. Carefully remove the seeds from the pods, taking care to avoid damaging them.
c. Prepare a seed starting mix by combining equal parts sterile potting soil and perlite or vermiculite.
d. Fill seed trays, pots, or seedling trays with the seed starting mix, leaving a 1/4 inch (0.6 cm) space at the top.
e. Plant the seeds on the surface of the soil, lightly pressing them down to ensure good seed-to-soil contact.
f. Cover the seeds with a thin layer of the seed starting mix. The depth should be no more than twice the thickness of the seed.
g. Moisten the soil using a spray bottle or a light misting to avoid displacing the seeds.
h. Place the trays or pots in a warm (around 70°F or 21°C), well-lit area, preferably under grow lights or near a sunny window.
i. Keep the soil consistently moist, but not waterlogged, by misting it regularly or covering the containers with a clear plastic dome to maintain humidity.
j. Germination can take anywhere from two to six weeks. Once the seedlings are large enough to handle, separate them into individual pots or trays with proper spacing.
k. Continue to provide adequate light, water, and care as the seedlings grow.
l. After the last frost, when the seedlings have reached a suitable size, they can be transplanted into their permanent location in well-draining soil.
Note: Although Orthrosanthus Multiflorus may have different common names depending on the region or language, the propagation methods remain the same.


