Plant Overview
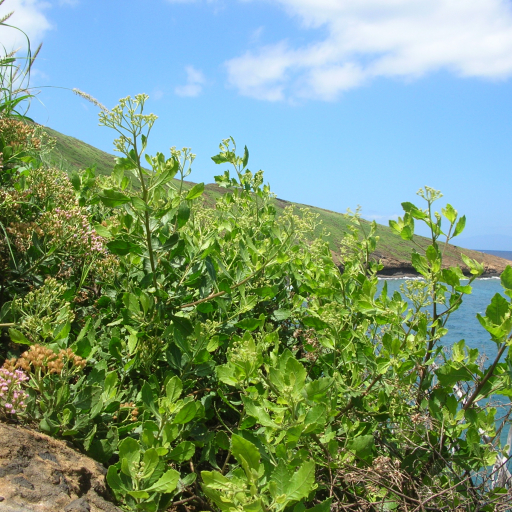
Often called the Indian Camphorweed or Indian Fleabane, this hardy perennial shrub is a master of the marshes. Native to the coastal regions of Southeast Asia and Northern Australia, it is famously resilient, often found thriving in salty soils where other plants wither. In many cultures, it is a dual-purpose resident, serving as both a protective coastal hedge and a staple in traditional herbal medicine.
🔍 How to Identify
- 🍃 The Leaves: Look for bright green, oval-shaped leaves with distinct "toothed" or serrated edges. They are slightly hairy and feel somewhat leathery to the touch.
- 🌸 The Blooms: It produces small, terminal clusters of fluffy, tubular flowers. These range in color from a soft lavender to a pale pinkish-mauve, appearing almost like tiny pom-poms.
- 👃 The Scent: One of the easiest ways to identify this plant is to crush a leaf; it releases a pungent, herbal aroma that many compare to camphor or medicinal tea.
🏡 In Your Garden
- 💧 Water & Soil Nuance: Because this plant naturally inhabits salt marshes and mangrove edges, it is incredibly "thirsty" and salt-tolerant. It is an excellent choice for low-lying areas of a garden that remain damp or for coastal properties facing salty sea breezes.
- ✂️ Growth Habit: Pluchea indica is a fast grower and can become quite "leggy" or spindly if left to its own devices. To keep it looking like a lush garden shrub rather than a wild weed, regular pruning is necessary to encourage a bushier, denser shape.
⚠️ Safety & Toxicity
- ✅ Status: Generally considered non-toxic to humans and frequently used in Southeast Asian cuisine and traditional teas.
- 🐾 Pets & Kids: While not listed as a primary toxic plant, the high concentration of essential oils (which give it that camphor smell) can cause mild digestive upset in curious cats or dogs if eaten in large quantities. As always, keep an eye on pets that like to "sample" the greenery.
✨ Fun Fact
In parts of Thailand and Indonesia, Pluchea indica is known as a "living deodorant." The leaves are often eaten raw in salads or steamed because they are traditionally believed to help reduce body odor from the inside out!

Detailed Care Instructions
Growing Pluchea Indica (also known as Indian Fleabane) can be a rewarding experience. Here are some guidelines to help you grow this plant successfully:
- Climate and Sunlight: Pluchea Indica thrives in warm, tropical, and subtropical climates. It prefers full sun but can tolerate partial shade. Ensure it receives at least 6-8 hours of direct sunlight per day.
- Soil: The plant prefers well-draining soil. It can tolerate a wide range of soil types but prefers slightly acidic to neutral soil pH (around 6.0-7.0). Prepare the soil by adding organic matter like compost, as it helps improve drainage and fertility.
- Watering: Pluchea Indica requires regular watering, especially during dry spells. Water the plant deeply, allowing the soil to dry slightly between waterings. However, avoid overwatering, as it can lead to root rot.
- Fertilizer: Feed your Pluchea Indica plants with a balanced, slow-release fertilizer during the growing season. Follow the instructions on the packaging for the appropriate dosage and frequency. Avoid over-fertilizing, as it can negatively impact the plant's health.
- Propagation: Pluchea Indica can be propagated from seeds or cuttings. Collect seeds from mature plants and sow them in seed-starting trays filled with seed-starting mix. Ensure the trays are kept moist until the seeds germinate. For cuttings, take stem cuttings from healthy plants, dip them in rooting hormone, and place them in a well-draining potting mix. Keep the soil consistently moist until roots develop.
- Pruning and Maintenance: Regular pruning helps maintain a compact and bushy shape for Pluchea Indica. Trim back any dead or damaged branches and shape the plant as desired. Remove spent flowers to encourage new blooms and prevent self-seeding.
- Pests and Diseases: Pluchea Indica is relatively resistant to pests and diseases. However, keep an eye out for common garden pests like aphids, whiteflies, and spider mites. Treat infestations using organic insecticides or by blasting the bugs off with a strong stream of water.
- Harvesting and Usage: Pluchea Indica leaves and flowers have medicinal properties and are used in traditional herbal remedies. Harvest leaves and flowers when they are young and tender. Allow them to dry before storing or grinding for use.
Remember to research and follow any specific requirements or conditions for Pluchea Indica in your particular region or climate. Enjoy the process of growing this versatile and useful plant!

Place in a bright room that is sun drenched almost all day. Or directly in a south-facing window.

To water this specific plant, you should first check the soil moisture level by either inserting your finger into the soil or using a moisture meter. If the soil is dry, water the plant thoroughly until the water runs out from the drainage holes. It is important to avoid letting the plant sit in standing water, as this can lead to root rot. Allow the soil to dry out slightly before watering again, as overwatering can also harm the plant. It is best to water the plant in the morning or evening when it is cooler and less likely to evaporate quickly. Additionally, using slightly warm water can help prevent shock to the plant's roots.
To fertilize the Pluchea Indica plant, apply a balanced fertilizer with a 10-10-10 NPK ratio during the growing season. Use a slow-release granular fertilizer or diluted liquid fertilizer every two weeks. Avoid over-fertilizing as it can result in weak and leggy growth. Water the plant thoroughly after fertilizing to prevent nutrient burn.
The Pluchea Indica plant prefers well-draining soil with good moisture retention. The soil should be rich in organic matter and slightly acidic with a pH level between 5.5 and 6.5. A soil mix that is one part garden soil, one part peat moss or coco coir, and one part perlite or coarse sand is a suitable option for this plant. It is important to ensure that the soil is kept constantly moist but not waterlogged, as this can lead to root rot and other issues. Additionally, fertilizing the plant with a balanced fertilizer every two to three months can help maintain the health of the plant's soil.
Pluchea Indica can be propagated easily through stem cuttings. To propagate, select a healthy stem part from the plant, preferably from its top part which has leaf nodes. Cut the stem with a sharp and sterilized garden shears or knife, making sure it's around 4-6 inches long.
Remove the leaves from the lower half of the cutting, leaving 3-4 leaves at the top part. Dip the cut end of the stem into a rooting hormone powder. Rooting hormone powder or gel helps the stem to establish new roots.
Prepare the soil for the cutting by mixing sand and peat moss in equal quantities to create a well-draining and moist soil mixture. The soil should be slightly acidic in pH.
Make a small hole in the soil with a stick or finger and insert the prepared stem cutting into the hole, pressing the soil gently around it.
Water the cutting gently, ensuring that the soil is moist but not soggy. Place the pot in a bright and warm but filtered light area, avoiding direct sunlight. Cover the pot with a plastic sheet or a plastic bag to retain moisture and humidity around the cutting.
After two to three weeks, remove the plastic sheet or bag from the top of the pot and check for the presence of new leaves and roots. Once the cutting has established new roots and growth, transplant it to a larger pot or into an outdoor garden bed.


