Plant Overview
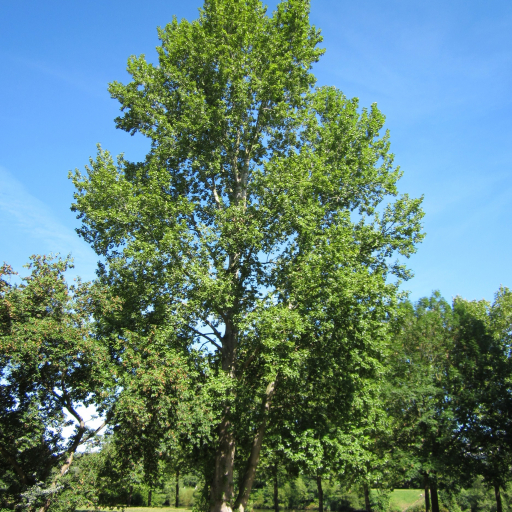
The Grey Poplar is a majestic natural hybrid, born from a wild romance between the ghostly White Poplar (Populus alba) and the trembling Aspen (Populus tremula). Often referred to as "The Silver Shadow," this tree is prized for its rapid growth and the shimmering, bi-colored effect its foliage creates when caught in a summer breeze.
🔍 How to Identify
- 🍃 Bi-colored Foliage: The most striking feature is the leaves; the tops are a dark, glossy green, while the undersides are coated in a soft, felt-like greyish-white down.
- 💎 Diamond Bark: The trunk starts smooth and pale grey, but as it ages, it develops distinctive dark, diamond-shaped pits (lenticels) that eventually turn into deep, blackish fissures at the base.
- 🌱 Variable Leaves: You will see two types of leaves on one tree—broad, lobed leaves on the vigorous young suckers and more rounded, "aspen-like" leaves on the older branches.
🏡 In Your Garden
- 🌊 Water Seeker: This tree has a "thirst" that is hard to quench. It thrives in damp, heavy soils and is excellent for stabilizing riverbanks or boggy areas where other trees might drown.
- 🏗️ Space Requirement: The Grey Poplar is not for the small suburban plot. It produces aggressive "suckers" (mini-trees growing from the roots) and has an expansive root system that can easily interfere with pipes, sidewalks, or foundations if planted too close.
- 🌬️ Coastal Warrior: It is incredibly hardy against salt spray and high winds, making it a premier choice for creating privacy screens or windbreaks in coastal regions.
⚠️ Safety & Toxicity
- 🟢 General Safety: This tree is considered non-toxic to humans and common household pets like dogs and cats.
- 🌬️ Allergy Alert: In early spring, male trees produce long, drooping catkins that release significant amounts of pollen. If you suffer from severe hay fever, this might not be the neighbor you want.
- 🩹 Chemical Note: The bark contains salicin (a natural compound similar to aspirin). While not dangerous to touch, pets that make a habit of chewing on fallen branches may experience mild stomach upset.
✨ Fun Fact
The wood of the Grey Poplar is surprisingly resistant to fire and does not splinter easily. Because of these unique properties, it was historically the preferred material for weaving traditional fruit baskets and even for the flooring of high-end horse carriages!

Detailed Care Instructions
To grow Populus x Canescens (Grey Poplar), follow these steps:
- Choose a suitable location: Grey Poplars prefer full sun and well-drained soil. They can tolerate a wide range of soil types, including loam, clay, and sandy soil.
- Prepare the soil: Amend the soil with organic matter, such as compost, to improve drainage and fertility. Remove any weeds or grass from the planting area.
- Propagation: Grey Poplars can be propagated from cuttings or by planting saplings. If using cuttings, take 6-8 inch (15-20 cm) long pieces from the stem, remove the leaves from the lower part, and plant them in a pot or directly in the ground. Saplings can be purchased from nurseries or online.
- Planting: Dig a hole approximately twice the diameter and depth of the sapling's root ball. Place the sapling in the hole, fill it with soil, and gently firm it around the roots. Ensure that the plant is at the same depth it was in its container.
- Watering: After planting, water the sapling thoroughly and maintain a regular watering schedule during the growing season. Grey Poplars prefer moist soil but can tolerate periodic droughts once established.
- Mulching: Apply a layer of mulch around the base of the plant, leaving some space around the stem to prevent moisture buildup, which can cause rotting. Mulch helps retain moisture, suppress weeds, and regulate soil temperature.
- Pruning: Prune the tree in late winter or early spring to remove dead or damaged branches. Proper pruning helps maintain the shape of the Grey Poplar and promotes healthy growth.
- Fertilization: Grey Poplars generally do not require regular fertilization. However, if the soil is poor in nutrients, you can apply a slow-release balanced fertilizer in spring.
- Pests and diseases: Grey Poplars are generally resistant to many pests and diseases. However, they can occasionally be affected by leaf spot, canker, or aphids. Monitor your plant regularly and take appropriate action if any issues arise.
- Winter care: Grey Poplars are hardy trees and generally do not require special winter care. However, young saplings may benefit from winter protection, such as wrapping the trunk with burlap or providing them with a windbreak.
By following these steps, you can grow and enjoy your own Populus x Canescens plant.

Place in a bright room that is sun drenched almost all day. Or directly in a south-facing window.

To water this plant, it is important to first check the soil moisture level. One way to do this is to stick your finger into the soil up to the second knuckle and see if the soil feels dry. If it does, it is time to water the plant.
When watering, make sure to water the entire root ball thoroughly, allowing the water to soak into the soil. It is important to avoid getting water on the leaves as this can promote the growth of fungal diseases.
The frequency of watering will depend on various factors including the temperature, humidity, and soil type. As a general rule, this plant should be watered deeply once every week or two. However, during periods of hot weather or low humidity, it may need more frequent watering.
To fertilize this plant, you should apply a balanced fertilizer during the growing season, typically from spring to early fall. It is recommended to apply the fertilizer in four applications, spaced out every four to six weeks. Be careful not to apply too much fertilizer, as it can result in excessive growth and weaken the plant. Additionally, make sure to water the plant thoroughly after fertilizing to ensure proper nutrient absorption.
Populus x canescens plant requires a well-draining soil that has good moisture retention capabilities. It prefers a slightly acidic to neutral soil pH level, ranging from 5.5 to 7.5. The soil should be rich in organic matter and nutrients to support the growth and development of the plant. Sandy loam or loamy soil with a moderate to high fertility level is recommended for this plant. However, it can tolerate a wide range of soil types, including clay soils with good drainage. It is important to avoid waterlogged or compacted soils that can lead to root rot and other soil-borne diseases. Regular fertilization and mulching can help maintain the soil quality and promote healthy growth of Populus x canescens plant.
To propagate this plant, collect hardwood cuttings of approximately 12 inches in length from healthy, disease-free parent plants during the dormant season. Cut each stem just below a node and strip off the lower leaves, leaving two or three nodes exposed. Dip the cut end into a rooting hormone and insert it into a well-draining soil mix or sand, burying it up to the first node. Ensure that the cuttings are kept moist and in a warm, bright area, but out of direct sunlight. After several weeks, check for the development of roots by gently tugging on the cuttings. Once roots have formed, transplant the cuttings into individual pots or into the ground, taking care to protect young plants from extreme weather and pests.


