Plant Overview
Known as the Blackcap Raspberry or Whitebark Raspberry, this Western North American native is a showstopper in the wild and a hidden gem for foragers. Its scientific name, leucodermis, literally translates to "white skin," referring to the striking, ghostly white coating that covers its arching stems. While it may look like a common blackberry at first glance, its flavor is uniquely complex—often described as a mix of traditional raspberry with a deep, wine-like richness.
🔍 How to Identify
- 🌿 The "White Skin": The most distinct feature is the powdery, bluish-white waxy coating (called a glaucous bloom) on the canes, which can be rubbed off with your thumb.
- 🪝 Hooked Prickles: The stems are armed with stout, curved thorns that act like small hooks, helping the plant "climb" over other vegetation.
- 🍇 Hollow Fruit: Like all raspberries, the fruit pulls away from the central core (receptacle) when ripe, leaving a hollow center—hence the name "Blackcap."
🏡 In Your Garden
- 🏜️ Drought Resilience: Unlike many commercial raspberry varieties, the Blackcap is remarkably drought-tolerant once established. It thrives in well-drained soil and can handle the drier summers of the Pacific Northwest and mountain regions.
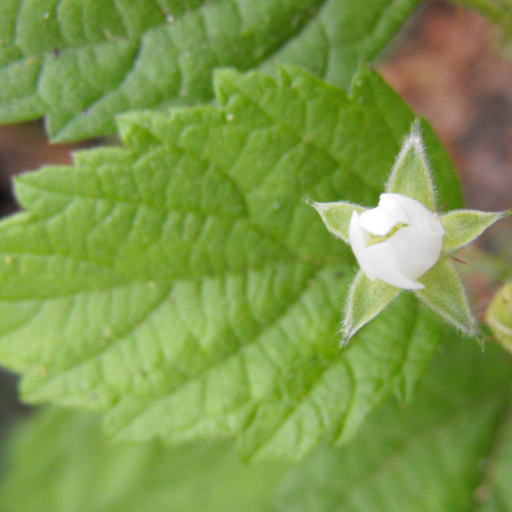
- 🦋 Wildlife Magnet: This plant is a cornerstone of the local ecosystem. Its early summer flowers provide nectar for native bees, while the dense, thorny thickets offer excellent nesting cover for small birds looking to hide from predators.
- ✂️ Tip-Rooting Habit: Be aware that this plant is a "walker." When the long, arching canes touch the ground, they will quickly sprout new roots, allowing the plant to spread across a garden bed if not pruned.
⚠️ Safety & Toxicity
- 🥣 Safe & Edible: The berries are non-toxic and highly prized for their intense flavor, often used in gourmet jams and syrups.
- 🧤 Physical Hazard: The primary danger is the thorns. They are sharp, hooked, and very effective at snagging skin or clothing. Always wear thick leather gloves when pruning or harvesting.
- 🐾 Pet Safety: The plant is considered non-toxic to dogs and cats, though the prickles can cause minor skin irritation or scratches if a curious pet tries to run through a patch.
✨ Fun Fact
The deep, concentrated pigment of the Blackcap Raspberry is so potent that it was historically used as a natural purple-blue dye for basketry and textiles. Even today, if you pick them with bare hands, your fingers will stay stained for hours!

Detailed Care Instructions
To grow Rubus Leucodermis plant, commonly known as whitebark raspberry, follow these steps:
- Climate and soil requirements: Whitebark raspberry thrives in moist and cool climates, typically found in mountainous areas. It prefers well-drained soil with a pH range of 5.5 to 6.5.
- Propagation methods: Whitebark raspberry can be grown from seeds, but it is easier to propagate through stem cuttings or root division.
- Stem cuttings: Take a healthy stem cutting about 6-8 inches long from an existing plant. Remove the lower leaves from the cutting and dip the cut end in rooting hormone. Plant the cutting in a pot with moist soil and place it in a partially shaded area. Keep the soil consistently moist until roots develop.
- Root division: Dig up an established whitebark raspberry plant during the dormant season. Divide the root ball into smaller clumps, each containing 2-3 healthy shoots. Replant the divisions in well-prepared soil, spacing them out adequately.
- Stem cuttings: Take a healthy stem cutting about 6-8 inches long from an existing plant. Remove the lower leaves from the cutting and dip the cut end in rooting hormone. Plant the cutting in a pot with moist soil and place it in a partially shaded area. Keep the soil consistently moist until roots develop.
- Planting:
- Select a sunny or partially shaded location for planting. Prepare the soil by removing weeds, loosening it, and incorporating organic matter.
- If planting multiple whitebark raspberry plants, space them 3-4 feet apart to allow for proper growth and air circulation.
- Dig a hole slightly larger than the root ball or division. Place the plant in the hole at the same depth it was previously growing.
- Backfill the hole with soil, gently firming it around the roots.
- Water the plant thoroughly after planting.
- Select a sunny or partially shaded location for planting. Prepare the soil by removing weeds, loosening it, and incorporating organic matter.
- Care and maintenance:
- Watering: Whitebark raspberry prefers consistent moisture. Keep the soil evenly moist but not waterlogged. Provide about 1-2 inches of water per week during dry periods.
- Mulching: Apply a layer of organic mulch around the base of the plant to help conserve moisture, suppress weeds, and regulate soil temperature.
- Fertilization: Whitebark raspberry generally does not require heavy fertilization, but applying a balanced organic fertilizer in early spring can promote healthy growth.
- Pruning: Prune the plant in early spring to remove any dead, damaged, or weak canes. Also, thin out congested growth and remove any suckers to maintain a manageable plant.
- Support: Depending on the variety and growth habit, whitebark raspberry may require trellising or support to prevent the canes from sprawling.
- Watering: Whitebark raspberry prefers consistent moisture. Keep the soil evenly moist but not waterlogged. Provide about 1-2 inches of water per week during dry periods.
- Harvesting: The berries typically ripen in late summer or early fall. Harvest the ripe berries by gently pulling them off the plant. They are typically white to pale amber in color and have a sweet, tangy flavor.
By following these guidelines, you can successfully grow Rubus Leucodermis and enjoy its delicious berries.

Place in a bright room that is sun drenched almost all day. Or directly in a south-facing window.

1. Identify the plant: Before watering the plant, it is important to identify the plant correctly. Observe the plant's appearance and characteristics to confirm its identity and ensure that you are taking care of the right plant.
2. Soil type: The soil type is an important factor in watering the plant. Rubus Leucodermis plants prefer well-draining soil that is not too dry or too moist. The ideal soil type should be rich in nutrients and have good water retention properties.
3. Watering frequency: The frequency of watering the Rubus Leucodermis plant depends on the climatic conditions, soil type, and the plant's growth stage. Generally, these plants require moderate watering during the growing season and less watering in winter.
4. Watering method: The plant should be watered at the base, avoiding getting water on the leaves and stem. This prevents the plant from standing in a pool of water. Depending on the soil type, watering can be done slowly or quickly to ensure that the plant receives enough water.
5. Watering amount: The amount of water required depends on the size of the plant and soil type. The plant should be watered enough to moisten the soil to a depth of about four inches. Avoid overwatering, as this can lead to root rot and other problems.
6. Rainfall: During rainy seasons, Rubus Leucodermis plants may not require frequent watering, as they receive moisture from the rain. However, it is important to ensure that the soil is not waterlogged.
7. Temperature: In hot weather, the plant may require more water than usual. It is essential to monitor the soil moisture levels closely, especially during periods of prolonged drought.
Overall, make sure to monitor the Rubus Leucodermis plant closely and adjust the watering schedule as necessary to ensure a healthy and thriving plant.
To fertilize this plant, apply an all-purpose balanced fertilizer in early spring before new growth emerges. Use a slow-release granular fertilizer and apply it according to the package instructions. You can also use a liquid fertilizer diluted in water and applied to the soil around the base of the plant. Avoid applying fertilizer too close to the stem or foliage of the plant, as this can damage the leaves or stems. Water the plant thoroughly after fertilizing. Repeat the fertilization process once or twice more during the growing season, spaced out by several weeks.
Rubus Leucodermis plant prefers well-draining soil that is rich in organic matter and slightly acidic. A mixture of loam, sand, and peat moss can be used to create the optimum soil conditions for this plant. It is important to ensure that the soil is moist but not waterlogged, as well-draining soil will prevent the roots from becoming waterlogged and rotting. A layer of organic mulch can be added to the top of the soil to help retain moisture and suppress weed growth. Additionally, fertilization should be done sparingly, as too much fertilizer can lead to the plant becoming weak and susceptible to diseases.
To propagate this plant, begin by taking a cutting from a healthy and mature stem. Use a sharp and clean pair of pruning shears to cut the stem at a 45-degree angle. The cutting should be at least 6 inches long and should have a few leaves attached to it.
Next, prepare a pot with well-draining soil. You can use a mixture of potting soil and perlite or sand to create a lightweight and aerated soil. Make a hole in the soil and insert the cutting, pressing the soil around it gently to hold it in place.
Water the cutting thoroughly and cover it with a plastic bag or a propagation dome to create a humid environment. Keep the pot in a warm and bright location, but avoid direct sunlight.
Check the soil regularly and water the cutting when it feels dry to the touch. After a few weeks, you should start to see new growth emerging from the cutting. At this point, you can remove the plastic bag or dome and begin to acclimate the plant to normal conditions.
Once the plant has outgrown the pot, you can transplant it into a larger container or into the ground, depending on your growing conditions. With proper care, your new plant should continue to grow and thrive.


