Plant Overview
Often called the "Jewel of the Windowsill," the African Violet (Saintpaulia) isn't actually a true violet at all. Discovered in the mist-shrouded cloud forests of Tanzania in 1892, these charming perennials have become a global favorite for their velvety texture and ability to bloom almost year-round. They are the quintessential "grandmother’s plant," carrying a legacy of nostalgia and delicate beauty.
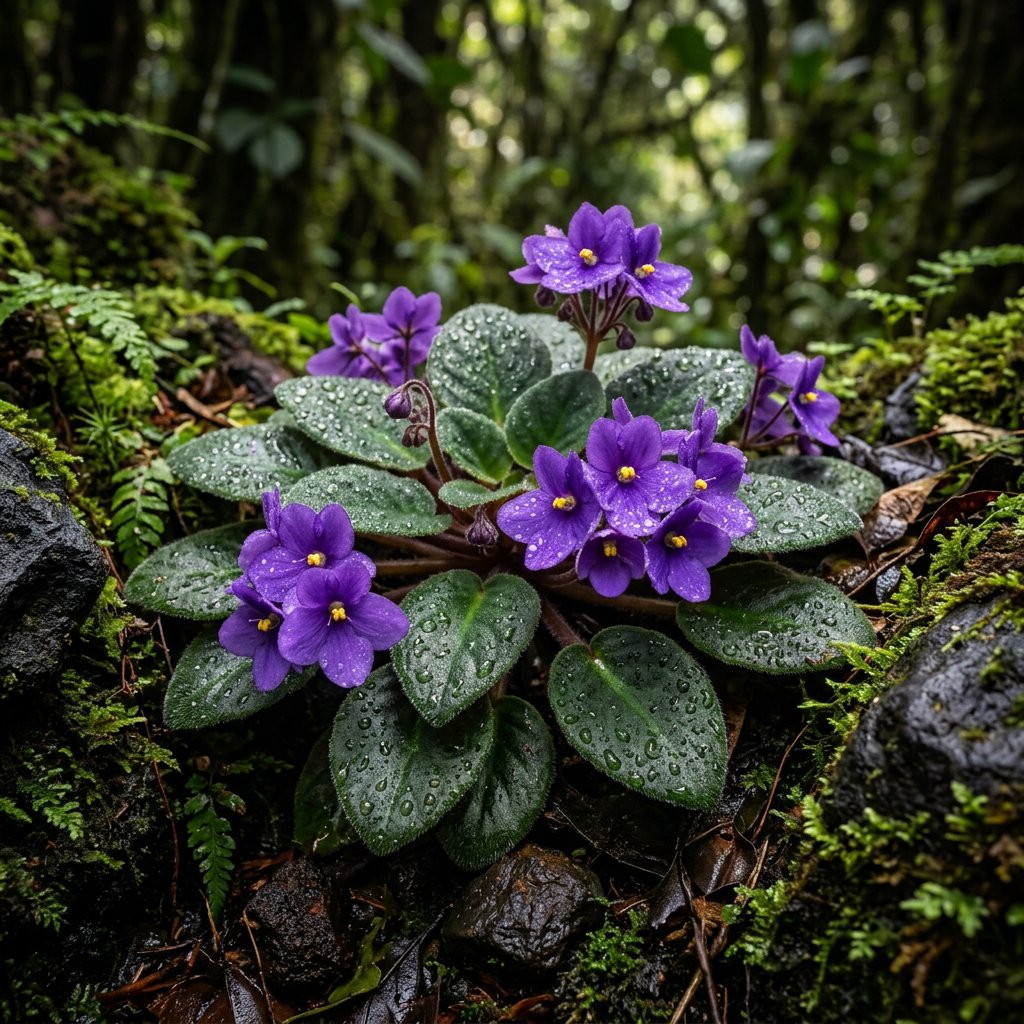
🔍 How to Identify
- 🍃 Fuzzy Foliage: The leaves are thick, fleshy, and covered in fine, soft hairs that give them a distinct suede-like appearance and texture.
- 🌸 Crowned Blooms: Flowers usually feature five petals with a cluster of bright yellow anthers in the center, appearing in shades of deep purple, blue, pink, and white.
- 🌀 Rosette Habit: The plant grows in a compact, symmetrical circle radiating from a central crown, rarely reaching more than 6 inches in height.
🏡 In Your Garden
- 💧 The "No-Splash" Rule: These plants are famously sensitive to water on their leaves, which can cause permanent brown spotting or "leaf scorch." Most enthusiasts prefer bottom-watering to keep the foliage dry.
- ☀️ Filtered Light Lovers: In their native habitat, they live under the canopy of trees. In your home, they thrive in bright, indirect light; too much direct sun will burn the leaves, while too little will prevent them from blooming.
- 🪴 Tight Quarters: Saintpaulia actually prefers to be slightly root-bound. Shifting them to a pot that is too large can lead to overwatering issues and a lack of flowers.
⚠️ Safety & Toxicity
- ✅ Non-Toxic Status: African Violets are widely recognized as safe and non-toxic to cats, dogs, and horses.
- 👶 Family Friendly: They are excellent "starter plants" for children’s bedrooms because they are harmless if nibbled, though the plant itself is quite fragile and easily bruised.
✨ Fun Fact
Despite their name and appearance, African Violets are more closely related to the Streptocarpus (Cape Primrose) than to the common garden violet (Viola). They were named after Baron Walter von Saint Paul-Illaire, who first sent their seeds back to Germany in the late 19th century.

Detailed Care Instructions
| Humidity | Normal |
| Lighting | Part Sun |
| Difficulty | Medium |
| Hibernation | Cold Period |
| Temperature | 18°C - 25°C |
| Hardiness Zones | Min 11A |
Here are some tips on how to grow Saintpaulia plant (African violet):
- Lighting: African violets prefer bright, indirect light. Place them near a north or east-facing window to ensure they receive enough light without direct sunlight, which can scorch their leaves.
- Temperature: Keep the temperature between 65-75°F (18-24°C). Avoid extreme temperature fluctuations, as this can negatively impact the plant's growth.
- Watering: Water the African violet from the bottom to prevent water from touching the leaves. Use room temperature water and allow the plant to soak up the water through the drainage holes for about 15-20 minutes. Empty any excess water from the saucer after watering.
- Humidity: African violets prefer higher humidity levels. You can increase humidity around the plant by placing it on a tray filled with water and pebbles or using a humidifier.
- Soil: Use a well-draining, soilless potting mix specifically formulated for African violets. Avoid regular garden soil as it may contain pests or pathogens.
- Fertilizer: Feed your African violet with a balanced, water-soluble fertilizer every 2-4 weeks during the growing season. Dilute the fertilizer according to the package instructions.
- Pruning: Remove any yellow or dead leaves to keep the plant healthy. Pinch off spent flowers to encourage more blooms.
- Repotting: African violets prefer slightly crowded roots. However, if your plant outgrows its container or becomes root-bound, repot it in a slightly larger pot using fresh soil.
- Pests and diseases: Monitor your African violet for common pests like aphids, mealybugs, or fungus gnats. If detected, treat them with appropriate organic or chemical solutions. Avoid overwatering to prevent root rot.
- Propagation: African violets can be propagated by leaf or stem cuttings. Choose a healthy leaf/stem and place it in a rooting hormone. Plant the cutting in a small pot with a mixture of perlite and peat moss. Keep the soil moist and place the cutting in a warm and bright location.
Remember, each African violet variety may have specific care requirements, so it's always good to research the type of Saintpaulia plant you have for more tailored care instructions.

Place in a window with dappled sun or a spot in the middle of a room. Or directly in a window facing west or east.

To water the plant, fill a small watering can with room temperature water. Slowly pour the water into the soil beneath the leaves of the plant, being careful not to get water on the leaves themselves. Allow the soil to absorb the water, and then discard any excess water in the saucer beneath the pot. Avoid overwatering the plant, as this can lead to root rot. Instead, wait until the top inch of soil feels dry to the touch before watering again. It is also important to provide adequate drainage for the plant, as standing water can cause damage to the roots.
For best results, fertilize your plant twice a month with a balanced fertilizer (with equal amounts of nitrogen, phosphorus, and potassium) specifically formulated for houseplants. Dilute the fertilizer according to instructions on the package, and apply it to moist soil around the base of the plant. Be sure not to over water, as excess water can lead to root rot.
For optimal growth and health of the plant commonly known as Saintpaulia, it is recommended to use a well-draining soil mix that is rich in organic matter. The soil should have a slightly acidic pH level, ideally between 5.5 and 6.5. It is important to select a soil that promotes good air circulation and water drainage to prevent root rot. The soil can be amended with perlite or sand to improve drainage. Additionally, adding a slow-release fertilizer to the soil can provide necessary nutrients for the plant's growth.
One way to propagate this plant is by taking stem cuttings. First, choose a healthy stem with at least two nodes and several leaves. Cut the stem just below a node using a sharp, clean pair of scissors. Remove the bottom set of leaves, leaving only a few at the top. Then, dip the cut end in rooting hormone powder and insert it into a pot filled with moist, well-draining soil. Cover the pot with a clear plastic bag and place it in a bright, warm spot with indirect sunlight. Keep the soil moist, but not waterlogged, and mist the cutting regularly to keep the humidity high. In a few weeks, the cutting should have rooted and started to grow new leaves. Gradually acclimate it to lower humidity and brighter light until it is established and can be grown as usual.


