Plant Overview
Known as the "Walking Sansevieria," this rare succulent looks more like a desert sculpture or an alien inhabitant than a typical houseplant. Originating from the arid Baringo District in Kenya, it has developed a fascinating survival strategy: it "walks" across the ground using stilt-like aerial roots to find better soil or shade. Its thick, architectural leaves and rugged nature make it a prized gem for collectors of unique flora.
🔍 How to Identify
- 🚶 The "Stilt" Roots: Unlike most plants that grow deep into the earth, this species produces thick, woody aerial roots that lift the main rosette off the ground, giving it its famous walking appearance.
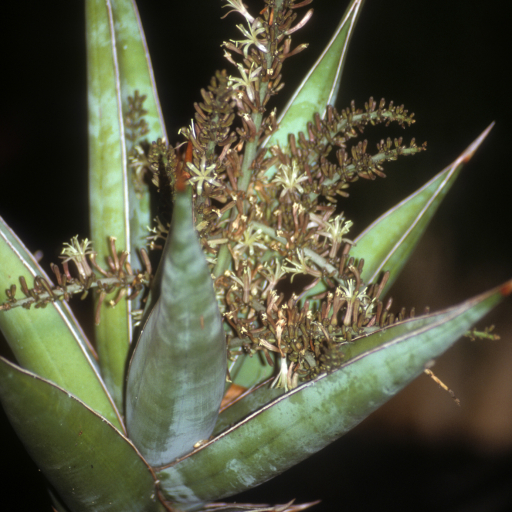
- 🗡️ Chubby Rosettes: The leaves are exceptionally thick, short, and concave, growing in a tight, symmetrical rosette pattern that stores water for long periods of drought.
- 🎨 Blue-Green Hue: The foliage has a distinct waxy, glaucous (blue-green) coating with a sharp, reddish-brown spine at the tip of every leaf.
🏡 In Your Garden
- 🏜️ Drainage is Vital: Because it naturally lives in rocky, dry environments, it hates "wet feet." Use a very gritty cactus mix or even pure pumice to ensure the roots never sit in stagnant water, which leads to immediate rot.
- ☀️ Light & Patience: While it can tolerate lower light, its iconic blue color and compact shape are best maintained in bright, indirect sunlight. Be prepared for a slow journey; this plant takes years to reach maturity, making every new leaf a cause for celebration.
⚠️ Safety & Toxicity
- 🐾 Mildly Toxic: Like most members of the Dracaena family (formerly Sansevieria), this plant contains saponins.
- 👄 The Risk: If ingested by cats or dogs, it can cause nausea, vomiting, or diarrhea. The sharp terminal spines on the leaves can also pose a physical poking hazard to curious toddlers or pets.
✨ Fun Fact
Despite its name, Sansevieria pinguicula is not carnivorous! It was named "pinguicula" because its thick, greasy-looking leaves closely resemble those of the Pinguicula genus of butterworts, though the two are not related at all.

Detailed Care Instructions
To grow a Sansevieria Pinguicula plant, also known as the "Shark's Fin" snake plant, follow these steps:
- Choose the right location: Sansevieria Pinguicula plants thrive in indirect bright light. Place it near a window where it can receive sufficient light without direct sunlight.
- Provide well-draining soil: Use a well-draining potting mix that is specifically formulated for succulent plants. This type of soil allows excess water to drain, preventing root rot.
- Watering: Water the plant deeply but infrequently. Allow the soil to dry out between waterings but avoid letting it become completely dry. Overwatering can be harmful to the plant, so it's better to underwater than overwater.
- Temperature and humidity: Sansevieria Pinguicula plants prefer average room temperatures around 65-80°F (18-27°C). They can tolerate lower temperatures to some extent but should be protected from freezing temperatures. These plants can adapt to different humidity levels, but average indoor humidity is usually sufficient for their growth.
- Fertilization: Sansevieria Pinguicula plants are not heavy feeders. Apply a balanced houseplant fertilizer at half the recommended strength once a month during the growing season (spring and summer). Do not fertilize during winter.
- Repotting: Repot the plant when it outgrows its current container or every couple of years. Use a slightly larger pot with fresh soil to provide more space for growth. Handle the plant with care as its leaves can be sharp.
- Propagation: You can propagate Sansevieria Pinguicula by division or leaf cuttings. To divide the plant, gently separate the offshoots from the mother plant and plant them in separate containers. For leaf cuttings, cut a healthy leaf into sections, and plant them in well-draining soil. After a few weeks, roots and new growth will develop.
- Pest control: Sansevieria plants are generally pest-resistant, but occasional infestations may occur. Inspect the plant regularly for pests such as mealybugs or spider mites. If any pests are found, treat them with an appropriate insecticidal soap or neem oil.
Remember to provide adequate care, monitor the plant closely, and adjust care practices as needed. With time and proper maintenance, your Sansevieria Pinguicula plant should grow and thrive.

Place in a window with dappled sun or a spot in the middle of a room. Or directly in a window facing west or east.

To water this plant, you should begin by feeling the soil to determine if it is dry. If the soil feels dry to the touch, it is safe to water. When watering, you want to ensure that the water penetrates the soil deeply. You do not want to just moisten the surface. It is important not to overwater this plant, so be sure to allow the soil to dry between waterings. Frequency of watering will depend on factors such as the size of the pot, humidity levels, and temperature of the room. It is best to water in the morning or early afternoon, so the plant has time to dry before nighttime.
To properly fertilize this plant, begin by selecting a balanced houseplant fertilizer. Mix this fertilizer according to the package instructions, being careful not to make it too strong. Once mixed, pour the fertilizer mix into a watering can and prepare to water the plant.
Water the plant as you normally would, being sure to evenly distribute the fertilizer mix throughout the soil. This may require that you pour the mixture into the soil around the edges of the pot, allowing it to seep in slowly, rather than directly onto the leaves of the plant.
Be sure to follow the fertilizer instructions carefully, as different brands may have different application rates. It is also important not to over-fertilize, as this can lead to burnt roots and other issues. Stick to the recommended schedule for fertilizing to keep your plant healthy and thriving.
When planting Sansevieria Pinguicula, it is important to use well-draining soil that can hold water without becoming waterlogged. The soil should have good aeration and be slightly acidic to neutral in pH. It is recommended to use a mixture of potting soil, sand, and perlite in equal parts. Alternatively, you can use a cactus or succulent soil mix which will also work well. Avoid using heavy, clay soils as these can cause root rot and prevent proper drainage.
There are different methods to propagate this plant, but one method is through leaf cuttings. First, identify a healthy leaf on the plant and use a sharp, sterile knife or scissors to cut it close to the base. Remove any excess leaf material from the bottom of the cutting, leaving only the part that will be inserted into the soil.
Next, prepare a well-draining potting mix such as a mixture of perlite and peat moss. Moisten the mix slightly and insert the cut end of the leaf into the soil, burying it about an inch deep.
Place the pot in a bright but indirect light and maintain a consistent temperature between 70-80°F (21-27°C). Keep the soil evenly moist but not waterlogged.
After a few weeks, the cutting should begin to show signs of growth. Wait until new shoots are at least a couple of inches tall before transplanting them to their own pots.
Another method of propagation is through division, which involves separating the plant into smaller sections and potting them separately. This can be done when the plant has become too large for its pot or if the grower wants to create new plants from the original.
To do this, remove the plant from its pot and gently shake off excess soil. Look for natural separations in the plant, such as where it appears to have layered or divided itself. Use a sterile knife or scissors to separate these sections, being careful not to damage the roots. Pot each section in its own pot using well-draining soil.
As with all propagating, patience is key as it can take time for a new plant to establish itself and mature into a healthy, thriving individual.


