Plant Overview
Known affectionately as "Blue Chalksticks," this South African succulent looks like a cluster of neon-blue crayons reaching toward the sky. It is a designer favorite for its architectural "upright" growth and its rare, true-blue color that provides a stunning contrast in any garden or container.
🔍 How to Identify
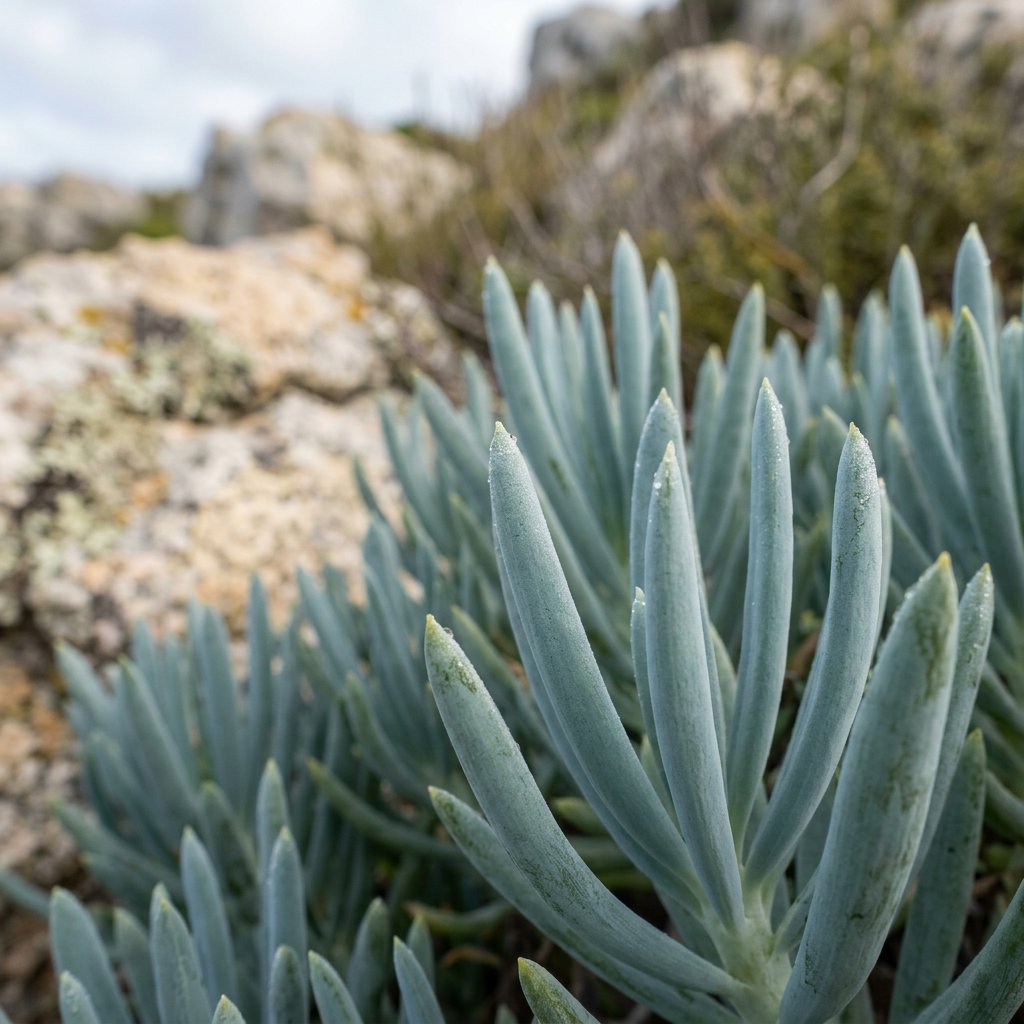
- 🧪 The Leaves: Long, fleshy, finger-like leaves that grow 3–4 inches tall and curve slightly upward.
- 🎨 The Color: A striking silvery-blue or turquoise. The color comes from a powdery wax called "farina" that covers the surface.
- 📏 Growth Habit: It forms a dense, spreading mat that stays low to the ground but fills out horizontally, making it an excellent "living carpet."
🏡 In Your Garden
- ☀️ Sunscreen Coating: That beautiful blue powder isn't just for show; it acts as a natural sunscreen. If you grow it in deep shade, the plant will turn green and lose its protective wax.
- 💧 Drought Specialist: Because it stores water in its thick leaves, it prefers to be neglected rather than pampered. It is highly prone to root rot if the soil stays wet for more than a day or two.
- ✂️ Easy Propagation: If a "finger" breaks off or a stem gets too long, you can simply stick it back into the soil, and it will likely grow a brand-new root system with almost zero effort.
⚠️ Safety & Toxicity
- 🚫 Status: Toxic to humans and pets.
- 🐾 Details: Like many members of the Senecio family, it contains pyrrolizidine alkaloids. If ingested by dogs, cats, or horses, it can cause lethargy, vomiting, or even liver damage over time.
- 🧤 Skin Irritation: The sap can be a mild skin irritant for some people; it’s best to wear gloves when pruning or propagating large patches.
✨ Fun Fact
Blue Chalksticks are frequently used in "fire-wise" landscaping. Because their leaves are filled with water and they lack woody stems, they are naturally fire-retardant and can help create a defensible "cool zone" around homes in wildfire-prone areas.

Detailed Care Instructions
To successfully grow Senecio mandraliscae (Blue Chalksticks), follow these steps:
- Choose the right location: Senecio mandraliscae prefers full sun to partial shade. Make sure that the plant receives at least 6 hours of direct sunlight every day.
- Soil requirements: Blue Chalksticks thrive in well-draining soil. It is essential to ensure that the soil is not overly compacted or waterlogged as it can lead to root rot.
- Planting: Dig a hole slightly larger than the root ball of the plant. Place the plant in the hole and backfill it with soil. Gently firm the soil around the roots.
- Watering: Blue Chalksticks are drought-tolerant plants, but they do require some water initially to establish their roots. Water the plant deeply after planting and then allow the soil to dry out between waterings. Overwatering can damage the roots, so it is important to maintain a balance.
- Fertilizer: Senecio mandraliscae does not require regular feeding. If desired, you can apply a balanced, slow-release fertilizer in the spring to provide some nutrients to the plant.
- Pruning: Blue Chalksticks generally do not require pruning. However, if the plant becomes too leggy or straggly, you can trim it back in the spring to encourage a more compact growth habit.
- Propagation: Senecio mandraliscae can be propagated through stem cuttings. Take stem cuttings from a healthy plant, allow them to dry for a few days, and then place them in well-draining potting soil. Keep the soil slightly moist until the cuttings have rooted.
- Pests and diseases: Blue Chalksticks are relatively pest and disease-free. However, keep an eye out for common succulent pests like mealybugs or scale insects. If detected, treat them with an appropriate insecticide or use natural pest control methods like neem oil.
By following these guidelines, you can successfully grow Senecio mandraliscae and enjoy its beautiful silvery-blue foliage.
- Assess the soil condition: Before watering the plant, it's important to check the soil's moisture level. Inserting a finger about an inch deep in the soil can give you an idea of how dry or moist it is.
- Watering frequency: Generally, Senecio Mandraliscae plants prefer moderate watering. They don't need to be watered frequently, as overwatering can cause root rot. A good rule of thumb is to water the plant if the top inch of soil feels dry.
- Watering method: Instead of pouring water directly over the plant, it's best to water from the base of the plant. This helps prevent water from reaching the plant's leaves, which can lead to fungal growth.
- Watering quantity: It's essential to water the plant thoroughly, ensuring that the water reaches the roots. Once you begin watering, continue to do so until the water starts to come out of the drainage holes at the bottom of the pot.
- Water quality: Make sure the water you use is of good quality, free from any harmful chemicals or excess salts that can damage the plant over time. If possible, use filtered or distilled water.
- Environmental factors: Environmental factors such as sunlight exposure, humidity levels, and temperature can affect how much water the plant needs. It's important to be mindful of these factors and adjust your watering routine accordingly.
Overall, watering Senecio Mandraliscae plants requires a balance between proper frequency, quantity, quality, and method to keep them healthy and thriving.
To fertilize the plant, mix a balanced, water-soluble fertilizer according to the manufacturer's instructions. Apply the fertilizer to the soil around the base of the plant during the growing season, every three to four weeks. Be sure to water the plant immediately after fertilizing to help the nutrients penetrate the soil. Avoid over-fertilizing, as this can lead to burned or damaged foliage.
Senecio Mandraliscae plant grows well in well-draining soil that is enriched in organic matter and nutrients. The ideal soil for this plant is a sandy, loamy soil with slightly acidic to neutral pH levels ranging between 6 and 7.5. The soil should be moist but not waterlogged, and it should provide good drainage to avoid root rot. The addition of pumice, perlite, or other coarse sand can improve drainage in heavy or poorly draining soils. Additionally, soil that is rich in nitrogen and phosphorus is beneficial for the growth and development of healthy plants. Choosing a high-quality potting mix or amending garden soil with compost and organic matter can improve the soil's overall health and vitality. Overall, providing a well-draining, nutrient-rich soil will ensure that Senecio Mandraliscae plant thrives and produces lush, vibrant foliage.
To propagate this plant, take a stem cutting that is at least 4 inches long with 3 to 4 leaves. Remove the bottom leaves of the cutting, leaving only the top 2 leaves. Dip the end of the cutting into rooting hormone powder and tap off the excess. Plant the cutting in well-draining soil and water thoroughly. Cover with a clear plastic bag or a propagation dome to create a humid environment. Place in a bright, indirect light area, avoiding direct sunlight. The cutting should root within a few weeks. After about a month, remove the covering and continue to care for the new plant as usual.


