Plant Overview
Often called the "Yellow Mustard" or "White Mustard," Sinapis alba is the cheerful, sun-colored ancestor of the condiment sitting in your refrigerator. Originating from the Mediterranean, this fast-growing annual has been prized for millennia, not just for its spicy kick, but as a "green manure" that heals tired garden soil. Whether you see it as a crop or a wildflower, its presence usually signals the arrival of cool, refreshing spring weather.
🔍 How to Identify
- 🌼 The Flowers: Look for bright yellow, four-petaled flowers that form a distinct "cross" shape (a classic trait of the Brassicaceae family).
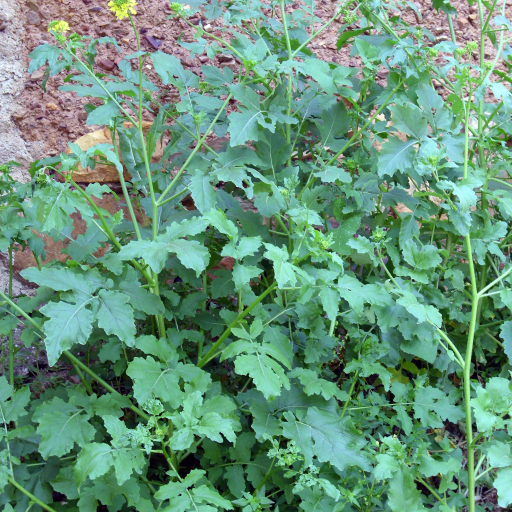
- 🍃 The Foliage: The leaves are deeply lobed and "lyrate," meaning the end lobe is much larger than the side ones. They often feel slightly rough or hairy to the touch.
- 🌱 The Seed Pods: Unlike other mustards, its pods (siliques) are notably bristly and end in a flat, sword-like "beak" that is often longer than the seed-bearing part itself.
🏡 In Your Garden
- 🚜 Soil Healer: Gardeners often plant this as a cover crop. Its deep roots break up compacted soil, and when turned back into the earth, it acts as a natural bio-fumigant, suppressing harmful soil pests and weeds.
- 🐝 Pollinator Magnet: It is an invaluable source of early-season nectar for honeybees and hoverflies. If you let it bloom, your garden will hum with activity, though you should harvest the seeds before they drop if you want to avoid a "mustard forest" next year.
⚠️ Safety & Toxicity
- ✅ Status: Generally safe and widely edible for humans.
- 👅 Details: While the leaves and seeds are culinary staples, the plant contains glucosinolates which give it that "heat." In very large quantities, it can cause digestive upset in livestock (especially horses). For humans, handling crushed seeds can sometimes cause mild skin irritation or redness—a sensation historically used in "mustard plasters."
✨ Fun Fact
While the seeds of Sinapis alba are naturally a light tan color, the bright neon-yellow color of "American Mustard" isn't from the plant at all—it usually comes from the addition of turmeric powder!

Detailed Care Instructions
Here are some steps you can follow to grow Sinapis Alba plants:
- Choose a suitable location: Sinapis Alba, also known as white mustard, prefers full sun but can tolerate partial shade. Ensure that the planting area has well-draining soil.
- Prepare the soil: Before planting, loosen the soil and remove any weeds or debris. Add compost or well-rotted manure to improve the soil's fertility and drainage.
- Sow the seeds: Sinapis Alba plants can be grown from seeds. Sow the seeds directly into the prepared soil, spacing them about 2-3 inches apart. Gently cover the seeds with a thin layer of soil.
- Water regularly: Keep the soil evenly moist during the germination period. Be careful not to overwater, as excessive moisture can lead to rot.
- Thin the seedlings: Once the seedlings have grown a few inches tall, thin them out. Remove weaker or overcrowded plants, leaving the healthiest ones spaced about 6-8 inches apart.
- Provide adequate care: Sinapis Alba plants require minimal maintenance. Water them regularly, especially during dry periods. However, make sure not to waterlog the soil.
- Control weeds: Regularly weed the area around the plants to prevent weeds from stealing nutrients and sunlight.
- Harvest: Sinapis Alba plants typically reach maturity in about 60-75 days. Harvest the leaves and stems when they are young and tender, usually before the white flowers start to bloom. You can also allow the plants to produce seed pods for harvesting mustard seeds if desired.
By following these steps, you should be able to successfully grow Sinapis Alba plants. Remember to adjust the specific growing conditions based on your climate and soil type.

Place in a bright room that is sun drenched almost all day. Or directly in a south-facing window.

To water this plant, use a watering can or hose to gently water the soil around the base of the plant. Water should be applied deeply and consistently, keeping the soil moist but not waterlogged. Avoid getting water on the foliage, as this may lead to mold or disease. Water requirements may vary depending on climate and soil conditions, so it is important to monitor the plant regularly and adjust watering as needed. It is also important to avoid overwatering, as this can lead to root rot and other issues.
To fertilize this plant, you should apply a balanced fertilizer during the growing season. It is important to follow the recommended dosage on the label and avoid over-fertilizing as it can cause damage to the plants. Additionally, you may consider using an organic fertilizer to promote healthy growth and avoid chemical buildup in the soil. Water the plants thoroughly after fertilizing to help distribute the nutrients evenly in the soil.
The recommended soil type for this plant has a pH level within the range of 6.5 to 7.5. The soil should be nutrient-rich and well-draining, as this plant cannot tolerate waterlogged conditions. A loamy soil type is ideal, as it allows for proper aeration and water retention, but other soil types can also be used as long as drainage is maintained. Compost or organic matter should be added to the soil before planting to provide the necessary nutrients and improve soil structure. Heavy clay soils should be amended with sand or perlite to improve drainage. Mulching around the plant is also recommended to help conserve moisture and suppress weed growth.
To propagate this plant, first select healthy stem cuttings that are about 5-6 inches in length. Make sure that each cutting has at least 2-3 sets of leaves. Next, remove the leaves from the bottom half of the cutting, leaving only the top leaves intact. Dip the cut end of the stem in rooting hormone powder, as this will help promote root growth.
Fill a small pot or container with rich, well-draining potting soil. Make a small hole in the soil with a pencil or your finger, and place the stem cutting in the hole. Firmly press the soil around the stem to ensure that it is secure. Water the cutting thoroughly, and cover the pot with a plastic bag or plastic wrap to create a humid environment. Place the cutting in a warm, bright location, but out of direct sunlight.
Check on the cutting frequently, and water as needed to keep the soil moist. In about 2-3 weeks, check for root growth by gently tugging on the stem. If you feel some resistance, it means that roots have started to form. At this point, it is safe to remove the plastic covering and start transitioning the cutting to a more permanent location.
When the roots are well-established and the plant is growing, it can be transplanted into a larger pot or planted outdoors in a sunny location with well-draining soil.


