Plant Overview
Known as the "Tree Tomato," Solanum betaceum is a fast-growing, exotic jewel originally from the high-altitude forests of the Andes. Despite its common name, it isn't a true tomato but a distant cousin that bears clusters of egg-shaped, vibrant fruits. In the 1960s, it was rebranded as the "Tamarillo" to give it a more tropical flair, and it has since become a favorite for gardeners seeking a tangy, architectural centerpiece.
🔍 How to Identify
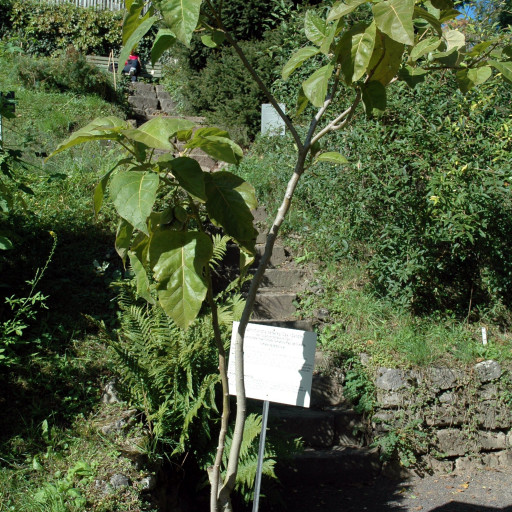
- 🍃 Large Foliage: Features heart-shaped, velvety leaves that can grow up to a foot long, giving the plant a lush, "jungle" appearance.
- 🌸 Star-Shaped Blooms: In early summer, it produces clusters of small, fragrant, pinkish-white flowers that look remarkably like potato or eggplant blossoms.
- 🍅 Egg-Shaped Fruit: The smooth-skinned fruits hang from long stalks. Depending on the variety, they ripen into a deep ruby red, amber orange, or bright yellow.
🏡 In Your Garden
- 🌬️ Shelter is Key: Because the wood is brittle and the leaves are so large, the Tamarillo is easily damaged by strong winds. It thrives best when tucked into a sunny, protected corner of the garden.
- 💧 Thirsty but Sensitive: It requires consistent moisture to produce juicy fruit, but its shallow root system is prone to rot. It hates "wet feet," so well-draining soil is a non-negotiable requirement for its health.
⚠️ Safety & Toxicity
- 🐾 Mildly Toxic: Like many members of the Nightshade family, the leaves, stems, and unripe fruit contain solanine.
- 🚫 Keep Away from Pets: Ingesting the foliage can cause gastrointestinal distress or lethargy in cats and dogs. While the ripe fruit is a delicious treat for humans, the skin is quite bitter and is usually discarded.
✨ Fun Fact
The name "Tamarillo" isn't actually Spanish or indigenous; it was invented by the New Zealand Fruit Growers Federation in 1967. They combined the Maori word tama (signifying leadership) with the Spanish word amarillo (yellow) to make the fruit sound more exciting for export!

Detailed Care Instructions
| Lighting | Full Sun |
| Hardiness Zones | 9B - 11 |
To grow Solanum Betaceum (also known as tamarillo or tree tomato) plant, you can follow these steps:
- Seed selection: Obtain fresh seeds from a reliable source or purchase them from a nursery.
- Prepare the soil: Tamarillos prefer well-drained, fertile soil. Prepare the soil by adding organic matter such as compost or well-rotted manure to enhance its fertility.
- Germination: Start by germinating the seeds indoors in seed trays or pots. Fill the trays or pots with seed-starting mix. Place one or two seeds in each pot, covering them lightly with the mix.
- Temperature and environment: Tamarillo seeds require warmth and consistent temperatures for germination. Keep the pots in a warm location, ideally around 20-25°C (68-77°F). Provide consistent moisture by misting or watering lightly.
- Transplanting: Once the seedlings have developed a couple of true leaves, they can be transplanted into individual pots or directly into the ground. Make sure to harden off the seedlings by gradually exposing them to outdoor conditions before transplanting.
- Planting: Tamarillo plants should be spaced approximately 3 to 6 feet apart. Dig a hole slightly larger than the root ball of the seedling and place it in the hole. Gently backfill with soil, ensuring the plant is sturdy and upright.
- Watering and fertilizing: Tamarillo plants need regular watering to keep the soil evenly moist, especially during dry periods. However, they also require good drainage, so be cautious not to overwater. Fertilize the plants every 4-6 weeks with a balanced fertilizer to promote healthy growth.
- Pruning: Prune tamarillo plants in the early years to establish a sturdy framework and remove any damaged or crossing branches. Pruning helps with air circulation, stimulates new growth, and improves the overall shape of the plant.
- Mulching: Apply a layer of organic mulch around the base of the plant to retain moisture and suppress weed growth. Pine straw, wood chips, or compost can be used as mulch.
- Pollination and fruiting: Tamarillo plants are self-fertile, but they can benefit from cross-pollination to improve fruit set. Encourage pollinators like bees and butterflies by planting flowering plants nearby.
- Harvesting: Tamarillo fruit usually ripens within 4-6 months after planting. Harvest them when they turn into a vibrant color (red, orange, yellow, or purple), depending on the variety. Twist or cut the fruit from the stem when it is fully ripe.
Remember to research the specific variety of tamarillo you are growing, as some may have slightly different requirements.

Place in a bright room that is sun drenched almost all day. Or directly in a south-facing window.

To water this particular plant, it is important to keep in mind its watering needs based on its specific characteristics. This plant thrives in well-draining soil that is kept moderately moist, but not waterlogged. Over-watering can lead to root rot and other issues, so it's crucial to find the right balance.
One way to water this plant is to wait until the top inch of soil is dry before watering. This can be determined by sticking your finger into the soil up to the first knuckle. If it feels dry, it's time to water.
When watering, use a watering can or gentle stream of water to avoid disturbing the soil or damaging the plant. Water around the base of the plant, avoiding the leaves and stem. It's important not to let the plant sit in standing water, as this can lead to root rot.
In addition to regular watering, it's important to fertilize this plant on a regular basis to promote healthy growth. As always, it's important to research the specific needs of your plant and adjust your watering schedule as necessary.
To fertilize this plant, begin by selecting a balanced, water-soluble fertilizer with equal amounts of nitrogen, phosphorus, and potassium. Before applying the fertilizer, ensure the soil is moist and the area around the plant is clear of any debris. Follow the instructions on the fertilizer package for the correct dosage based on the plant's size and current health. Spread the fertilizer evenly around the plant's base, being cautious not to get any on its leaves. Water the plant thoroughly after applying the fertilizer to help it absorb the nutrients. Repeat this fertilizing process every 4-6 weeks during the growing season.
The ideal soil for this plant should be well-draining and rich in nutrients. It should contain equal parts of sand, loam, and organic matter such as compost or manure. The pH of the soil should be slightly acidic, preferably between 5.5 and 6.5. It is important to avoid using heavy soils that can cause waterlogging and root rot. Adding perlite or vermiculite to the soil mix can improve drainage. Regular fertilization with a balanced fertilizer can help promote healthy growth. Additionally, mulching with organic matter can help maintain soil moisture and temperature.
To propagate this plant, you can collect its seeds and plant them in a well-draining soil mix. The seeds should be planted at a depth of around 1/4 inch and kept moist until germination occurs.
Another method of propagation is by taking stem cuttings. Select a healthy stem and cut it at an angle with a sharp, sterilized knife. Remove any leaves from the lower half of the stem and dip the cut end in rooting hormone. Plant the stem cutting in a well-draining soil mix and keep it moist until roots form.
This plant can also be propagated by layering. Select a low branch that can be bent towards the ground, make a small cut in the bark of the branch, and bury it in the soil. Keep the soil moist and wait for roots to form before cutting the branch from the mother plant and transplanting it.
Regardless of the method chosen, it is important to keep the new plant in a warm, humid location with indirect light until it is well established.
Common pests of the tree tomato include Spider mites, aphids, larvae. Make a habit of checking your tree tomato frequently for pests so that any infestations can be caught and managed early.


