Plant Overview
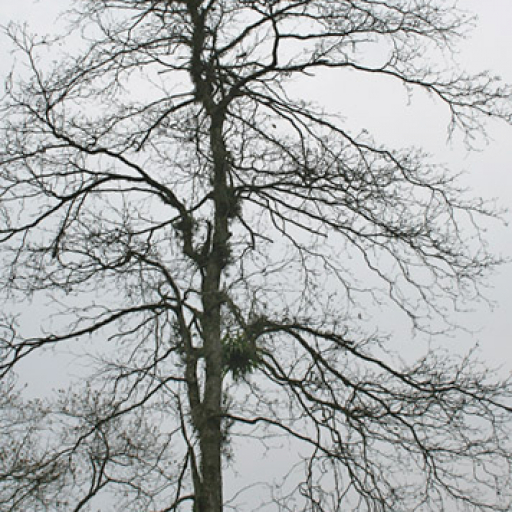
Often hailed as the "King of Medicines" in Tibetan and Ayurvedic traditions, Terminalia chebula—commonly known as Haritaki or Black Myrobalan—is a majestic deciduous tree native to South Asia. It is deeply rooted in spiritual folklore and is frequently depicted in the hands of the "Medicine Buddha" as a symbol of universal healing. While it can grow into a massive canopy tree in the wild, it is prized by enthusiasts for its elegant, ribbed fruits and historical significance.
🔍 How to Identify
- 🍃 The Foliage: Look for oval or elliptic leaves that grow in pairs or alternate patterns. A key giveaway is the presence of two small, distinct glands located at the top of the leaf stalk (petiole).
- 🌼 The Flowers: It produces small, dull-white to yellowish blossoms arranged in spikes. Be warned—while they look delicate, they often emit a strong, somewhat pungent scent that isn't traditionally "floral."
- 🥜 The Fruit: The most famous feature is the drupe (stone fruit). It is egg-shaped and develops five distinct longitudinal ridges as it dries, turning from a waxy green to a yellowish-brown or black.
🏡 In Your Garden
- ☀️ Room to Grow: This is a long-term legacy tree. It requires a permanent spot with full sun exposure and plenty of vertical clearance, as it can eventually reach heights of 60 to 80 feet in ideal conditions.
- 🌱 Soil Nuance: While it is surprisingly resilient to poor soils, it hates "wet feet." Ensure your planting site has excellent drainage; it prefers loamy or sandy soils over heavy, compacted clay.
- 💧 Establishment: During its first three years, it needs consistent moisture to develop its deep taproot. Once established, it becomes remarkably drought-tolerant, making it a sturdy choice for warmer, subtropical climates.
⚠️ Safety & Toxicity
- ✅ Status: Generally considered non-toxic to humans and widely used in traditional supplements.
- 🤢 Digestive Warning: The raw or unripe fruit is a potent natural laxative. Ingesting large quantities without preparation can lead to significant digestive distress or dehydration.
- 🐶 Pet Caution: The hard, woody pits inside the fruit pose a serious choking hazard for dogs. Additionally, the high tannin content in the bark and leaves may cause stomach upset in curious pets if chewed.
✨ Fun Fact
In ancient Indian mythology, it is said that the Haritaki tree first sprouted when a drop of nectar fell from the cup of Indra (the King of Heaven) onto the earth, granting the plant its legendary "divine" healing properties.

Detailed Care Instructions
To grow Terminalia Chebula, also known as Haritaki, follow the steps below:
- Obtain the seeds: You can purchase the seeds from a reliable seed supplier or collect them from mature Terminalia Chebula fruits.
- Prepare the pot or container: Choose a pot or container that is at least 12 inches deep and has drainage holes at the bottom. Fill it with well-draining soil or a mixture of sand, compost, and garden soil.
- Germination process: Soak the seeds in water overnight to soften the outer seed coat. The next morning, plant the seeds about 1 inch deep in the prepared pot. Water the pot gently to provide moisture for germination.
- Provide suitable growing conditions: Terminalia Chebula thrives in warm and tropical regions, so place the pot in a spot with indirect sunlight. The ideal temperature for its growth is between 70 to 90°F (21 to 32°C). Make sure the plant receives at least 6 hours of indirect sunlight daily.
- Watering and humidity: Keep the soil moist, but avoid overwatering, as it can lead to root rot. Allow the top inch of soil to dry out before watering again. Terminalia Chebula prefers a moderately humid environment, so misting the leaves occasionally can be beneficial.
- Fertilization: Apply a balanced, slow-release fertilizer once a month during the growing season to provide necessary nutrients. Follow the instructions on the fertilizer package for the appropriate dosage.
- Pruning: Prune the plant regularly to maintain its shape and promote healthy growth. Remove any dead or damaged branches to enhance air circulation.
- Transplanting: Once the plant has grown to a suitable size, or if it outgrows its container, it can be transplanted into a larger pot or directly into the ground. Ensure the new location has well-draining soil and sufficient sunlight.
- Pests and diseases: Check the plant regularly for any signs of pests or diseases, such as aphids or fungal infections. Treat them promptly using appropriate organic or chemical pesticides.
- Harvesting: Terminalia Chebula fruits are typically harvested when they turn yellow or brown. Pick the ripe fruits and extract the seeds for future propagation or dry them for medicinal purposes.
Remember, Terminalia Chebula is a slow-growing plant, so it requires patience and consistent care to thrive.

Place in a bright room that is sun drenched almost all day. Or directly in a south-facing window.
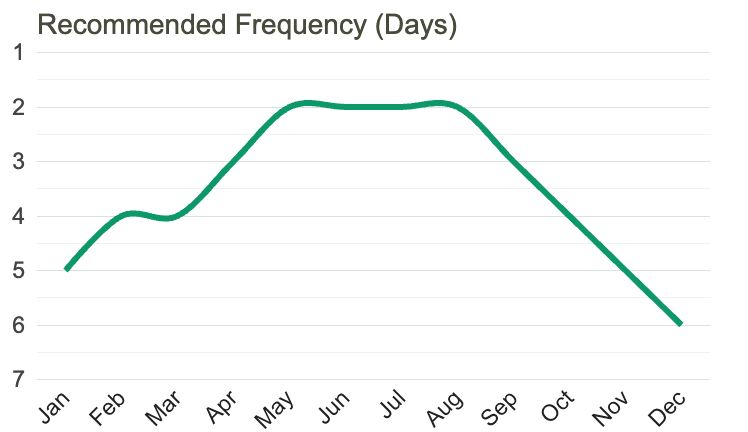
1. Determine the watering needs of the plant: Research the water requirements of the plant and determine how much water it needs to thrive.
2. Assess the soil moisture: Check the soil moisture of the plant by sticking a finger about an inch deep into the soil. If it feels dry to the touch, it is time to water.
3. Use the right watering technique: Water the plant deeply and evenly, making sure the water reaches all areas of the root zone. Avoid overwatering or letting the plant sit in standing water as this can cause root rot.
4. Water at the right time: Water the plant early in the morning or late in the evening when the temperatures are cooler to prevent the water from evaporating too quickly.
5. Monitor the plant: Keep an eye on the plant over time to ensure it is getting enough water and adjust your watering schedule as necessary based on seasonal changes or changes in the plant’s growth patterns.
To fertilize this plant, use a balanced all-purpose fertilizer with an N-P-K ratio of 10-10-10 or 20-20-20. Apply the fertilizer in the early spring and late summer months by sprinkling it around the base of the plant and watering it in thoroughly. Be careful not to over-fertilize as this can harm the plant. Additionally, it is recommended to incorporate organic matter such as compost or aged manure into the soil before planting to improve soil fertility.
The ideal soil for a Terminalia Chebula plant is a well-draining, slightly acidic soil with a pH between 5.5 and 7.5. It should be rich in organic matter and nutrients. A mix of sand, loam, and peat moss would be suitable. Additionally, adding perlite or vermiculite could improve drainage. It is important to make sure the soil is moist, but not waterlogged. Overwatering can cause root rot. The plant should also be placed in a location with partial to full sunlight.
Terminalia Chebula plant can be propagated through various methods such as seed propagation, stem cutting propagation, and grafting.
Seed propagation method:
- Collect mature seeds from the parent plant.
- Soak the seeds in water overnight.
- Sow the seeds in a seed tray filled with well-draining soil.
- Cover the seeds with a thin layer of soil and water the tray.
- Place the tray in a warm and humid area with indirect sunlight.
- Keep the soil moist and germination will occur within 2-3 weeks.
Stem cutting propagation method:
- Choose a healthy stem with a minimum of two leaves and a length of at least 5-6 inches.
- Make a clean cut at the base of the stem and remove any leaves from the bottom 2-3 inches of the stem.
- Dip the cut end of the stem in rooting hormone and plant it in a well-draining soil mix.
- Water the cutting and cover it with a plastic bag to retain humidity.
- Place the cutting in a warm, shady location with indirect sunlight.
- Continue to water the cutting and monitor it for signs of new growth.
Grafting method:
- Choose a healthy rootstock that is closely related to Terminalia Chebula plant.
- Cut the rootstock at a 45-degree angle and make a matching cut on the desired scion (a stem or branch of the desired plant).
- Fit the scion onto the rootstock and wrap the resultant graft with grafting tape.
- Place the graft in a warm, shady location with indirect sunlight.
- Monitor the graft for signs of new growth and remove any unneeded growth.


