Plant Overview
The Yucca guatemalensis, affectionately known as the "Spineless Yucca" or "Soft-tip Yucca," is the gentle giant of the desert world. Unlike its prickly relatives that guard themselves with needle-sharp points, this Central American native is famous for being "user-friendly." With its bold, architectural silhouette and rugged trunk, it brings a touch of prehistoric drama to modern homes and sun-drenched gardens.
🔍 How to Identify
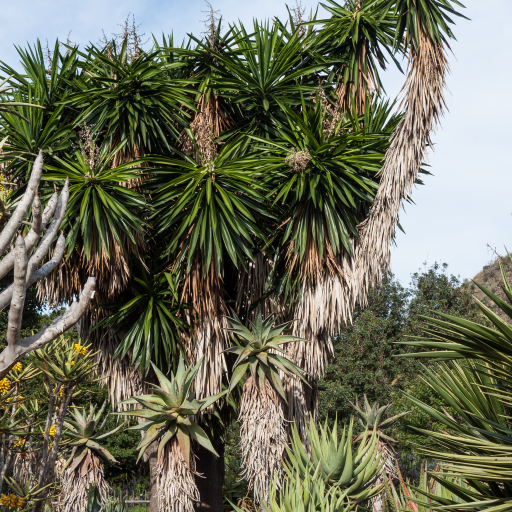
- 🍃 Soft Foliage: The leaves are long, sword-shaped, and vibrant green. Crucially, they lack the lethal terminal spine found on other Yuccas, feeling leathery rather than sharp to the touch.
- 🪵 Elephantine Trunk: As the plant matures, it develops a thick, woody base that resembles an elephant's foot. This "cane" stores water, allowing the plant to survive long periods of neglect.
- 🔔 Bell-Shaped Blooms: In the wild or in high-light outdoor settings, it produces massive upright clusters of creamy-white, waxy flowers that hang like delicate bells.
🏡 In Your Garden
- ☀️ Sun Worshiper: This plant craves light. While it can tolerate "bright indirect" spots indoors, it truly thrives when it can bask in direct sunlight. If it looks "leggy" or stretched, it's telling you it needs more rays.
- 🏜️ The "Less is More" Rule: Because it stores moisture in its thick trunk, overwatering is the quickest way to kill it. It prefers a "soak and dry" method, needing gritty, well-draining soil to prevent the dreaded root rot.
- ✂️ Size Management: It is a slow grower but can eventually reach the ceiling. If it gets too tall, you can actually saw the trunk to your desired height; it will usually sprout new rosettes of leaves just below the cut!
⚠️ Safety & Toxicity
- 🐾 Toxic to Pets: The plant contains saponins, which are toxic to dogs and cats. Ingestion can lead to drooling, vomiting, and loss of coordination. Keep it out of reach of nibbling furry friends.
- 👶 Child Safe: Because it lacks the sharp spines of other Yucca species, it is a much safer choice for households with children or in high-traffic areas where someone might brush against it.
✨ Fun Fact
🇸🇻 A National Treasure: The flower of this plant, known locally as the Flor de Izote, is the national flower of El Salvador. Not just pretty to look at, the petals are often blanched and cooked with eggs or lemons in traditional Central American dishes!

Detailed Care Instructions
| Humidity | Dry |
| Lighting | Part Sun |
| Difficulty | Easy |
| Temperature | 16°C - 27°C |
| Hardiness Zones | 10 - 11 |
To grow Yucca guatemalensis, also known as Guatemala yucca or Honduras yucca, you can follow these steps:
- Choose a suitable location: Yucca guatemalensis is a tropical plant that requires full sun to thrive. Select a spot in your garden that gets at least 6-8 hours of direct sunlight each day.
- Prepare the soil: Yucca guatemalensis prefers well-draining soil to prevent root rot. Amend heavy clay or compacted soil with sand or mixture of sand and peat moss to improve drainage.
- Planting the yucca: Dig a hole that is slightly larger than the root ball of your yucca plant. Place the plant in the hole and backfill with soil, making sure the top of the root ball is level with the ground. Gently firm the soil around the base of the plant.
- Watering: After planting, water the yucca thoroughly to help settle the soil. Yucca guatemalensis is drought-tolerant but will benefit from regular watering during the establishment period. Once established, reduce watering frequency and only water when the soil is dry.
- Mulching: Apply a layer of organic mulch, such as wood chips or bark, around the base of the yucca plant. This will help conserve moisture, suppress weeds, and regulate soil temperature.
- Fertilizing: Yucca plants generally do not require regular fertilization. However, you can apply a balanced slow-release fertilizer in spring to provide some nutrients to the plant.
- Pruning: Yucca guatemalensis rarely requires pruning. Remove any dead or damaged leaves as necessary. Be careful when handling the plant as the leaves have sharp tips.
- Protection from frost: If you live in a region with cold winters, it's important to protect your yucca from frost. Cover the plant with a frost cloth or bring it indoors during freezing temperatures.
- Pests and diseases: Yucca guatemalensis is relatively resistant to pests and diseases. However, it may occasionally face issues with aphids or scale insects. Use neem oil or insecticidal soap to control these pests if necessary.
- Enjoy your plant: Yucca guatemalensis is a beautiful and unique plant that can add a tropical touch to your garden. Enjoy its ornamental foliage and occasional white flowers that appear on mature plants.

Place in a bright room that is sun drenched almost all day. Or directly in a south-facing window.

To water this plant, you should first assess the soil's moisture level by sticking your finger 2-3 inches into the soil. If the soil feels dry, you can water the plant thoroughly, but be sure to allow the excess water to drain out of the pot's drainage holes. It is essential not to let the plant sit in standing water, as it can lead to root rot. You can reduce the frequency of watering during the winter months, as the plant's growth slows down in cooler temperatures. It is also essential to mist the plant's leaves occasionally to keep them clean and prevent the buildup of dust.
To fertilize this plant, use a balanced fertilizer with an N-P-K ratio of 10-10-10. Apply the fertilizer in early spring and again in midsummer. Mix the recommended amount of fertilizer with water according to the package instructions and apply it to the soil around the base of the plant. Avoid getting fertilizer on the leaves or stem of the plant, as it may cause damage. Water the plant thoroughly after fertilizing.
The ideal soil for the Yucca Guatemalensis plant should have a well-draining quality and a neutral to slightly acidic pH level. It should be composed of a mixture of sand, loam, and perlite to ensure adequate drainage and aeration. Additionally, the soil should be rich in organic matter to provide the plant with essential nutrients and moisture retention. It is recommended to avoid using heavy and compacted soils that can lead to root rot and other plant diseases.
To propagate this plant, you will need to select a healthy plant that is at least three years old and has a mature root system. Begin by removing the plant from its container and carefully separating the roots. Cut off any damaged or dead roots, and trim back any long, straggly roots to encourage bushy growth.
Next, prepare a well-draining potting mix that is rich in nutrients. A mix of equal parts peat moss, perlite, and coarse sand should work well. Fill a small pot with the potting mix, leaving a one-inch gap at the top.
Using a clean, sharp knife, cut one of the healthy rosettes away from the main plant. Make a clean cut just below the base of the rosette, being careful not to damage the stem.
Allow the cut end of the stem to dry out for a few days to prevent it from rotting. Once it has dried out, plant the rosette into the prepared potting mix. Firm the soil around the base of the plant, and water lightly.
Keep the newly planted rosette in a warm, bright location, away from direct sunlight. Keep the soil moist but not soggy, and ensure good drainage to prevent the plant from becoming waterlogged.
Within a few weeks, the rosette should begin to grow roots into the potting mix. Once the plant is established and growing well, it can be transplanted to a larger container or into the ground.
Common pests of the spineless yucca include Scale insect, mealybugs. Make a habit of checking your spineless yucca frequently for pests so that any infestations can be caught and managed early.


