Plant Overview
Elegant and sculptural, the Zantedeschia—commonly known as the Calla Lily—is a staple of both high-end floral arrangements and lush garden borders. Despite its common name, it isn't a true lily at all, but a member of the Araceae family. Historically, these plants have symbolized both purity and rebirth, making them a dual-purpose icon for both weddings and memorials.
🔍 How to Identify
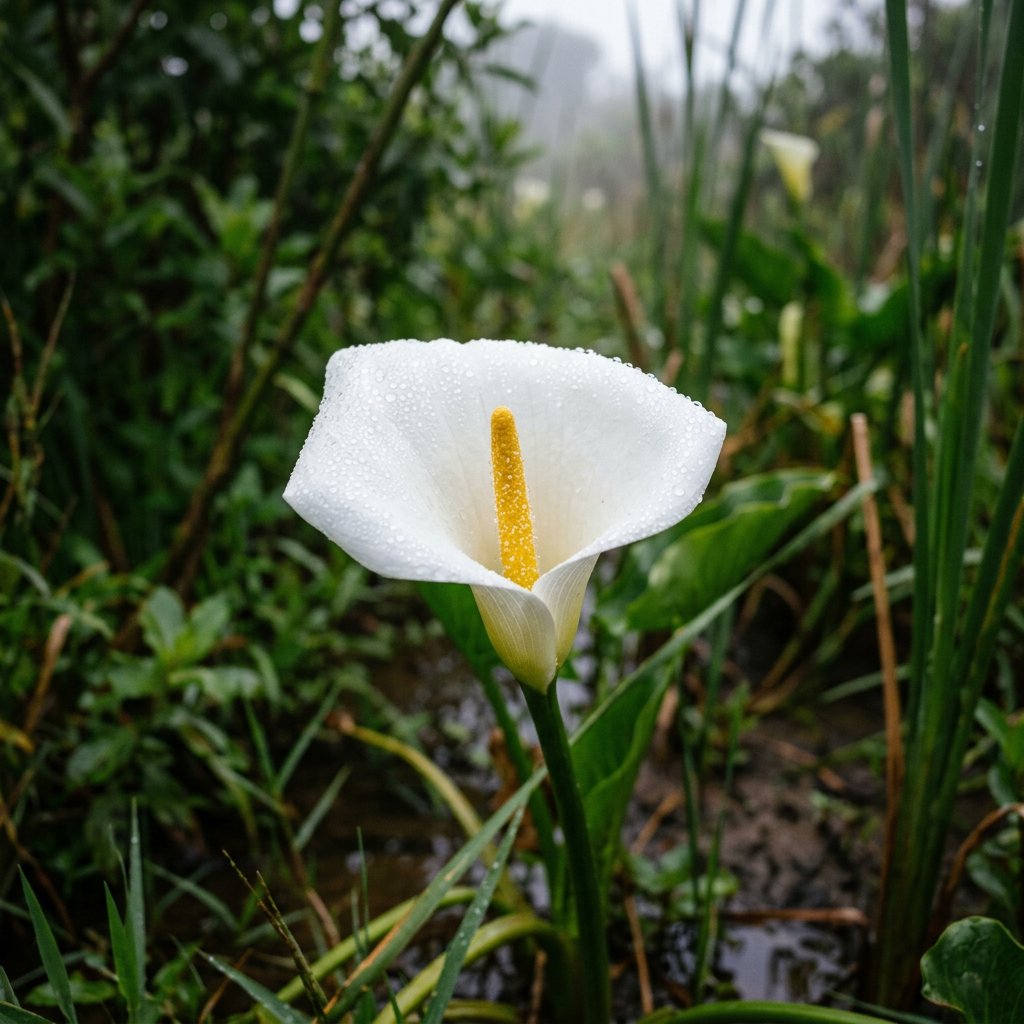
- 🎓 The Spathe: The most recognizable feature is the large, funnel-shaped "petal" (actually a modified leaf called a bract) that wraps gracefully in a spiral.
- 🕯️ The Spadix: Inside the colorful spathe sits a yellow or orange finger-like spike, which is where the actual tiny, fertile flowers are hidden.
- 🍃 Arrowhead Foliage: The leaves are typically broad, dark green, and shaped like arrowheads; many varieties feature charming translucent white speckles that look like splashes of paint.
🏡 In Your Garden
- 💧 Thirsty Roots: In their native South African habitats, many Zantedeschia species grow near ponds or marshes. They love "wet feet" and are perfect for boggy garden spots where other plants might suffer from root rot.
- 💤 Dormancy Needs: These plants grow from thick tubers and require a rest period. If your garden experiences frost, the foliage will die back, and you must either mulch heavily or dig up the tubers to keep them "sleeping" safely indoors until spring.
- ☀️ Light Sensitivity: While they love the sun, the colorful hybrid varieties appreciate a bit of afternoon shade in hotter climates to prevent their vibrant spathes from scorching or fading.
⚠️ Safety & Toxicity
- 🚫 High Toxicity: Every part of the Calla Lily contains calcium oxalate crystals, which act like tiny needles if chewed.
- 🐾 Pet & Child Danger: Ingestion causes immediate intense burning of the mouth, tongue, and throat, followed by swelling and digestive distress. Keep these well out of reach of curious cats, dogs, and toddlers.
- 🧤 Skin Irritant: The sap can cause contact dermatitis or itchy rashes for some individuals. It is always best to wear gloves when pruning or dividing the tubers.
✨ Fun Fact
The Calla Lily was a favorite subject of the famous artist Georgia O'Keeffe. She painted them so frequently and with such focus that the flower became an inseparable icon of her modernist style, often representing the intersection of nature and feminine form.

Detailed Care Instructions
| Humidity | Normal |
| Lighting | Part Sun |
| Toxicity | Poisonous |
| Difficulty | Medium |
| Hibernation | Cold Period |
| Temperature | 18°C - 25°C |
| Hardiness Zones | 8A - 10B |
To successfully grow a Zantedeschia plant (also known as a calla lily), follow these steps:
- Choose the Right Location: Select a spot that gets bright, indirect sunlight throughout the day. Zantedeschias prefer a warm, humid environment with temperatures between 65-75°F (18-24°C).
- Prepare the Soil: The soil should be loose, well-draining, and rich in organic matter. Add compost or well-aged manure to improve the soil's fertility.
- Planting: Zantedeschia bulbs can be planted outdoors in spring after the danger of frost has passed. Dig a hole that is twice the size of the bulb and plant it with the pointed end facing up. Space the bulbs about 12-18 inches apart.
- Watering: Keep the soil consistently moist but not waterlogged. Allow the top inch of soil to dry out before watering again. Avoid watering directly over the leaves, as this can invite fungal diseases.
- Mulching: Apply a layer of organic mulch around the plants to help retain moisture and suppress weed growth. This will also keep the roots cool during hot summer weather.
- Fertilization: Once the shoots appear, you can start feeding the plants every two weeks with a balanced liquid fertilizer to promote healthy growth.
- Provide Support: If the Zantedeschias become top-heavy, staking may be necessary to prevent them from falling over. Use bamboo stakes or other suitable supports to prop up the plants.
- Pruning: Remove any dead or yellowing leaves, as well as spent flowers. This enhances the plant's appearance and prevents the spread of diseases.
- Overwintering: In regions with cold winters, Zantedeschia bulbs need to be lifted and stored indoors during fall. Trim back the foliage, carefully dig up the bulbs, and store them in a cool, dry place until spring.
By following these steps, you can enjoy the beautiful, vibrant blooms of your Zantedeschia plant.

Place in a window with dappled sun or a spot in the middle of a room. Or directly in a window facing west or east.

The watering needs of this plant vary depending on the stage of its growth, climate, and soil type. However, in general, it requires regular watering to keep the soil moist but not waterlogged.
During the growing season, you should water it deeply at least once a week, but make sure the soil has dried out slightly before watering it again. In the winter, you can reduce the frequency of watering to once every two weeks.
It's important to avoid getting water on the foliage or blooms, as this can cause fungal diseases. Therefore, it's best to water the soil around the base of the plant using a watering can or hose with a gentle stream.
If your plant is potted, make sure it has good drainage and remove any excess water from the saucer after watering.
In summary, keep the soil moist, but not waterlogged, water deeply once a week during the growing season, reduce watering frequency in the winter, avoid getting water on the foliage or blooms, and ensure good drainage for potted plants.
To properly fertilize a Zantedeschia plant, follow these instructions:
- Start feeding the plant in early spring when new growth begins to emerge.
- Choose a balanced water-soluble fertilizer with equal ratios of nitrogen (N), phosphorus (P), and potassium (K).
- Dilute the fertilizer according to the package instructions. Over-fertilizing can harm the plant.
- Apply the diluted fertilizer directly to the soil around the base of the plant, avoiding contact with the leaves or flowers.
- Repeat the fertilization process every two to four weeks throughout the growing season.
- In late summer or early fall, decrease the frequency of fertilization to once a month.
- During the winter months, suspend fertilization as the plant enters a dormant period.
- If using slow-release granular fertilizer, apply it according to the package instructions at the beginning of the growing season and water the plant thoroughly.
- Regularly monitor the plant's foliage for any signs of nutrient deficiencies or excesses, such as yellowing leaves or stunted growth.
- Adjust the fertilization schedule or nutrient concentration if necessary, based on the plant's response.
Note: It is always recommended to carefully read the specific instructions provided with the fertilizer product and consider the plant's individual needs for optimal care.
When choosing soil for Zantedeschia plants, it is important to consider their specific requirements. The ideal soil for Zantedeschia plants is a well-draining, loamy soil that retains moisture without becoming waterlogged. It should have a slightly acidic to neutral pH level.
To optimize the growth and health of Zantedeschia plants, it is recommended to use a soil mixture that combines equal parts of peat moss, perlite or vermiculite, and garden soil. This mixture allows for proper aeration and drainage while retaining enough moisture for the plant's needs. Additionally, incorporating some organic matter, such as compost or well-rotted manure, can provide essential nutrients and improve the soil's overall fertility.
Before planting, it is advisable to ensure that the soil is properly prepared. This involves removing any weeds or debris and loosening the soil to facilitate root growth. Zantedeschia plants thrive in a soil that is moist but not waterlogged, as excessive water can drown the roots and lead to root rot. Regularly checking the moisture level of the soil and adjusting watering accordingly is essential for maintaining their health.
Overall, selecting the appropriate soil composition and maintaining its moisture levels are vital factors for successfully cultivating Zantedeschia plants.
Zantedeschia plants can be propagated through various methods such as division, seed sowing, and tissue culture. Here are the steps involved in propagating Zantedeschia plants:
- Division: This method involves separating the established plant into smaller divisions, each containing a portion of the root system. Here's how to do it:
a. Choose a healthy and mature Zantedeschia plant.
b. During the dormant period, typically in early spring or late fall, carefully dig up the plant, ensuring you don't damage the roots.
c. Gently separate the plant into smaller sections, making sure that each division has a good amount of roots and several active growing points or "eyes."
d. Trim any damaged or dead roots.
e. Plant each division in a well-draining potting mix, burying it shallow enough so that the eyes are just below the soil surface.
f. Water the divisions thoroughly and place them in a brightly lit area, away from direct sunlight.
- Seed sowing: While it is the least common method for propagation, it can be utilized if you have access to Zantedeschia seeds. Here's how to propagate the plant through seed sowing:
a. Collect mature seeds from a well-developed Zantedeschia flower.
b. Fill a seed tray or small pots with a sterile potting mix or seed-starting mix.
c. Sow the seeds on the surface of the soil, ensuring they are not buried too deep.
d. Mist the soil lightly to keep it moist but not soaked.
e. Place the tray or pots in a warm, bright location, ensuring they receive filtered sunlight or artificial grow lights.
f. As the seedlings grow, transplant them into individual pots when they have developed their first true leaves.
- Tissue Culture: This method requires specialized equipment and is often performed in a lab setting. It involves taking small tissue samples from a Zantedeschia plant and growing them in a culture medium containing essential nutrients and growth regulators.
Please note that Zantedeschia plants prefer moist, well-draining soil and appreciate a humid environment. Regular watering, fertilizing, and providing adequate light are essential for their successful propagation and overall growth.
Common pests of the calla lilies include Mealybugs, spider mites, aphids, thrips. Make a habit of checking your calla lilies frequently for pests so that any infestations can be caught and managed early.


