Plant Overview
Hailing from the sun-drenched coastal regions of Kenya, Aloe kilifiensis—commonly known as the Kilifi Aloe—is a showstopper for succulent collectors. Known for its distinctively marbled foliage and vibrant floral displays, this plant carries the spirit of the East African coastline into your home or garden. It is a resilient species that thrives on moderate neglect, making it a favorite for hobbyists who appreciate high-impact visuals with low-intensity care.
🔍 How to Identify
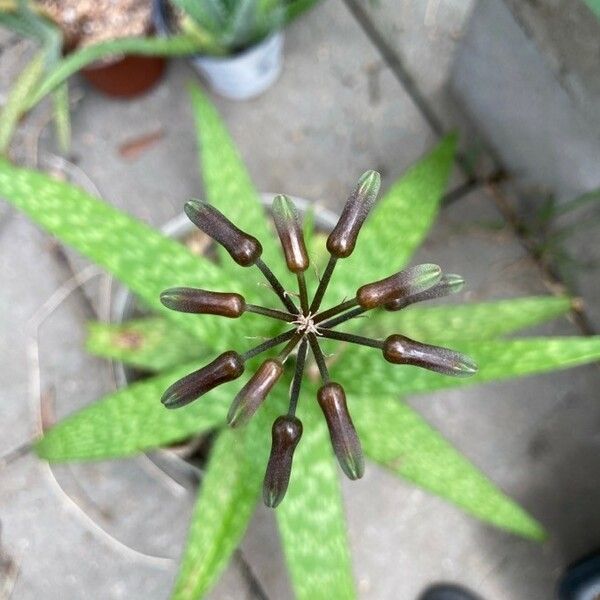
- 🌿 Spotted Foliage: The leaves are broad, fleshy, and dark green, heavily decorated with elongated creamy-white spots that often merge into irregular horizontal bands.
- 🦷 Reddish Teeth: The leaf margins are lined with prominent, sharp, reddish-brown "teeth" that provide a striking color contrast against the green leaves.
- 🌸 Branching Blooms: During its flowering season, it sends up a tall, branched stalk topped with clusters of tubular, bright orange-to-red flowers that are a magnet for pollinators.
🏡 In Your Garden
- 🏜️ Coastal Hardiness: Because it originates from coastal scrublands, it is slightly more tolerant of humidity than desert-dwelling aloes. However, it still "breathes" through its roots and will quickly decline if left in standing water or heavy, clay-rich soil.
- 👯 Social Clumper: This species loves to multiply. It naturally produces "pups" or offsets around its base. If you start with one plant, you will likely have a dense colony within a few seasons, making it excellent for filling decorative wide-mouth bowls.
⚠️ Safety & Toxicity
- 🐾 Toxic to Pets: Aloe kilifiensis contains aloin and saponins, which are toxic to dogs, cats, and horses if ingested.
- 🤢 Symptoms: Consumption can lead to digestive upset, tremors, and lethargy in animals. While the inner clear gel is often used medicinally in some aloe species, the yellow "latex" just under the skin of this plant can be a strong laxative and skin irritant for humans.
✨ Fun Fact
This plant is what botanists call a "narrow endemic." In the wild, it is found almost exclusively in the Kilifi District of Kenya. Because its natural habitat is so small, your cultivated pot at home acts as a tiny conservatory for a species with a very limited footprint on Earth!

Detailed Care Instructions
To grow an Aloe kilifiensis plant, you can follow these steps:
- Choose the right location: Aloe kilifiensis prefers bright, indirect sunlight, so place it near a window where it can receive filtered sunlight. Avoid placing it in direct sunlight, as this can scorch the leaves.
- Select a well-draining potting mix: Aloe kilifiensis prefers a well-draining soil mix. You can use a mix of cactus soil and perlite or sand to promote good drainage. Avoid using heavy potting soil that retains too much moisture.
- Plant it at the right depth: When repotting or planting a new Aloe kilifiensis, make sure not to bury the stem too deep. Plant it at the same depth it was previously growing at, or even slightly higher to prevent rotting.
- Watering: Aloe kilifiensis is a drought-tolerant plant that thrives in dry conditions. Water the plant thoroughly but infrequently, allowing the soil to dry out between waterings. Overwatering can lead to root rot, so it's important to strike a balance and not let the soil become waterlogged.
- Fertilizing: Aloe kilifiensis doesn't require frequent fertilization. You can feed it with a balanced, water-soluble fertilizer once or twice a year during the growing season. Dilute the fertilizer according to the package instructions and apply it sparingly.
- Pruning: Trim off any dead or damaged leaves to keep the plant looking tidy. Use clean, sharp pruning shears to make clean cuts.
- Propagation: Aloe kilifiensis can be propagated through offsets or leaf cuttings. Allow offsets to develop roots before separating them from the parent plant. For leaf cuttings, let them dry out for a few days before planting them in a well-draining potting mix.
- Provide adequate airflow: Good air circulation is important for Aloe kilifiensis to prevent fungal diseases. Ensure there is enough space between plants, and avoid crowding them.
Remember that Aloe kilifiensis is a slow-growing plant, so be patient and provide it with the right conditions for it to thrive.
To properly water this plant, it is important to allow the soil to completely dry out between watering sessions. This can be achieved by checking the soil moisture level with a finger or a moisture meter. When it is time to water, saturate the soil until water drains out of the bottom of the pot and make sure to discard any excess water. It is important to avoid overwatering this plant, as it is susceptible to root rot in consistently moist soil. In addition, it is recommended to water this plant at the base rather than from above to prevent water from settling in the leaves and rotting them.
To fertilize this plant, begin by selecting a balanced fertilizer with a 10-10-10 ratio, or a specialized fertilizer formulated for succulent plants. Alternatively, you may choose to use a slow-release fertilizer for convenience. Apply the fertilizer onto the soil surface, taking care not to get any on the leaves or stem of the plant. Water thoroughly after fertilizing to allow the nutrients to reach the roots. Fertilize once every three months during the growing season, approximately from April to September. Avoid fertilizing during the dormant season, from October to March.
A suitable soil for Aloe Kilifiensis plant must have good drainage capabilities and be well-draining to prevent waterlogging and root rot. A sandy or loamy soil mixture that is rich in organic matter is recommended. The soil should have a pH level of 6.0 to 7.0. It is also important to ensure that the soil is not too compacted, as this may prevent the roots from fully developing. One can add perlite or sand to the soil mix to improve its drainage properties. Additionally, one may mix small stones or gravel into the soil mix as this can also promote good drainage.
To propagate this particular plant, you will need to first gather a sharp and sterile cutting tool. Identify a healthy and mature leaf on the plant that you wish to use for propagation. Using your cutting tool, make a clean cut near the base of the leaf. Then, allow the cut to callus over for a day or two to prevent rotting.
Next, prepare a well-draining potting mix and moisten it slightly. Gently press the cut end of the leaf into the potting mix, burying it about an inch deep. Place the pot in a warm and bright location but out of direct sunlight. Water the cutting lightly once a week and avoid overwatering as this may cause the cutting to rot.
Within a few weeks, you should begin to see new roots and shoots emerging from the cut end of the leaf. Once these new roots and shoots have grown to a decent size, you can transplant the new plant into its own container or into your garden. Be sure to take care when transplanting the new plant to avoid damaging its delicate roots.