Plant Overview
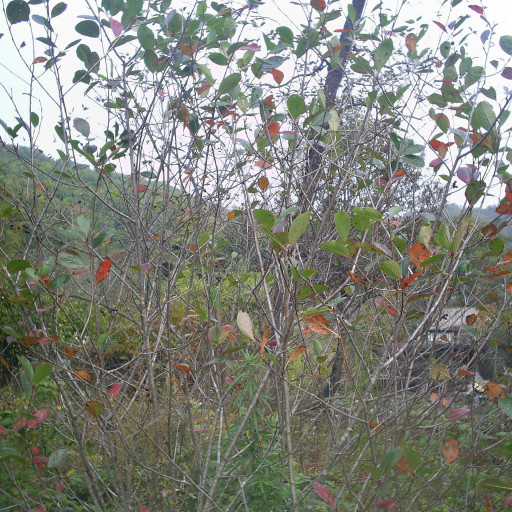
Often called the Black Chokeberry, Aronia melanocarpa is a hardy North American native that has recently skyrocketed to "superfood" fame. While its name sounds a bit intimidating, it simply refers to the tart, mouth-drying sensation of the raw berries, which are so astringent they can make you wince. Beyond the kitchen, it is a landscape favorite, offering a dramatic transformation from snowy white spring blooms to a fiery, blood-red leaf display in the autumn.
🔍 How to Identify
- 🍃 The Leaves: Look for glossy, dark green, oval leaves with finely serrated edges. A key secret is the "Aronia mark"—tiny, dark hair-like glands located along the top of the leaf’s central vein.
- 🌸 The Flowers: In late spring, the shrub produces clusters of small, five-petaled white flowers. If you look closely, the centers are dotted with delicate pink or purple anthers.
- 🍇 The Fruit: By late summer, the plant is weighted down by clusters of pea-sized berries that transition from green to a deep, ink-black purple with a waxy sheen.
🏡 In Your Garden
- 💧 Adaptability: This is a "plant it and forget it" shrub for many. It is incredibly tolerant of wet soil and can even handle occasional flooding, making it perfect for those low-lying "soggy" spots in your yard where other plants might rot.
- ☀️ Sun for Berries: While it will grow in partial shade, you’ll want a full sun position if you are looking for a heavy fruit harvest. Maximum sunlight also ensures the most vibrant red colors during the fall foliage transition.
⚠️ Safety & Toxicity
- ✅ Status: Safe and Edible.
- 🥣 Details: The berries are safe for humans and are typically processed into jams, wines, or syrups to balance their intense tartness. They are considered non-toxic to dogs, cats, and horses, though eating a large amount of any fibrous fruit can cause minor stomach upset in pets.
✨ Fun Fact
Aronia berries are nutritional powerhouses! They contain significantly higher levels of antioxidants (anthocyanins) than blueberries, cranberries, or even pomegranates, making them one of the healthiest fruits you can grow in a temperate climate.

Detailed Care Instructions
Native bees, especially mason bees, feed on the nectar and pollen of chokeberry. It is also a host plant for butterflies, moths, and songbirds.
Where does the name chokeberry come from
The berries are edible but so astringent and bitter that they make you choke when you try to eat them raw, hence the name, chokeberry.
Are the berries of the chokeberry edible?
They are edible but not palatable raw so they are usually cooked and used for jellies, jams, and pies.
| Color | White |
| Soil Ph | Acidic |
| Humidity | Normal |
| Lighting | Full Sun |
| Toxicity | Non-Toxic |
| Soil Type | Well-Drained |
| Bloom Time | Spring |
| Difficulty | Medium |
| Plant Type | Deciduous Shrub |
| Hibernation | Cold Period |
| Mature Size | Usually 3 To 6 Feet Tall And Wide (Though It Can Be Up To 10 Feet In Width) |
| Native Area | Eastern North America |
| Sun Exposure | Full Sun Or Partial Shade |
| Hardiness Zones | 3-8 |
To grow Aronia melanocarpa, also known as chokeberry, here are the steps you can follow:
- Plant Selection: Choose healthy and disease-free Aronia melanocarpa plants from a reputable nursery or garden center. Look for plants that are around 2-3 years old.
- Location: Aronia melanocarpa prefers full sun exposure but can tolerate partial shade. It is adaptable to different soil types but thrives in well-draining, moist soil. Ensure there is adequate space for the plant to grow, as it can reach up to 6-8 feet in height and width.
- Planting: Dig a hole that is twice as wide and deep as the root ball of the plant. Place the plant in the hole, ensuring it is at the same level as it was in the container. Backfill the hole with soil, gently firming it down to eliminate any air pockets.
- Watering: Water newly planted Aronia melanocarpa thoroughly and regularly, especially during the first year. Ensure the soil is evenly moist but not waterlogged. Once established, it is a relatively drought-tolerant plant.
- Mulching: Apply a layer of organic mulch around the base of the plant, such as wood chips or straw, to help retain moisture, suppress weeds, and regulate soil temperature.
- Pruning: Regularly prune Aronia melanocarpa to encourage a well-shaped plant and promote better fruit production. Pruning should be done in late winter or early spring before new growth begins.
- Fertilization: Aronia melanocarpa is generally a low-maintenance plant and does not require heavy fertilization. However, you can apply a balanced fertilizer in spring, following the instructions on the package.
- Pests and Diseases: Aronia melanocarpa is relatively pest and disease-resistant. However, it may sometimes be susceptible to diseases such as leaf spots or pests like aphids. Regularly monitor the plant for any signs of damage or infestation and take appropriate measures if necessary.
- Harvesting: The berries of Aronia melanocarpa are typically ripe for harvest in late summer to early fall when they turn dark purple or black. Harvest the berries by gently picking them off the branches. They can be eaten fresh, used in cooking or baking, or frozen for later use.
By following these steps, you should be able to successfully grow Aronia melanocarpa plants in your garden.

Place in a window with dappled sun or a spot in the middle of a room. Or directly in a window facing west or east.

When watering this plant, it is important to ensure that the soil is consistently moist but not waterlogged. This can be achieved by regularly checking the soil moisture level using a moisture meter or by digging a small hole in the soil and feeling the moisture level with your finger.
When watering, it is recommended to water deeply to encourage the roots to grow deeper into the soil. This can be done by using a slow-drip irrigation system or by slowly and evenly watering the soil around the base of the plant with a watering can or hose.
It is also important to avoid watering the leaves and stems of the plant as this can lead to fungal diseases. Instead, focus on watering the soil around the base of the plant.
In drier climates, it may be necessary to water the plant more frequently to prevent it from drying out. Additionally, during periods of high heat or drought, it is important to mulch around the base of the plant to help retain soil moisture.
Overall, it is important to monitor the soil moisture level and adjust watering accordingly to ensure the plant remains healthy and vibrant.
To fertilize this plant, apply a balanced slow-release fertilizer in the early spring before new growth appears. Follow the instructions on the fertilizer package for the appropriate amount to use based on the size of your plant. Avoid fertilizing late in the season as this can promote late-season growth that is more susceptible to winter damage. During the growing season, you can also apply a liquid fertilizer diluted to half strength every two to three weeks. Water the plant thoroughly before and after applying fertilizer. Lastly, avoid getting fertilizer directly on the leaves or stems as this can burn the plant.
The best soil to use for this plant is a well-draining soil that is rich in organic matter. The pH level of the soil should be between 4.5 and 6.5, as this plant prefers an acidic soil. It is also important to ensure that the soil is moist, but not waterlogged. Adding compost or other organic matter to the soil can help to improve its fertility and drainage. Additionally, incorporating peat moss or sulfur can help to lower the soil's pH level if needed.
There are different ways to propagate this plant, but one common method is by taking semi-hardwood cuttings. The best time to do this is in late summer or early fall when the plant is still actively growing, but before the first frost.
First, select a healthy stem that is about 6-8 inches long and has several leaves on it. Use a sharp, clean knife to make a diagonal cut just below a node (a point where a leaf is attached to the stem).
Remove the lower leaves from the cutting, leaving only the top 2-3 leaves. Dip the cut end into rooting hormone powder to stimulate root growth, tapping off any excess.
Prepare a pot or container with well-draining soil and make a hole large enough to accommodate the cutting. Insert the cutting into the hole, pressing the soil firmly around it to ensure good contact.
Water the cutting thoroughly and cover the pot with a clear plastic bag to create a mini greenhouse. Place the pot in a bright, indirect light location, but not in direct sun.
Check the pot regularly to ensure the soil is moist, but not waterlogged. After several weeks, gently tug on the stem to see if it has rooted. If it resists, it likely has formed roots. Once the roots have developed, the plastic bag can be removed and the plant can be transplanted to a larger pot or directly into the garden.
Common pests of the black chokeberry include Spider mites, larvae. Make a habit of checking your black chokeberry frequently for pests so that any infestations can be caught and managed early.