Plant Overview
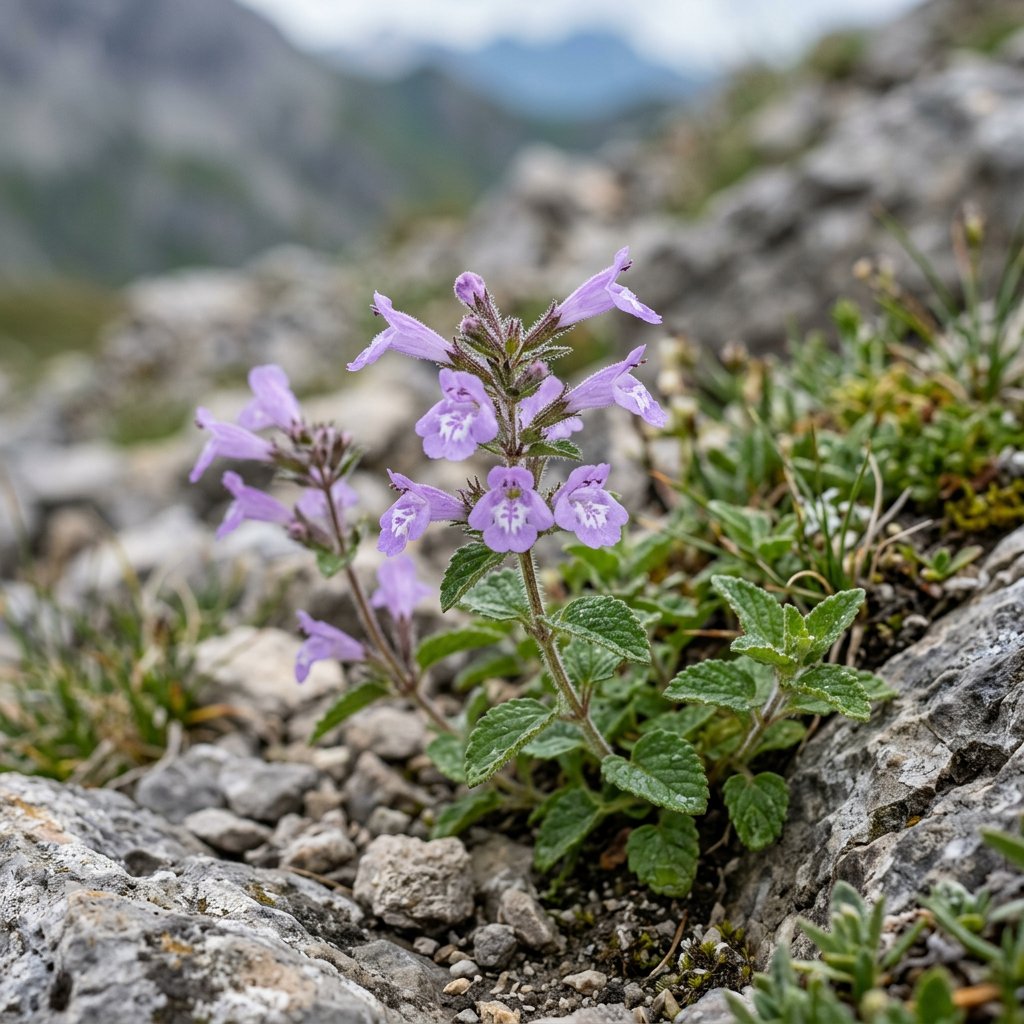
Known affectionately as the Large-flowered Calamint, this Mediterranean beauty is a secret weapon for sensory gardens. It bridges the gap between a culinary herb and a stunning ornamental, filling the air with a refreshing scent of peppermint and lemon whenever you brush past its foliage. Historically, it has been a staple in European "mountain teas," prized for its aromatic oils and delicate, tubular blossoms.
🔍 How to Identify
- 🌸 Showy Blooms: Unlike many of its mint-family cousins, this species features large, tubular, deep pink to lavender flowers that appear in clusters along the upper stems.
- 🍃 Aromatic Foliage: The soft, bright green leaves are oval with distinctly serrated edges; they release a potent minty fragrance when touched.
- 📐 Square Stems: True to the Lamiaceae family, the stems are noticeably square in cross-section and have a slightly hairy texture.
🏡 In Your Garden
- ⛰️ Drainage is Key: Originating from rocky, mountainous regions, this plant demands well-draining soil. It is particularly sensitive to "wet feet" during the winter, which can lead to root rot.
- 🦋 Pollinator Magnet: The nectar-rich flowers are shaped perfectly for long-tongued bees and butterflies, making it a "must-have" for any wildlife-friendly backyard.
- ✂️ Mid-Season Refresh: After the first heavy flush of flowers, the plant can look a bit "leggy." A quick haircut by one-third will encourage a tidy shape and often triggers a second bloom in late summer.
⚠️ Safety & Toxicity
- ✅ Generally Safe: Clinopodium grandiflorum is considered non-toxic to humans, cats, and dogs.
- 🍵 Herbal Use: While it is often used in traditional herbal teas, always ensure your plant hasn't been treated with chemical pesticides if you intend to use the leaves for fragrance or infusions.
✨ Fun Fact
In the wild, this plant is a "pioneer" species—it is often found thriving in the most difficult spots, such as the vertical cracks of limestone cliffs and ancient stone walls, where very little soil exists!

Detailed Care Instructions
Here are some steps you can follow to grow Clinopodium Grandiflorum:
- Choose a suitable location: Clinopodium Grandiflorum prefers a partially shaded area with well-draining soil. Ensure that the location receives bright but indirect sunlight.
- Prepare the soil: The soil should be rich in organic matter and slightly acidic. You can amend the soil with compost or well-rotted manure to improve its fertility and drainage.
- Sow the seeds: Plant the seeds in the prepared soil, spaced about 12 inches apart. The seeds should be sown at a depth of approximately ¼ inch.
- Watering: Keep the soil evenly moist but not waterlogged. Water the plants regularly, especially during dry periods. Avoid overhead watering to prevent disease and fungal issues.
- Fertilization: Fertilize the plants every 3-4 weeks during the growing season with a balanced, slow-release fertilizer. Follow the manufacturer's instructions for application rates.
- Mulching: Apply a layer of organic mulch around the base of the plants to help retain moisture, suppress weeds, and regulate soil temperature.
- Pruning: Regularly prune the plant to maintain its shape and encourage bushier growth. Pinch off the stem tips to promote branching.
- Pests and diseases: Monitor the plants regularly for any signs of pests or diseases. Common pests that can attack Clinopodium Grandiflorum include aphids and spider mites. Control measures like neem oil or insecticidal soap can be applied if necessary.
- Winter care: Clinopodium Grandiflorum is not typically frost-tolerant. If you live in a region with cold winters, consider growing the plant in containers. Bring the containers indoors or provide frost protection to ensure plant survival during the winter.
By following these steps, you can successfully grow Clinopodium Grandiflorum in your garden or container.

Place in a window with dappled sun or a spot in the middle of a room. Or directly in a window facing west or east.

The best way to water this plant is to gently pour water into the soil at the base of the plant, making sure not to get water on the leaves or stem. It is important to ensure that the soil is moist but not saturated, as overwatering can lead to root rot. The frequency of watering will depend on the environmental conditions, such as temperature and humidity, and the type of soil the plant is growing in. It is recommended to check the moisture level of the soil before watering, using a soil moisture meter or by feeling the soil with your finger. If the top inch of soil feels dry, it is time to water the plant. Lastly, it is important to provide good drainage to prevent standing water in the soil, which can also lead to root rot.
To promote healthy growth and blooms for this plant, it should be fertilized at the beginning of the growing season with a slow-release fertilizer. Follow the manufacturer's instructions for application rates and frequency. Additionally, incorporate organic matter into the soil to encourage healthy root growth and to improve soil structure. During the growing season, use a balanced liquid fertilizer every 2-3 weeks to provide essential nutrients to the plant. Avoid over-fertilizing, as this can lead to poor growth and development.
To successfully grow the Clinopodium Grandiflorum plant, it is recommended to use a well-draining soil mix that contains a blend of organic matter and inorganic materials. The pH of the soil should be slightly acidic to neutral, ideally around 6.0-7.0. It is important to avoid using heavy clay soils that do not drain well, as this can cause root rot. A soil mix that consists of equal parts of peat moss, perlite, and coarse sand or vermiculite can provide the optimal growing conditions for this plant. Additionally, adding some slow-release fertilizer to the soil mix can provide the necessary nutrients for the plant's growth and development. When repotting the Clinopodium Grandiflorum plant, it is recommended to do so during the spring or early summer, using a pot that is slightly larger than the current one to allow for root growth. Overall, providing a well-draining, nutrient-rich soil mix can help ensure healthy and vigorous growth for this plant.
To propagate this plant, you will need to take stem cuttings. Select a healthy stem that is about 4-6 inches long and has at least 3 nodes. Nodes are the points on the stem where the leaves grow out. Cut the stem just below a node using a sharp, clean pair of scissors or pruning shears.
Remove the leaves from the bottom two nodes of the stem and leave only a few leaves on the top node. This will help the cutting conserve energy while it develops roots.
Next, dip the end of the stem in rooting hormone powder. This will encourage the stem to grow roots more quickly and efficiently.
Now, fill a small pot with a well-draining potting mix (such as a mix of perlite and peat moss). Water the potting mix until it is evenly moist, but not soaking wet.
Create a hole in the potting mix using a pencil or your finger. Insert the stem cutting into the hole and gently press the soil around the stem to secure it in place.
Place the pot in a warm and bright location, but away from direct sunlight. Cover the pot with a plastic bag to create a greenhouse effect and trap moisture around the cutting. This will help the cutting retain moisture while it develops roots.
Check the pot regularly and make sure the soil stays moist. After a few weeks, you should notice small roots forming from the bottom of the stem cutting. Once the roots are about an inch long, you can transplant the cutting into a larger pot or directly into your garden.