Plant Overview
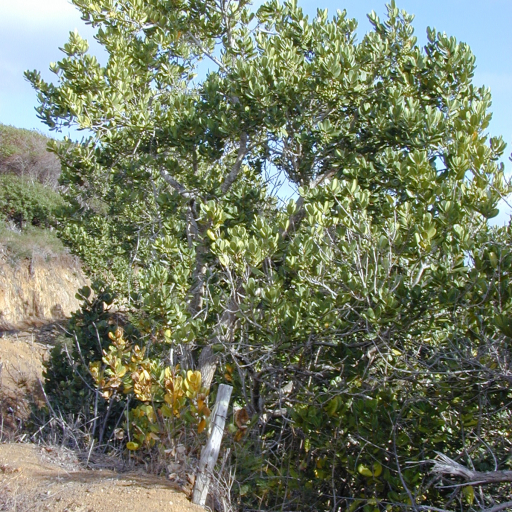
Often called the Madagascar Olive, this hardy coastal gem is prized for its thick, leathery leaves that look like they have been professionally polished. While it belongs to the same family as the olives we eat, this species is more of a decorative powerhouse, often found braving the salty winds of tropical shorelines. In its native Madagascar, it is a resilient survivor that brings a lush, deep-green structure to the landscape year-round.
🔍 How to Identify
- 🍃 The Notched Leaf: The leaves are thick, glossy, and paddle-shaped. If you look closely at the tip, you’ll notice a small "notch" or indentation, which is exactly what its scientific name emarginata describes.
- 🌼 Fragrant Clusters: It produces small, bell-shaped flowers that are cream or pale yellow. They might be tiny, but they pack a sweet, subtle fragrance that drifts through the air on warm evenings.
- 🍇 Olive-Like Fruit: After blooming, the plant produces round or egg-shaped fruits. They start green and ripen into a dark purplish-black, looking remarkably like a traditional olive.
🏡 In Your Garden
- 🌊 Salt Spray Hero: This is one of the best plants for seaside gardening. It has a high tolerance for salt spray and wind, making it a perfect "first line of defense" or windbreak for coastal homes.
- ✂️ Slow & Steady: Because it grows at a moderate to slow pace, it is an excellent choice for a low-maintenance hedge or a specimen tree. It holds its shape well and doesn't require constant pruning to look neat.
- ☀️ Sun Seeker: While it can handle some light shade, it develops its best leaf density and "gloss" when given plenty of bright, direct sunlight.
⚠️ Safety & Toxicity
- 🟢 General Safety: Noronhia emarginata is generally considered non-toxic to touch and is safe to handle during pruning or planting.
- 🚫 Not a Snack: Despite the name "Madagascar Olive," the fruits are not for human consumption. They are quite bitter and astringent.
- 🐾 Pet Watch: While not listed as a major toxin for dogs or cats, the seeds inside the fruit are hard and could pose a choking hazard or cause mild stomach upset if ingested in large quantities.
✨ Fun Fact
The Madagascar Olive is so tough that it has become "naturalized" in parts of Florida and the Caribbean. It’s a master of adaptation, capable of growing in almost pure sand where other plants would quickly wither!

Detailed Care Instructions
To grow Noronhia emarginata, also known as the Madagascar palm, follow these steps:
- Climate: Ensure you live in a suitable climate for this plant. Noronhia emarginata thrives in warm, tropical regions and does not tolerate frost or cold temperatures.
- Lighting: Provide ample sunlight. Place the plant in an area with full sun exposure, ideally a south-facing window or outdoors where it can receive direct sunlight.
- Soil: Use well-draining soil. Noronhia emarginata prefers a mixture of sandy soil and organic matter. Ensure the soil is loose and able to drain excess water easily to prevent root rot.
- Watering: Water the plant regularly, allowing the soil to dry out between watering. Avoid overwatering as it can lead to root rot. The frequency of watering may vary depending on the climate, time of year, and humidity levels.
- Fertilization: Use a balanced fertilizer. Feed the Noronhia emarginata plant with a balanced, slow-release fertilizer during the growing season (spring and summer). Follow the instructions on the fertilizer packaging for proper application.
- Repotting: Repot the plant if it becomes root-bound. When the roots start to outgrow the current pot, transplant the plant into a slightly larger pot using fresh, well-draining soil. This allows the roots to expand and promotes healthy growth.
- Pruning: Trim dead or damaged leaves. Remove any yellow or brown leaves to maintain the plant's appearance and overall health. Use clean pruning shears to avoid the spread of diseases.
- Pest control: Monitor for pests such as mealybugs or spider mites. If you notice any infestations, use appropriate insecticides or natural remedies to eliminate them.
- Patience: Remember that Noronhia emarginata is a relatively slow-growing plant. It may take several years for it to reach its full size and potential.
- Support: Consider staking or providing support for the plant. As Noronhia emarginata grows, it can become top-heavy and benefit from a stake or support system to prevent it from toppling over.
By following these guidelines, you should be able to successfully grow Noronhia emarginata.

Place in a bright room that is sun drenched almost all day. Or directly in a south-facing window.

Noronhia Emarginata is a type of plant that requires proper watering for healthy growth. To water this plant, you should first assess the moisture level of the soil by touching it with your finger. If the soil feels dry, it's time to water the plant. Fill a watering can with room temperature tap water and pour slowly around the base of the plant until the soil is evenly saturated.
Avoid over-watering the plant as this can lead to root rot. Allow the soil to dry out partially between watering sessions. Ensure that the plant pot has drainage holes to allow excess water to drain out. Also, make sure that the plant is not sitting in a saucer of standing water.
In general, Noronhia Emarginata prefers to be kept slightly on the drier side. Therefore, you should reduce the frequency of watering during winter months when the plant is not actively growing.
It's also important to note that Noronhia Emarginata is sensitive to changes in water quality. Therefore, it's best to use tap water that has been left to sit for at least 24 hours to allow chemicals like chlorine to evaporate. Alternatively, filtered or distilled water can be used.
Regularly monitoring the moisture level of the soil, adjusting watering frequency as required, and using proper water quality can help ensure the healthy growth and survival of Noronhia Emarginata.
- Choose a balanced, slow-release fertilizer with equal amounts of nitrogen, phosphorus, and potassium.
- Apply the fertilizer in the spring, before the growing season starts.
- Use a handful of fertilizer per plant, following package instructions for the specific product.
- Spread the fertilizer evenly over the soil around the base of the plant.
- Water the plant thoroughly after fertilizing to help the nutrients soak into the soil.
- Repeat the fertilization process once or twice a year, depending on the growth rate of the plant and the soil quality.
- Avoid applying fertilizer to dry soil or during drought conditions, as it can burn the roots or cause fertilizer runoff into nearby water sources.
Noronhia Emarginata is a species of plant that requires a well-draining soil mixture to grow properly. The ideal soil for this plant should be light and porous, with good moisture retention properties. This type of soil will not only help the plant to establish its roots but also allow for good air circulation around the roots.
The pH level of the soil should be slightly acidic, between 5.5 and 6.5, with a high level of organic matter. The soil should be fertile and rich in nutrients, with a mixture of compost, sand, peat, perlite, and vermiculite.
When planting Noronhia Emarginata, it's important to ensure that the soil is loose enough to allow the roots to spread out easily. The plant should be planted in a hole that is slightly larger than the root ball and the soil should be firmly packed around the roots.
A good way to ensure that the soil is suitable for Noronhia Emarginata is to test it before planting. A soil test can be taken either by purchasing a soil testing kit or by sending a sample to a soil testing laboratory. This will help you to determine what amendments, if any, are required to make the soil suitable for your plant.
Noronhia Emarginata plant can be propagated by taking stem cuttings from a mature and healthy plant. Select a stem that is at least 4-6 inches long and has a few leaves. Make a clean cut at the base of the stem, just below a node (the point where the leaf meets the stem). Remove any leaves from the bottom inch of the stem.
Dip the cut end of the stem in rooting hormone powder to encourage root growth. Plant the stem cutting in a pot of well-draining soil, burying the cut end about 1 inch deep. Water the soil lightly and cover the pot with a plastic bag to create a humid environment.
Place the pot in a bright, indirect light location and keep the soil evenly moist. After about 4-6 weeks, check for root growth by gently tugging on the stem. If there is resistance, roots have formed and the plastic bag can be removed. Gradually increase the amount of light the plant receives and fertilize with a balanced fertilizer every 4-6 weeks.


