Plant Overview
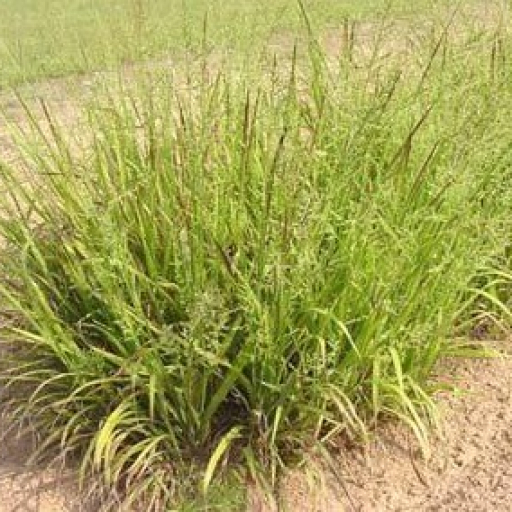
Known commonly as Beaked Panicgrass, this resilient native perennial is a quiet hero of the North American landscape. While it might look like a simple meadow grass at first glance, its "beaked" seeds and distinctively flattened stems make it a favorite for those looking to add architectural texture to a naturalized garden. It is often celebrated by conservationists for its ability to thrive in damp, heavy soils where other grasses might struggle.
🔍 How to Identify
- 🌾 Flattened Stems: Unlike many grasses with round stems, the base of this plant is noticeably compressed or two-edged, which is exactly what the Latin name anceps refers to.
- 🦜 The "Beak": The tiny spikelets (seeds) have a slightly curved, pointed tip that resembles a miniature bird’s beak, giving the plant its common name.
- 🌬️ Airy Panicles: In late summer, it produces loose, spreading flower clusters that look like a delicate purple or green mist hovering above the foliage.
🏡 In Your Garden
- 💧 Moisture Lover: This grass is a specialist for "wet feet." It thrives in low spots of the yard, rain gardens, or along the edges of ponds where the soil remains consistently damp.
- 🦋 Wildlife Buffet: It serves as a vital resource for songbirds who feast on the oily, nutritious seeds, and it acts as a host plant for several species of skipper butterflies.
- 🌱 Low Maintenance: Because it spreads via underground rhizomes, it is excellent for erosion control, though it stays in neat enough clumps that it won't aggressively take over a managed flower bed.
⚠️ Safety & Toxicity
- ✅ Non-Toxic: Beaked Panicgrass is considered safe and non-toxic for humans, dogs, cats, and horses.
- 🌾 Allergy Note: Like most grasses, it produces wind-borne pollen during its blooming season (mid-summer to fall), which may trigger hay fever in sensitive individuals.
✨ Fun Fact
The species name anceps translates to "two-headed" or "two-edged" in Latin, a direct reference to the unique way the stems are flattened so that they feel like a dull blade when pinched between your fingers!

Detailed Care Instructions
To grow Panicum anceps, also known as panicgrass, follow these steps:
- Choose the right location: Panicum anceps thrives in full sun to partial shade. Ensure that the chosen spot receives at least six hours of direct sunlight each day.
- Prepare the soil: Panicum anceps prefers well-draining soil. Amend heavy clay or compacted soil with organic matter, such as compost or well-rotted manure, to improve drainage and nutrient content.
- Planting: Purchase Panicum anceps seeds or transplants from nurseries or reputable online suppliers. Till the soil to a depth of around six inches and remove any weeds or grasses. Sow the seeds or transplant the seedlings, spacing them around 12-18 inches apart.
- Watering: Panicum anceps is moderately drought-tolerant once established, but it's crucial to keep the planting area consistently moist until the roots have fully developed. Water deeply around twice a week, ensuring the soil is damp but not waterlogged.
- Mulching: Apply a layer of organic mulch, such as straw or wood chips, around the base of the plants to help retain moisture and suppress weeds.
- Fertilizer: Panicum anceps generally doesn't require heavy fertilization. However, if the soil lacks nutrients, you can apply a balanced slow-release fertilizer once in early spring.
- Pruning: Panicum anceps only requires minimal pruning. Remove any dead or damaged foliage and trim back overgrown stems to maintain the plant's shape and appearance.
- Controlling pests and diseases: Panicum anceps is generally free from pests and diseases. However, if any issues arise, treat them promptly with appropriate organic or chemical controls.
- Propagation: To propagate Panicum anceps, collect seeds from mature plants and sow them in the desired location following the same planting and care instructions. Alternatively, divide established clumps in early spring.
- Winter care: Panicum anceps is winter-hardy in many regions. However, if you live in an area with extremely cold winters, it's advisable to apply a layer of mulch around the plant base to protect the roots.
Remember to research and consider your region's specific climate and growing conditions to ensure optimal success when growing Panicum anceps.
To water this plant, it is best to avoid overhead watering as it can lead to disease and fungus growth. Instead, use a soaker hose or drip irrigation system to water the base of the plant, ensuring the soil is well saturated. Water deeply once or twice a week, depending on the weather conditions and soil moisture levels. Allow the soil to dry slightly between watering, but do not allow it to completely dry out. Additionally, mulching around the base of the plant can help retain soil moisture and regulate temperature. Finally, be sure to water early in the morning or late in the day to avoid evaporation and water loss.
To fertilize this plant, use a balanced, slow-release fertilizer in the spring and summer months. Apply the fertilizer evenly over the root zone of the plant, being careful not to allow it to touch the leaves or stems. Water the plant immediately after fertilizing to help distribute the nutrients. Avoid fertilizing during the dormant season, as the plant will not be actively growing and cannot absorb the nutrients effectively.
For optimal growth and health of this particular plant species, it is recommended to use a well-draining and nutrient-rich soil. The soil should have a neutral to slightly alkaline pH, ideally between 6.0 and 7.5. The plant prefers a sandy loam soil texture that does not retain too much moisture. Adding organic matter or compost to the soil can help improve its fertility and texture. It is also important to ensure that the soil is not compacted, as this can impede root growth and water penetration. Overall, choosing the right soil is crucial for the success of this plant.
To propagate this grass species, one can collect seeds from mature plants during fall. These seeds can be stored in a cool, dry place until the following spring. In early spring, the seeds can be planted in a well-draining soil mix that is kept moist. The planting container can be covered with plastic or a lid to retain moisture. Once the sprouts have grown to a sufficient size, they can be transplanted into their permanent location in the garden or in a larger container. Alternatively, the plant can be propagated through root division in the early spring or fall. Simply dig up the established plant and separate the root clumps into multiple smaller clumps, making sure each clump has several healthy roots. These smaller clumps can then be planted into their new location and given plenty of water until they establish themselves.