Plant Overview
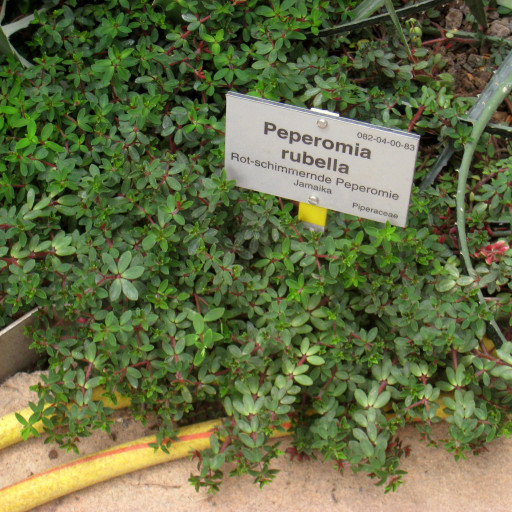
Often called the "Tiny-leaved Peperomia," the Peperomia rubella is a miniature marvel hailing from the rocky landscapes of Jamaica. This petite beauty is a favorite for indoor gardeners who lack space but crave a splash of dramatic color. With its jewel-toned stems and striking two-toned foliage, it looks like a living piece of botanical art specifically designed for a windowsill or a glass terrarium.
🔍 How to Identify
- 🍃 Two-Toned Leaves: The most striking feature is the color contrast; the tops of the small, oval leaves are a rich forest green, while the undersides are a vibrant, glowing crimson.
- 🔴 Ruby Stems: True to its name "Rubella" (meaning reddish), the stems are thin, succulent, and a deep reddish-pink color that pops against the green foliage.
- 🌿 Whorled Growth: Unlike many plants where leaves grow in pairs, this Peperomia grows its leaves in "whorls," usually in groups of four along the stem, giving it a very symmetrical, geometric appearance.
🏡 In Your Garden
- 💧 The Succulent Secret: While it looks like a delicate tropical plant, it acts more like a succulent. It stores water in its fleshy leaves and stems, meaning it prefers to dry out between waterings. Overwatering is the quickest way to upset this plant, as it is prone to root rot.
- ☀️ Light Sensitivity: In its natural habitat, it grows in the dappled light of the Caribbean. In your home, it thrives in bright, indirect light. If the red color on the underside begins to fade, it’s likely telling you it needs a bit more sun!
- 🪴 Terrarium Star: Because it stays compact and rarely exceeds 6 inches in height, it is a hall-of-fame plant for closed terrariums. It loves the humidity of a glass enclosure but still needs well-draining soil to keep its "feet" dry.
⚠️ Safety & Toxicity
- 🐾 Pet-Friendly: Great news for animal lovers—the Peperomia rubella is considered non-toxic to both cats and dogs.
- 👶 Safe for Humans: It is generally safe for curious toddlers as well. However, because the stems are quite brittle and snap easily, it’s best kept on a high shelf where it won't be accidentally bumped or "pruned" by little hands.
✨ Fun Fact
In the wild, Peperomia rubella is often an "epiphyte," meaning it can grow on the branches of trees or in the crevices of rocks rather than just in the ground. It uses its roots primarily for anchoring itself, absorbing much of its moisture from the humid Caribbean air!

Detailed Care Instructions
| Humidity | Normal |
| Lighting | Part Sun |
| Difficulty | Medium |
| Hibernation | Cold Period |
| Temperature | 18°C - 25°C |
| Hardiness Zones | 10A - 11B |
Peperomia Rubella plant, like many other Peperomia varieties, is relatively easy to grow and care for. Here are some tips on how to successfully grow a Peperomia Rubella plant:
- Light: Peperomia Rubella plants prefer bright, indirect light. They can tolerate lower light conditions, but the colors of the leaves may fade. Avoid direct sunlight, as this can scorch the leaves.
- Temperature: Keep your Peperomia Rubella plant in a warm environment, with temperatures between 65-75°F (18-24°C). It is important to protect the plant from drafts and sudden temperature changes.
- Watering: Water your Peperomia Rubella plant only when the top inch of the soil feels dry to the touch. Make sure to water thoroughly, but allow excess water to drain out of the pot to prevent root rot.
- Humidity: Peperomia Rubella plants prefer higher humidity levels, so misting the leaves occasionally or placing a tray of water near the plant can help increase humidity.
- Soil: Use a well-draining potting mix that is rich in organic matter, such as peat moss or perlite. A mix designed for succulents or cacti would also work well for Peperomia Rubella plants.
- Fertilizing: Feed your Peperomia Rubella plant with a balanced liquid fertilizer diluted to half strength every 4-6 weeks during the growing season (spring and summer).
- Pruning: Trim any leggy or diseased growth to maintain the plant's compact shape. You can also propagate new plants by taking stem cuttings and rooting them in water or soil.
By following these care tips, you can help your Peperomia Rubella plant thrive and grow successfully. Happy gardening!

Place in a window with dappled sun or a spot in the middle of a room. Or directly in a window facing west or east.

To properly water this plant, it is important to consider the environment in which it is grown. Peperomia Rubella can thrive in a variety of light and temperature conditions, but it is more sensitive to overwatering than under-watering.
When watering, it's essential to allow the soil to dry out slightly between waterings. This plant is susceptible to root rot, so avoid letting it sit in standing water or soil that is too wet.
When watering, pour a moderate amount of water into the soil, taking care to avoid getting water on the leaves or stem of the plant. It's crucial not to soak the soil, as this can lead to root rot and other issues.
It's also crucial to remember that the amount of water a Peperomia Rubella needs will vary based on the size of the pot and the environment in which it's grown. Be mindful of the soil's moisture level, and adjust watering frequency accordingly.
Fertilize the Peperomia Rubella plant once a month during the growing season, using a balanced liquid fertilizer diluted to half-strength. Avoid over-fertilizing, as this can cause harm to the plant. Additionally, make sure to water the plant before fertilizing to prevent burning the roots.
Peperomia Rubella plant prefers a well-draining soil mix that retains moisture but is not waterlogged. A soil mix with sand, perlite, and coconut coir would be suitable to provide the necessary drainage and aeration while retaining some moisture. The soil should also be rich in nutrients, so adding some organic matter like compost or worm castings would be beneficial. It is important to avoid compacted soil as it can restrict root growth and drainage. The pH range for the soil should be between 5.5 and 7.5, which is slightly acidic to neutral. The plant can also benefit from a top dressing of fertilizer during the growing season to promote healthy growth.
Peperomia Rubella plant can be propagated through stem cuttings. To do this, choose a healthy stem that is about 3-4 inches long and has at least two leaves. Carefully cut the stem just below a leaf node using clean, sharp scissors.
Next, remove the leaves from the lower half of the cutting to expose the nodes. This will encourage the growth of roots. Dip the cut end of the stem in rooting hormone to promote root development.
Fill a small pot with well-draining potting mix and make a hole in the center. Insert the cutting into the hole and gently firm the soil around it. Water the cutting thoroughly and place it in a warm, humid location with indirect light.
Keep the soil moist but not soggy and mist the cutting regularly to maintain humidity. Within a few weeks, roots should begin to form. Once the cutting has established roots, you can transplant it into a larger pot with well-draining soil.
Common pests of the peperomia rubella include Mealybugs, fungus gnats. Make a habit of checking your peperomia rubella frequently for pests so that any infestations can be caught and managed early.


