
Plant Overview
Petunia × atkinsiana is the undisputed royalty of the summer garden. Often known as the common garden petunia, these South American hybrids have spent centuries being bred for their vibrant, trumpet-shaped blooms that look like colorful splashes of paint across a landscape. Whether they are cascading from a hanging basket or filling a flower bed, they are the go-to choice for gardeners who want high-impact, season-long color.
🔍 How to Identify
- 🌸 The Blooms: Large, funnel or trumpet-shaped flowers that can be smooth-edged, fringed, or even double-petaled.
- 🌿 Sticky Foliage: The oval leaves and stems are covered in tiny, glandular hairs (trichomes) that feel slightly tacky or "sticky" to the touch.
- 🎨 Color Palette: They boast one of the widest color ranges in the plant kingdom, including solids, starburst patterns, and the famous "Night Sky" speckles.
🏡 In Your Garden
- ☀️ Sun Chasers: Petunias are heavy feeders that require at least six hours of direct sunlight. Without enough light, the stems become "leggy" and thin as the plant desperately stretches toward the sun.
- ✂️ The Mid-Summer Haircut: To prevent the plant from looking tired by August, a "pinch back" or pruning is necessary. Cutting back the stems by half stimulates a fresh flush of growth and more flowers.
- 🌧️ Petal Protection: Many large-flowered varieties have delicate petals that can look "melted" or damaged after a heavy rainstorm; planting them in sheltered containers can keep them looking pristine.
⚠️ Safety & Toxicity
- 🐾 Pet Friendly: Petunias are generally listed as non-toxic to dogs, cats, and horses by the ASPCA, making them a worry-free choice for household gardens.
- 👅 Mild Irritant: While not poisonous, the sap can occasionally cause very mild skin irritation in sensitive individuals, and the bitter taste usually discourages children or pets from eating them.
✨ Fun Fact
🌌 Cosmic Relatives: Despite their innocent appearance, Petunias are members of the Solanaceae (Nightshade) family. This means they are surprisingly close cousins to tomatoes, potatoes, and even the "Deadly Nightshade" belladonna!

Detailed Care Instructions
To grow Petunia X atkinsiana (commonly known as Petunias), follow these steps:
- Choose a suitable location: Petunias prefer full sun, meaning they need at least six hours of direct sunlight each day. Select a spot in your garden or on your balcony that receives ample sunlight.
- Prepare the soil: Petunias require well-draining soil. Amend your soil by adding organic matter such as compost to improve drainage and fertility. Prepare the soil by loosening it with a gardening fork or tiller.
- Planting seeds: Petunia seeds are small and delicate, so it's essential to handle them with care. Scatter the seeds on the soil surface, lightly pressing them into the soil, but avoid covering them with more than a thin layer of soil. Water gently after sowing to settle the seeds.
- Watering: Keep the soil consistently moist but not waterlogged. Water the plants regularly, allowing the top inch of soil to dry out between waterings. Avoid overhead watering, as it can lead to fungal diseases. Instead, water at the base of the plants.
- Fertilization: Petunias benefit from regular fertilization to promote healthy growth and abundant flowering. Apply a balanced, water-soluble fertilizer every two to three weeks following the manufacturer's instructions.
- Pinching and deadheading: To encourage bushier growth and more flowers, pinch or trim off the tips of young Petunia plants once they have established a few sets of leaves. Additionally, remove spent flowers (deadheading) to encourage continuous blooming and prevent seed production.
- Disease and pest control: Monitor your Petunias regularly for signs of diseases or pests such as aphids, fungal infections, or slugs. Treat any issues promptly using organic or chemical methods, depending on your preference.
- Pruning: Trim the plants occasionally, removing any overgrown or leggy branches to maintain a compact shape and encourage new growth.
- Mulching: Apply a layer of organic mulch, such as wood chips or straw, around the base of the plants to help retain moisture, suppress weeds, and regulate soil temperature.
- Enjoy your Petunias: Regularly admire and enjoy the colorful blooms that Petunias offer. They are prolific bloomers and should bring beauty to your garden or balcony throughout the growing season.

Place in a bright room that is sun drenched almost all day. Or directly in a south-facing window.
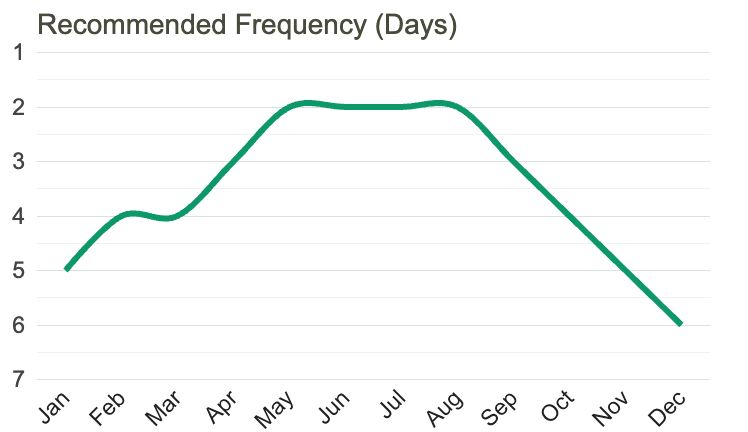
Petunia X Atkinsiana plant requires regular watering to maintain its health and growth. The watering frequency and amount of water required may vary based on the growing conditions and season. However, it is recommended to keep the soil moist but not waterlogged.
To water the plant without using its common names, you can follow these general guidelines:
1. Fill a watering can or bucket with room temperature water.
2. Gently pour the water onto the soil around the plant, avoiding pouring directly on the leaves or flowers.
3. Watch the soil to ensure that the water is being absorbed rather than running off the surface.
4. If the soil feels dry to the touch, water the plant until the water reaches the root zone.
5. Do not water too frequently, as it can lead to root rot and other plant problems.
6. Consider using a moisture meter or sticking your finger into the soil to check for moisture levels before watering.
7. Adjust the watering frequency and amount as needed based on the plant's response and the growing conditions.
Additionally, it is important to water the plant early in the day to allow the leaves and flowers to dry off before nightfall, which can prevent fungal diseases.
To properly fertilize this plant, use a balanced, water-soluble fertilizer with equal ratios of nitrogen, phosphorus, and potassium. Dilute the fertilizer according to the manufacturer's instructions and apply it evenly to the soil around the base of the plant. Avoid getting the fertilizer on the leaves or flowers. Fertilize every two weeks during the growing season and reduce feeding during the winter months. Water the plant thoroughly after fertilizing.
When planting Petunia X Atkinsiana, it is important to consider the type of soil that will best support its growth. This plant thrives in a loose, well-draining soil that is rich in nutrients. The ideal soil for Petunia X Atkinsiana should be slightly acidic, with a pH range of 6.0 to 6.5. It should also be able to retain moisture, but not be too wet or swampy, as this can lead to root rot and other issues. The soil should be loose and airy, with plenty of space for water and air to circulate around the roots. Organic matter, such as compost or well-rotted manure, can be added to increase fertility and to improve soil structure. Avoid using heavy clay soils or soils that are excessively sandy, as these may not provide the necessary support for the Petunia X Atkinsiana plant.
To propagate this plant, you will need to take stem cuttings from a mature plant. Choose a stem that is healthy and about 4-6 inches long. Make a clean cut at a 45-degree angle with a sterilized sharp knife or pruning shears.
Remove the leaves from the bottom 2 inches of the stem. Dip the cut end of the stem into rooting hormone powder and gently shake off any excess.
Prepare a container filled with a well-draining potting mix. Moisten the soil and use a pencil to make a hole in the center of the soil. Place the stem cutting in the hole and press the soil around it to ensure good contact.
Cover the container with a clear plastic bag to create a mini greenhouse. Place the container in a bright, indirect light location, away from direct sunlight. Water the cutting lightly as needed to keep the soil slightly moist.
In about 2-4 weeks, you should see new growth appearing from the stem cutting. Once the new growth is visible, you can remove the plastic bag. After a few more weeks, you can transplant the young plant to a larger pot or to your garden.


