Plant Overview
Known affectionately as the Spadeleaf Philodendron, this lush climber is a crown jewel of the indoor gardening world. Originally hailing from the tropical rainforests of South America, its glossy, elongated leaves bring an immediate sense of "jungle luxury" to any room. It is a resilient favorite that has been gracing homes since the mid-20th century due to its forgiving nature and rapid growth.
🔍 How to Identify
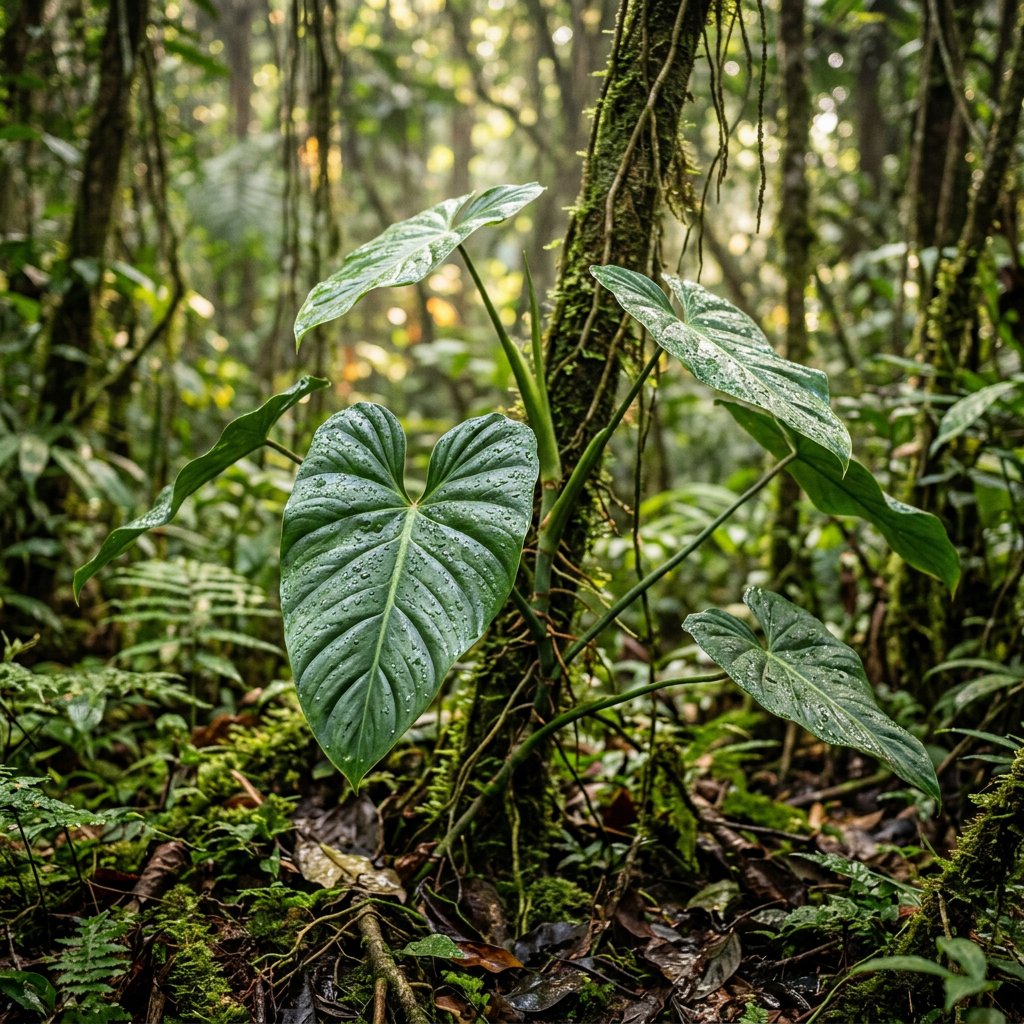
- 🍃 The Leaf Shape: True to its name, the leaves are shaped like large, elegant spades or arrowheads, reaching up to 20 inches in length when mature.
- ✨ Glossy Texture: The foliage has a distinct waxy sheen that reflects light, helping the plant maximize photosynthesis in the dim rainforest understory.
- 🧗 Climbing Habit: Look for thick, green stems that produce "air roots"—brown, stringy appendages used to grip onto trees or moss poles as the plant reaches for the canopy.
🏡 In Your Garden
- 🗼 The Support System: Because this is a climbing species, it hates being left to trail on the floor. Providing a moss pole or trellis mimics its natural environment, encouraging the plant to produce much larger, healthier leaves.
- 💧 Drainage is Key: While it loves humidity, it is highly susceptible to root rot if left in standing water. It prefers a chunky, aerated soil mix (like one containing orchid bark or perlite) rather than heavy, dense potting soil.
⚠️ Safety & Toxicity
- 🚫 Status: Toxic to humans and pets.
- 🐈 Details: The plant contains insoluble calcium oxalate crystals. If leaves are chewed or swallowed, they cause immediate mouth irritation, swelling of the throat, and digestive upset. It is best displayed on a high shelf or hanging basket if you have curious cats or dogs.
✨ Fun Fact
In its natural habitat, Philodendron domesticum undergoes a "metamorphosis." As the plant climbs higher and receives more light, the leaves can change shape and size significantly compared to the small, juvenile leaves seen when the plant is growing along the forest floor!

Detailed Care Instructions
To grow a Philodendron Domesticum plant, you can follow these steps:
- Choose the right environment: Philodendron Domesticum prefers bright indirect light, so find a spot in your home where it can receive bright but filtered sunlight. Avoid direct sunlight as it can burn the leaves and cause damage.
- Temperature and humidity: Ideal temperature range for Philodendron Domesticum is between 60-75°F (15-24°C). It also prefers moderate to high humidity levels. You can increase humidity by using a humidifier or placing the plant on a tray filled with water and pebbles.
- Watering: Water the plant thoroughly when the top 1-2 inches of soil feel dry. Ensure proper drainage in the pot to prevent waterlogging, which can lead to root rot. Remember not to overwater or let the plant sit in standing water.
- Fertilization: Feed the plant with a balanced, water-soluble houseplant fertilizer once a month during the growing season (spring and summer). Follow the instructions on the fertilizer package for proper dosage and application.
- Potting and repotting: Use a well-draining potting mix for Philodendron Domesticum. Repot the plant when it becomes root-bound or every 1-2 years. Increase the pot size gradually to accommodate the growing plant.
- Pruning: Regularly remove any dead or yellowing leaves to maintain the plant's appearance. You can also trim back leggy stems to encourage bushier growth.
- Propagation: Philodendron Domesticum can be propagated through stem cuttings. Take a cutting of a healthy stem with at least two leaves, remove the lower leaf, and place it in a glass of water or directly in moist soil. Keep the cutting in a warm and humid environment, and roots should develop within a few weeks.
- Pests and diseases: Keep an eye out for common houseplant pests like spider mites, mealybugs, or aphids. If you notice any infestation, treat it with an appropriate insecticide or by washing the leaves with a gentle soap and water solution.
Remember to provide regular care, attention, and patience to your Philodendron Domesticum plant, and it should grow and flourish well in your home.

Place in a dark room with little light, like a dark bedroom or a spot far away from a window or directly in a north-facing window.

To water this particular plant, first check the soil moisture level by sticking your finger an inch or two into the soil. If the soil is dry to the touch, it's time to water. Before watering, make sure the pot has drainage holes to prevent water from sitting in the soil and causing root rot. Water the plant until water begins to drain out of the drainage holes. Allow the soil to dry out partially before watering again, but do not let it completely dry out. This plant prefers consistently moist soil, but overwatering can lead to problems. It's important to also avoid getting water on the leaves as this can promote fungal growth.
To fertilize your Philodendron Domesticum plant, you can follow the following instructions:
- Choose a balanced, water-soluble fertilizer specifically formulated for houseplants or foliage plants. Look for a fertilizer with an NPK ratio of around 10-10-10 or similar.
- Dilute the fertilizer according to the manufacturer's instructions. In general, it is recommended to use half the recommended dosage to avoid over-fertilizing.
- Water the plant thoroughly before applying the fertilizer to ensure the soil is already moist.
- Pour the diluted fertilizer solution evenly onto the soil surface, taking care not to directly apply it to the leaves or stems of the plant.
- Allow the excess fertilizer solution to drain out through the drainage holes of the plant's pot.
- Avoid fertilizing during the winter months or when the plant is not actively growing. Philodendron Domesticum plants usually have a slower growth rate during this period.
- Repeat the fertilizer application every four to six weeks during the plant's active growing season (generally from spring to early fall).
- Monitor the plant for any signs of fertilizer burn, such as yellowing or wilting leaves. If this occurs, flush the soil with water to remove any excess fertilizer and adjust the dilution or frequency of fertilizing.
Remember to also provide your Philodendron Domesticum plant with adequate lighting, regular watering, and proper care to ensure its overall health and vitality.
The recommended soil type for the plant is a loose and well-draining soil that is slightly acidic to neutral in pH. The ideal soil composition should consist of a mix of organic matter, such as peat moss or compost, and a mineral component like perlite or coarse sand. The soil should allow for good air circulation and drainage, as the plant roots do not want to be sitting in soggy soil. It is also important to ensure that the soil is not too compacted, as this can hinder root growth and overall plant health.
Propagation of Philodendron Domesticum can be done through a few different methods. One approach is by using stem cuttings. First, select a healthy section of stem that has at least two or three leaf nodes. The nodes are the points on the stem where leaves emerge. Then, using a clean and sharp pair of scissors or pruners, make a clean cut just below a leaf node. Remove any lower leaves to expose the node.
Next, prepare a well-aerated potting mix that is suitable for rooting. A mix of equal parts peat moss and perlite or vermiculite is commonly used. Moisten the mix slightly, ensuring it is not too wet or too dry.
Dip the cut end of the stem into a rooting hormone powder to stimulate root development. Shake off any excess hormone powder. Then, create a small hole in the potting mix using your finger or a pencil, and gently insert the cutting into the hole, ensuring the node is covered with the mix. Firmly press the mix around the cutting to provide stability.
After planting, place the pot in a warm and bright location, but avoid direct sunlight. Ensure the humidity around the cutting remains high, as this will promote successful rooting. Covering the pot with a clear plastic bag or using a propagator can help maintain high humidity levels. It is important to keep the potting mix moist but not waterlogged.
Over the course of several weeks, the cutting should begin to root. You can gently tug on the stem to check if it has rooted by feeling for resistance. Roots typically develop within 4-6 weeks. Once the cutting has developed a sufficient root system, it can be transplanted into a larger pot with regular potting soil.
Another method of propagation is through air layering. This involves creating a small wound on a healthy section of stem, applying rooting hormone, and surrounding the wound with a moistened sphagnum moss or other suitable medium. Once roots form, the rooted section can be cut just below the new roots and potted up as a new plant. This method can be slower but often results in a larger and more mature plant faster than stem cuttings.
Remember to keep the newly propagated plant in a warm and bright location, and provide proper care to encourage healthy growth.
Common pests of the spade-leaf philodendron include Mealybugs, spider mites, thrips. Make a habit of checking your spade-leaf philodendron frequently for pests so that any infestations can be caught and managed early.


