Plant Overview
The Potentilla aurea, commonly known as the Golden Cinquefoil, is a tiny alpine gem that brings the golden glow of the European mountains right to your doorstep. Often mistaken for a common buttercup, this resilient perennial is prized by gardeners for its ability to weave a carpet of sunshine over rock gardens and stone walls. Its name comes from its five-lobed leaves, which folklore once suggested looked like a powerful hand reaching out from the earth.
🔍 How to Identify
- 🍃 Leaf Structure: It features "cinquefoil" (five-leaved) foliage. The dark green leaves are divided into five serrated leaflets, often edged with fine, silvery hairs that catch the light.
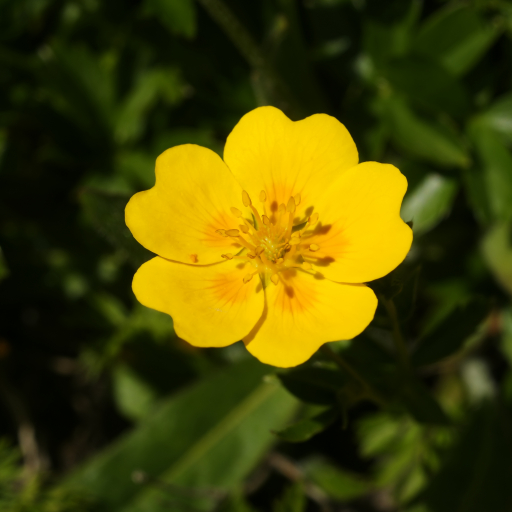
- 🌼 The Bloom: Small, saucer-shaped flowers appear in late spring. Each petal is a brilliant yellow with a distinct, darker orange "eye" or "blotch" at the center, resembling a miniature sun.
- 🌱 Growth Habit: This is a prostrate, mat-forming plant. It stays very low to the ground, usually topping out at only 4 inches high, spreading horizontally to fill gaps between stones.
🏡 In Your Garden
- 🏔️ Mountain Roots: Because its ancestors thrived in the rocky Alps and Pyrenees, this plant craves "sharp drainage." It hates having "wet feet," so if your garden has heavy clay, mix in plenty of grit or gravel to keep it happy.
- ☀️ Sun & Coolness: While it loves basking in full sun to produce the most vibrant flowers, it prefers its roots to stay relatively cool. Mulching with light-colored pea gravel can help mimic its natural high-altitude habitat.
⚠️ Safety & Toxicity
- ✅ Safe Status: Potentilla aurea is considered non-toxic to humans, dogs, and cats. It is an excellent choice for family-friendly gardens or areas where pets roam freely.
- 👐 Skin Friendly: Unlike some garden plants that cause rashes, the Golden Cinquefoil is soft to the touch and does not contain irritating saps or thorns.
✨ Fun Fact
The genus name Potentilla is derived from the Latin word potens, meaning "powerful." This refers to the plant's historical reputation in ancient herbalism, where it was believed that these "little powerful ones" could treat everything from fevers to heartache.

Detailed Care Instructions
To grow Potentilla Aurea, also known as golden cinquefoil, follow these steps:
- Choose the right location: Potentilla Aurea thrives in full sun but can tolerate partial shade. Ensure that the location has well-draining soil.
- Prepare the soil: Before planting, amend the soil with organic matter like compost to improve drainage and nutrient content.
- Planting: Dig a hole slightly larger than the pot size of the plant. Place the plant in the hole, making sure the top of the root ball is level with the soil surface. Backfill with soil, gently firming it around the plant.
- Watering: Water the plant thoroughly after planting to settle the soil and help the roots establish. Potentilla Aurea requires regular watering, especially during dry spells, but avoid overwatering, as it can lead to root rot.
- Mulching: Apply a layer of organic mulch around the base of the plant to help retain moisture, suppress weeds, and regulate soil temperature.
- Pruning: Prune Potentilla Aurea in early spring or after flowering to maintain its shape and promote better airflow, which helps prevent diseases. Remove dead or damaged branches and cut back old growth to encourage new growth.
- Fertilizer: Potentilla Aurea is a low-maintenance plant that doesn't require much fertilization. However, you can apply a balanced, slow-release fertilizer in early spring to provide nutrients for healthy growth.
- Pests and diseases: Monitor the plant for common pests like aphids, spider mites, or powdery mildew. If necessary, treat with insecticidal soap or neem oil according to the package instructions.
- Overwintering: Potentilla Aurea is generally hardy and can withstand cold temperatures. However, in colder regions, you can protect the plant by mulching heavily around the base during late fall.
- Division: If your Potentilla Aurea becomes overcrowded or loses vigor over time, you can divide the plant in early spring by carefully digging it up and separating the root clumps. Replant the divisions in well-prepared soil.
Remember to consult your local gardening community or nursery for any specific growing tips and advice tailored to your region.

Place in a bright room that is sun drenched almost all day. Or directly in a south-facing window.

Potentilla Aurea is a plant that requires frequent watering to thrive. To water this plant, one should use a watering can or a hose with a gentle flow of water. The water should be poured slowly and evenly around the base of the plant, making sure that the soil is thoroughly moistened. It is important not to overwater the plant, as this can lead to root rot and other problems.
One way to ensure that the plant is receiving enough water is to check the soil moisture level regularly. This can be done by inserting a finger into the soil, or by using a soil moisture meter. If the soil feels dry to the touch, it is time to water the plant.
Potentilla Aurea also benefits from occasional misting, especially during hot and dry weather. This can be done using a spray bottle filled with water. Misting helps to improve humidity levels around the plant and encourages healthy growth.
In addition to watering, it is important to provide Potentilla Aurea with well-draining soil and adequate sunlight. This plant prefers bright, indirect light, and should be placed in a location with good air circulation. With proper care, Potentilla Aurea can be a beautiful addition to any garden or indoor space.
To fertilize this plant, use a balanced fertilizer in spring and again in midsummer. Follow the instructions on the fertilizer package and apply it evenly over the soil around the plant, avoiding contact with the foliage. Water the plant thoroughly after fertilizing.
Potentilla Aurea plant requires well-draining soil that is fertile and rich in organic matter. It prefers slightly acidic soil with a pH range of 5.5 to 6.5. The soil should be able to retain moisture without becoming waterlogged as excessive water can lead to root rot. Sandy loam soil is considered best for this plant as it provides adequate drainage while also retaining enough moisture. The addition of compost or well-rotted manure can help improve soil fertility and structure. Adding perlite or coarse sand to the potting mix can help improve drainage. It's also important to ensure that the soil is weed-free and sterile to prevent the growth of unwanted plants that can compete with Potentilla Aurea for nutrients and water. Overall, healthy soil is vital for the growth and development of Potentilla Aurea plant.
Potentilla Aurea plant can easily be propagated through semi-hardwood or hardwood cuttings. First, select healthy branches of approximately 6-8 inches in length. Cut the branches at an angle using a sharp sterilized pruning shears. Remove any leaves and flowers from the bottom half of the cuttings. Dip the cut end in rooting hormone, and insert it into a pot filled with moist soil mix. Cover the pot with a plastic bag to create a moist environment. Place the pot in a warm, bright, and indirect light location. Water the cutting daily and mist the foliage to maintain moisture. In about six to eight weeks, the cuttings will develop roots, and the foliage will start growing. Transplant the rooted cuttings into individual pots and continue to care for them until they are strong enough to be planted in the ground.


