Plant Overview
Known as the "King of the Forest," the Quercus genus—the Mighty Oak—is the ultimate symbol of strength, endurance, and longevity. Across many cultures, from the ancient Druids to modern-day national emblems, these trees are revered as sacred guardians of the landscape. Whether you are looking at a sprawling White Oak or a majestic Live Oak, these trees serve as the backbone of their ecosystems, supporting more life forms than almost any other tree genus on Earth.
🔍 How to Identify
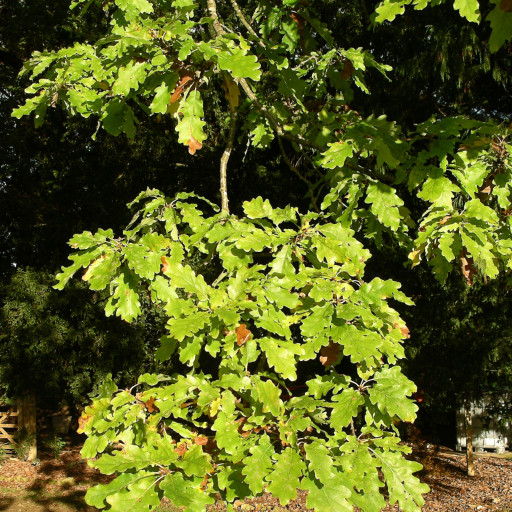
- 🍃 The Foliage: Most oaks are famous for their "lobed" leaves—rounded or pointy finger-like projections—though some species, like the Willow Oak, have narrow, smooth edges.
- 🥜 The Acorn: This is the oak's signature. Look for a nut sitting in a woody, scaly "cupule" (the little hat). No other tree produces this specific type of fruit.
- 🌳 Bark Texture: As they age, oaks develop deeply furrowed, craggy bark that often looks like rugged ridges or even "alligator skin" on certain species.
🏡 In Your Garden
- 🌱 The Deep Taproot: Oaks are famous for their massive taproots. This makes them incredibly drought-tolerant once established, but it also means they hate being moved. Choose their "forever home" carefully, as transplanting a sapling after its second year is often fatal.
- 🦋 A Living Buffet: If you plant an oak, you are planting a neighborhood. They are "keystone species," meaning they host hundreds of species of caterpillars, which in turn feed the local bird population. It is the best choice for a high-impact wildlife garden.
- ⏳ Patience is Key: Most oaks are slow growers. They spend their first few years focusing on root development rather than height. Don't worry if it seems "stuck"—it’s just building its foundation.
⚠️ Safety & Toxicity
- 🐾 Moderate Toxicity: While iconic, oak leaves and raw acorns contain high concentrations of tannins. These can be toxic to horses, cattle, and dogs if eaten in large quantities, leading to kidney or digestive issues.
- 👶 Choking Hazard: For humans, the tree is safe to touch, but the fallen acorns can be a choking hazard for toddlers playing in the yard.
- 🌰 Edibility Note: While acorns were a staple food for many indigenous cultures, they must be leached of their bitter tannins through a specific water-soaking process before they are safe for human consumption.
✨ Fun Fact
Oaks are the ultimate "late bloomers." Most oak trees do not start producing their first crop of acorns until they are between 20 and 50 years old. If you see an oak with acorns, you are looking at a tree that has likely been standing since at least the previous generation!

Detailed Care Instructions
| Humidity | Normal |
| Lighting | Part Sun |
| Difficulty | Medium |
| Temperature | 10°C - 24°C |
| Hardiness Zones | Min 7B |
Here are some steps to help you grow a Quercus plant:
- Choose the right variety: Quercus is a large genus with many species, so research which species or variety would be suitable for your climate and soil conditions.
- Collect or purchase acorns: Quercus plants are typically grown from acorns, which are the tree's seeds. Collect acorns from mature trees or purchase them from a reputable source. Make sure the acorns are healthy, without any cracks or damage.
- Prepare the soil: Quercus plants prefer well-draining soil with good organic content. Remove any weeds or grass and loosen the soil using a shovel or garden fork. You can also add compost or aged manure to enrich the soil if necessary.
- Plant the acorns: Dig a small hole about 2-3 inches deep and place the acorn, pointed end facing down, into the hole. Cover the acorn with loose soil and lightly tamp it down.
- Provide water: Keep the soil moist but not waterlogged. Water the newly planted acorn regularly, especially during dry periods, to encourage germination.
- Provide sunlight: Quercus plants require full sun to grow. Choose a location in your garden where the tree will receive at least 6-8 hours of direct sunlight.
- Protect from pests: Place a wire mesh or a small fence around the planted acorns to protect them from squirrels and other animals that may dig them up.
- Be patient: Quercus plants take several years to grow into mature trees. It may take 8-15 years for an oak tree to produce acorns, so be patient with the process.
- Prune and care for the tree: As the Quercus plant grows, you may need to prune it to shape it and remove any dead or diseased branches. Regularly check for pests or diseases and take appropriate measures to control them.
- Mulch and fertilize: Mulch around the base of the tree to help retain moisture and suppress weed growth. You can also apply a slow-release fertilizer in the spring to provide essential nutrients.
Remember that growing Quercus plants from acorns is a long-term project that requires patience and diligence. Enjoy the process and watch your tree grow and thrive over the years.

Place in a bright room that is sun drenched almost all day. Or directly in a south-facing window.

To water a certain type of plant in the Quercus genus, you should first ensure that the soil around the plant is moderately moist. This means that it should not be completely dry, nor should it be so wet that it appears waterlogged or muddy.
When watering, use a gentle stream of water to slowly trickle over the soil, being sure to thoroughly saturate the root zone. It is important not to overwater the plant, as this can lead to root rot and other issues. Instead, aim to water deeply but infrequently, allowing the soil to dry out slightly between waterings.
In addition to regular watering, you can also mulch around the base of the plant to help retain moisture and prevent weeds from sprouting. Finally, be sure to keep an eye out for any signs of stress or dehydration, such as wilted leaves or yellowing foliage, and adjust your watering routine as needed to keep the plant healthy and thriving.
When fertilizing the Quercus plant, it is important to provide it with the necessary nutrients to promote healthy growth.
Here are some instructions for fertilizing:
- Choose a well-balanced, slow-release fertilizer specifically formulated for woody plants.
- Apply the fertilizer in early spring, before new growth appears. This timing allows the plant to benefit from nutrients as it starts its active growing season.
- Calculate the appropriate amount of fertilizer based on the size and age of the plant. Refer to the package instructions for the recommended dosage.
- Scatter the fertilizer evenly around the base of the plant, keeping it away from the trunk to prevent direct contact.
- Gently work the fertilizer into the top inch of soil using a hand tool or rake.
- Water the plant thoroughly after applying the fertilizer to ensure that it reaches the roots.
- Avoid over-fertilizing, as excessive nutrients can harm the plant. Stick to the recommended dosage and frequency specified on the fertilizer package.
- Mulching the area around the plant can help retain moisture and reduce weed growth, which can further support its growth and health.
Remember to monitor the plant's response to fertilization and adjust the feeding schedule or fertilizer type if needed.
The best soil to use with this plant is a well-draining, loamy soil that is slightly acidic and rich in organic matter. It should have a pH level of around 5.5 to 6.5. It is important that the soil is not compacted, as this can inhibit root growth and lead to poor plant health. Adding compost or aged manure to the soil before planting can help improve its texture and nutrient content. Additionally, it is recommended to mulch around the base of the plant to retain moisture and provide additional nutrients as the organic material breaks down over time.
Propagation of Quercus plants can be achieved through different methods such as seed propagation, stem cuttings, and grafting. However, each method requires specific techniques and attention to detail.
- Seed Propagation:
- Collect fresh acorns from a healthy parent tree during autumn (fall).
- Remove the caps from the acorns and place them in a bucket of water for 24 hours.
- Discard any acorns that float as they are likely infertile.
- Fill small pots or seedling trays with a well-draining potting mix.
- Plant the remaining acorns vertically in the potting mix, covering them with a thin layer of soil.
- Water the pots thoroughly and place them in a cool, shaded area.
- Monitor the soil moisture and ensure it remains consistently damp but not waterlogged.
- Germination typically takes several weeks to a few months, so be patient.
- Once the seedlings have developed sturdy stems and leaves, they can be transplanted into individual containers.
- Collect fresh acorns from a healthy parent tree during autumn (fall).
- Stem Cuttings:
- Select a healthy, disease-free branch with a diameter of approximately 0.5 to 1 inch.
- Using clean, sharp pruning shears, make a clean cut just below a node (where a leaf or bud is attached).
- Prepare a mixture of equal parts perlite and peat moss to create a rooting medium.
- Dip the cut end of the stem into a rooting hormone powder to improve rooting success (optional).
- Insert the stem cutting into the prepared rooting medium, ensuring at least one node is buried.
- Place the pot or container in a warm area with indirect sunlight.
- Mist the cutting regularly to maintain humidity and prevent drying out.
- Within a few weeks to several months, roots should develop from the buried node.
- Once the roots are well-established, the cutting can be transplanted into a larger container or planted in the ground.
- Select a healthy, disease-free branch with a diameter of approximately 0.5 to 1 inch.
- Grafting:
- Select a rootstock plant that is compatible with the Quercus species you want to propagate.
- The rootstock should be a healthy, disease-free plant with a strong root system.
- Collect scion wood from a healthy, mature donor tree during winter dormancy.
- The scion wood should be approximately 1/4 to 1/2 inch in diameter and contain several buds.
- Prepare the rootstock by making a clean, slanted cut just above the soil level.
- Cut the scion wood at a slight angle, ensuring it matches the rootstock cut.
- Gently join the two pieces together, aligning the cambium layers (green layer just below bark) of both.
- Secure the union tightly with grafting tape or a grafting clip to hold the pieces in place.
- Apply grafting wax or a sealing compound to protect the graft union from infection.
- Place the grafted plant in a warm, humid environment, preferably in a greenhouse or misting system.
- As the grafted plant grows, monitor for signs of successful union and remove any shoots arising from the rootstock.
Remember that success rates can vary depending on the Quercus species and environmental conditions. It is also advisable to research specific techniques catered to the species you are propagating for optimal results.
- Select a rootstock plant that is compatible with the Quercus species you want to propagate.


